Your ultimate Moon photography cheat sheet: quick tips for stunning shots
This Moon Photography cheat sheet is full of quick tips that will help you capture stunning shots.
Because you've been watching a lot of Moon pictures lately...
They are like magnets that attract your attention and leave you hypnotized.
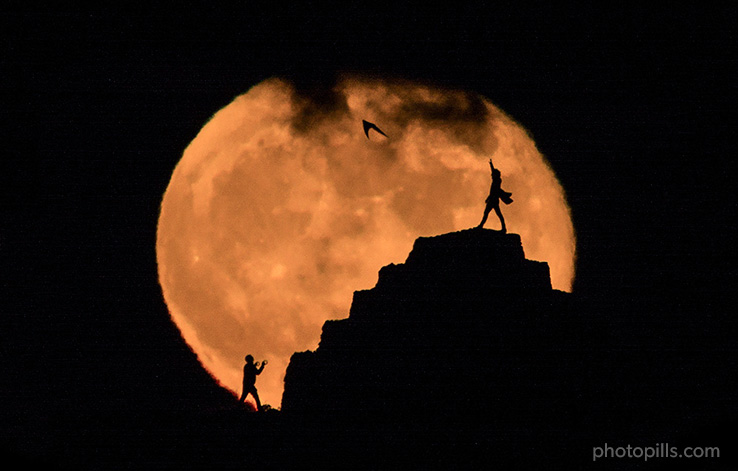
Like the photo I used as a cover for this article, taken by Chencho Mendoza.
I'm sure you can't stop staring at it.
I have the same problem too! XD
That's why I started in Moon photography, because I wanted to capture pictures like the ones that had been mesmerizing me.
And I bet you want to do the same too...
Well, you've come to the right place!
In this Moon Photography cheat sheet you're going to find absolutely everything you need to succeed:
The work of the best Moon photographers to learn from their craft.
How to plan a picture of the Moon with a foreground on a certain date.
How to plan a picture of the Moon with a foreground on a certain position.
Other pieces of camera equipment for Moon photography you'll need.
And if you want to keep learning (which is something I always recommend), have a look at the following guides:
OK, let's start the ride!
"A clever person solves a problem. A wise person avoids it." - Albert Einstein
Get this ebook for free now!
Content
- Find inspiration and imagine your Moon picture
- Plan your Moon shot to the last detail
- Use the best camera equipment for Moon photography
- Shoot your Moon photo successfully
- Take your Moon shots to the next level
1.Find inspiration and imagine your Moon picture
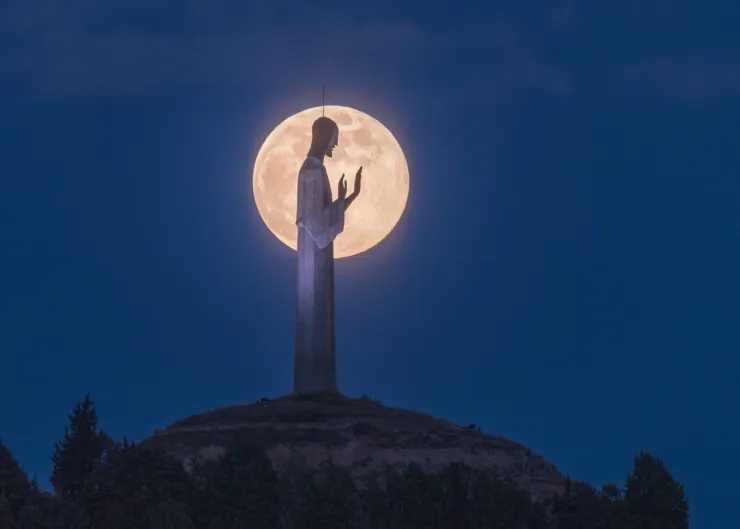
Photo by Yuleivy Matos
Often, getting inspired is about having a regular routine and habits that help our creativity.
Ideas can pop up from anywhere. You might get one from reading this article or checking out your favorite photographers. The important thing is to have habits, routines, tricks, and techniques that you can rely on when you want to be creative.
Your mindset can determine if you should seek inspiration from various sources. Sometimes, taking a break from too much information might be necessary.
Pay attention to how you feel when you keep up with other photographers on social media. Does it spark inspiration and creativity? Or do you feel tired from comparing yourself and too much information?
Sometimes staying connected all the time is not particularly beneficial. I suggest being purposeful. Decide based on what feels useful and good for your well-being.
In any case, here are the two ways I've used over the years to find my inspiration.
Hopefully, this will help you to continue doing what you love most, take photos.
Have a look at the best Moon pictures
In today's digital age, finding photos online has become super easy. You can discover collections on social media, photography websites, YouTube, and more.
Instead of aimlessly scrolling through these photo sites, try searching using tags. Seek out photos that genuinely attract your attention, ones that hold special meaning for you.
Build a collection of photos that truly inspire you. Then, whenever you can, head out and try your hand at recreating the style that speaks to you.
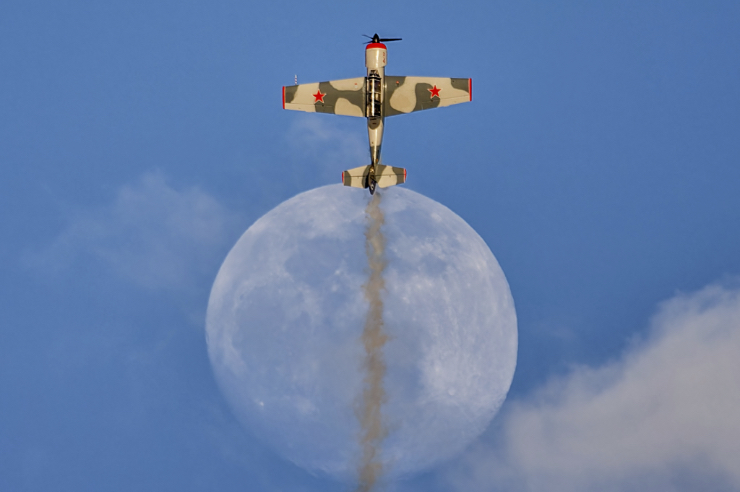
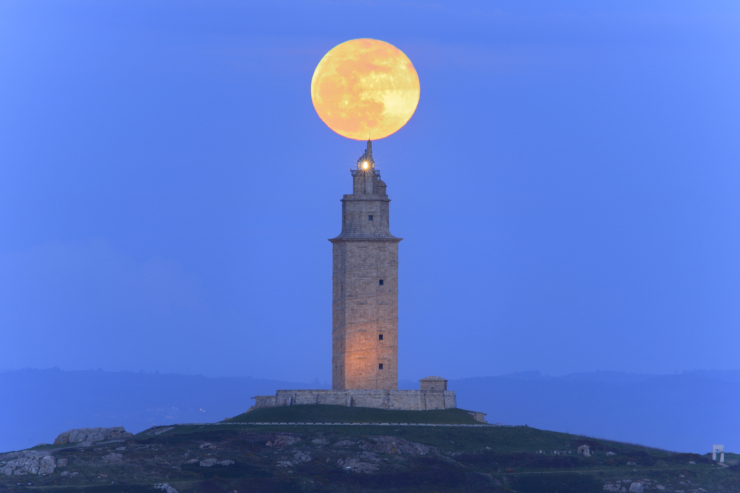
Have a look at what I consider the best Moon pictures:
Bonus: Watch movies, documentaries, series, etc., and try to mimic a scene you like.
Browse the work of amazing Moon photographers
Browsing the work of other photographers is a great way to get ideas to use in your own work.
These eminent Moon photographers have made a name for them and continue to shine the light for those who want to follow in their stead. Each one of them has their own unique style and differs from the rest.
Check out the work of these great Moon photographers.
2.Plan your Moon shot to the last detail
Getting a fantastic photo isn't just about showing up anywhere, anytime, and snapping away. It's not that simple.
To get a truly amazing shot, you've got to do some planning.
Planning is super important, especially for Moon photography.
And this is where PhotoPills comes in.
It's the top tool for helping you plan your Moon photos. It gives you the 3 basic things you need: where to shoot, when to shoot, and what time to shoot.
Now, let's talk about the two types of Moon photos you can take:
A picture of a specific Moon phase.
A photo of the Moon with something in the front.
If you want to master Moon photography planning, read the following guides:
Plan a certain Moon phase picture
Here are the steps you should follow to plan your photo of the phase of the Moon at night on a specific date.
In PhotoPills, open the Planner and place the Red Pin in the desired shooting location.
Set the date you're planning to photograph the Moon. Panel 4 above the map shows you the picture of the exact Moon phase for the selected date and time.
On the map, find out the Moonrise direction (thick light blue line) and Moonset direction (thick dark blue line).
Use the Time Bar (color bar below the map) to change time until it's nighttime. A thin blue line appears on the map showing you the position of the Moon for the selected time.
Based on the position of the Moon, choose your desired shooting time.
When you're in the field, at the Red Pin position, use the Augmented Reality view (AR) on the Planner to visualize on your smartphone where the Moon will rise (or set).
Plan a picture of the Moon with a foreground
You can plan 2 types of Moon shots:
- A plan for a certain date, as for example, when you want to plan the next Full Moon.
- A plan with the Moon in a certain position. In this case, you know the shooting spot and the photo you want, and you want to find out when it happens.
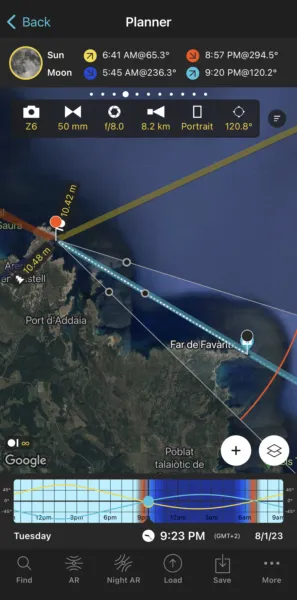
Plan a Moon on a certain date
Here's a video in which Rafa gives you the Moon photography cheat sheet to plan this type of photo:
Here are the steps you should follow to plan a big Moon on a specific date.
Set the shooting date.
Place the Red Pin near the subject.
Place the Black Pin on the subject.
Find the initial shooting spot and shooting time based on the Moonrise or set directions that appear on the map.
Adjust the shooting spot and the shooting time based on the position of the Moon you want relative to your subject.
Check the Moon size on the map.
Check the natural light.
When you're in the field, at the Red Pin position, use the Augmented Reality view (AR) on the Planner to visualize on your smartphone where the Moon will be.
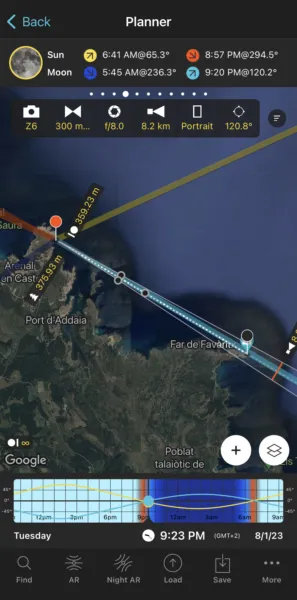
Plan a Moon in a certain position
Here's a video in which Rafa gives you the Moon photography cheat sheet you need to plan any Moon alignment you imagine:
Here are the steps you should follow to plan a big Moon in a specific position in the sky.
Place the Red Pin on the shooting spot.
Place the Black Pin where you want the Moon.
Use the Find tool to find the dates and times when the photo is possible.
Enter the date range.
Enter the Moon azimuth.
Enter the Moon elevation.
Get the possible shooting dates and times.
Adjust the shooting spot and the shooting time based on the composition you want.
Check the Moon size on the map.
Check the natural light.
When you're in the field, at the Red Pin position, use the Augmented Reality view (AR) on the Planner to visualize on your smartphone where the Moon will be.
3.Use the best camera equipment for Moon photography
Photo by Rahul Phutane
The process of photographing the Moon starts with your choice of camera gear. Not all cameras and lenses are ideal for all types of Moon photography.
As a matter of fact, your gear will determine the type of Moon images you can successfully create.
Here's a Moon photography cheat sheet with everything you need.
Choose the best lens for Moon photography
Choosing the right lens can greatly impact the quality and composition of your Moon photos.
But don't worry.
The best lens is the one you have, the longer the better...
What are the best lenses to photograph the Moon?
After years testing and comparing many camera lenses these are, in my opinion, the best lenses to photograph the Moon:
- Nikon NIKKOR Z 100-400mm f/4.5-5.6 VR S.
- Sony FE 100-400mm f/4.5-5.6 GM.
- Canon EF 100-400mm f/4.5-5.6L IS II.
- Fujifilm XF 100-400mm f/4.5-5.6 R LM.
- Sigma 100-400mm f/5-6.3 DG.
How to choose the best lens for Moon photography
To capture a big Moon there are 2 major factors that you should take into consideration:
The shooting spot determines the size of the Moon relative to the subject size. So the further away you are from the subject, the bigger the Moon will look like.
The focal length determines the Moon size in the frame. And that's because a telephoto lens compresses perspective.
Therefore:
- If you plan to include the Moon in a landscape shot, a shorter lens may be enough.
- If you want to capture close-up shots of the Moon with intricate details, a longer lens is advisable.
Here is everything you need to know about the best lens for Moon photography.
Consider the best camera to take pictures of the Moon
A good camera can help you get incredible photos.
But you don't need the best and most expensive camera in the market to shoot impressive pictures of the Moon...
What is the best camera to take pictures of the Moon?
After years testing and comparing many camera bodies these are, in my opinion, the best cameras to take pictures of the Moon:
How to choose the best camera for Moon photography
Let's take a look at some important things to think about when you're choosing the right camera for capturing the Moon:
- Don't obsess with a full frame 50MP sensor.
- Choose a camera with some sort of internal stabilization to avoid motion blur.
- Invest in high-quality autofocus to get tack sharp images.
- Make sure it has a good battery life to be able to work in cold weather.
- Try to get a camera body that's not excessively heavy.
Here you can find more information on the best camera to take pictures of the Moon.
Complete your camera equipment for Moon photography
I just gave my opinion on the features your lens and camera should have to get your Moon shot.
But apart from the lens and the camera, you're going to need a few more pieces of camera equipment. They'll surely prove extremely helpful.
1. PhotoPills is the best planning and shooting app that you can have in your pocket.
2. A sturdy tripod and head for keeping your camera stable and minimizing camera shake.
- The tripod should be tall enough for you.
- Both items should be capable of carrying the weight of your camera and lens.
3. An intervalometer to help you prevent camera shake when pressing the shutter button.
4. A bunch of memory cards.
5. A powerful headlamp (in case your session starts or ends at night).
Find out how to complete your camera equipment for Moon photography.
4.Shoot your Moon photo successfully
Photo by Robert Gallucci
Photographing the Moon requires a little knowledge about the correct camera settings, the shooting workflow you should follow, and some tips for nailing the shot.
Here's a Moon photography cheat sheet including all the steps you need to follow to successfully capture the Moon shot you've imagined.
Dominate the Moon photography settings
Once you have all your equipment in order, it's time to set up your camera to capture the perfect shot.
To photograph the Moon you'll need complete control over your settings, so it's best to work in manual mode.
Your settings will vary depending on the natural light conditions and what result you're looking for, but the settings below should give a good base.
Here are my recommended Moon photography settings:
Set the shooting mode to Manual (M).
Set the focal length according to the Moon size and the framing (composition) you want.
Set the aperture to f/8 to ensure the Moon is in focus.
Focus on the subject.
Set the ISO to 100 to minimize noise.
Adjust the shutter speed, but never above 1s to prevent motion blur.
Take a test shot and check the histogram.
Read a step by step guide to master Moon photography settings.
How to take a picture of the Moon
You want to photograph a cool Moon shot.
Well, there are a few things that you should take into consideration.
Step #1. Think about what kind of picture you want to shoot.
- Moon phase. You want to photograph just the Moon and a small portion of the sky. For example the Full Moon or a crescent Moon, just to mention 2 of the most important phases of the Moon.
- Moon with a foreground. You want to photograph the Moon with an interesting subject and a landscape. Have a look at this video where you'll learn how to photograph the Moon with a foreground.
Step #2. Plan the photo with PhotoPills (go to section 2 for more details).
Step #3. Take the shot! ;)
How to take a picture of a certain Moon phase
If you want to learn how to take a picture of a certain Moon phase, follow the steps below:
Get to your shooting spot in advance.
Place the tripod at the shooting spot.
Prepare your camera equipment.
Set the shooting mode to Manual (M).
Set the focal length according to the Moon size you want in the frame.
Set the aperture between f/8 and f/11.
Make sure that the Moon is tack sharp.
Set the ISO to 100.
Adjust the shutter speed, but never above 1s.
Take a test shot and check the histogram to make sure the exposure looks good.
The key step happens while focusing.
Here, you should focus on the Moon. There's nothing else in your frame except for the sky (negative space)!
How to photograph the Moon with a foreground
If you want to learn how to take a picture of the Moon with a foreground, follow the steps below:
Get to your shooting spot in advance.
Place the tripod at the shooting spot.
Prepare your camera equipment.
Set the shooting mode to Manual (M).
Set the focal length according to the Moon size and the framing (composition) you want.
Set the aperture to f/8 but be ready to open the aperture to f/5.6 or f/4 depending on the natural light you have in the scene.
Focus on the subject.
Set the ISO to 100 and be ready to push it up to 400 or 800 depending on the natural light you have at the time of the photo.
Adjust the shutter speed, but never above 1s.
Take a test shot and check the histogram to make sure the exposure looks good.
Take a 3-shot bracketing of 1 stop if you need it.
Here, you should focus on the subject.
- If your subject falls behind the hyperfocal distance, the Moon will be acceptably sharp too.
- If your subject falls in front of the hyperfocal distance, then the Moon will be out of focus.
Make sure you have your subject tack sharp and the Moon (somewhat) out of focus, and not the other way around. Remember that your subject is the main element of your picture, so it needs to be crystal clear to attract the viewer's attention.
Read the complete workflow you need to follow to successfully capture the Moon with a foreground.
Take advantage of these 50 tips for photographing the Moon
Moon photography is not a difficult genre, but it can present a few challenges both during the planning phase (here's where the PhotoPills app comes to your rescue) and on the shooting day.
As with every shoot, it all comes down to a combination of the following strategies:
- Using your imagination (don't be afraid of crazy ideas!)
- Being at the right place at the right time (plan your shot!).
- Deciding the right settings and equipment (don't obsess over gear!).
These 50 tips will help you avoid bad surprises and capture an amazing Moon picture.
5.Take your Moon shots to the next level
And that's it!
As you've seen, this Moon photography cheat sheet includes everything you need to take your Moon shots to the next level:
- Several sources of inspiration to let your imagination fly.
- All the types of plans that you can make with PhotoPills explained step by step.
- The best camera gear and the workflow you need to follow to nail your shooting session.
Since this is just a condensed summary, you can always delve into each piece of information to get a deeper knowledge. Just click on the links and you'll be taken to one of our Moon photography related articles. All of them are full of practical and easy to understand guidelines ;)
Photographing the Moon is not a difficult photography genre to master. You only need to know what to do and when to do it!
I hope that this cheat sheet helps you with becoming a better Moon photographer.
Now it's your turn...
Start planning a jaw-dropping Moon picture and don't stop until you get it! :)
Note: Some links on this page are affiliate links. What does this mean? If you buy/rent using these links you're helping support us and it costs you nothing extra. Thank you for your support.
Get this ebook for free now!