Astronomical Events 2024: The Definitive Photography Guide
No matter where you are on Earth.
As a photographer, you're always looking for great photo opportunities, right?
To find them...
It's essential to get inspired, be more creative, pick a great location and come up with different photo ideas with the Sun, the Moon, the Milky Way, Star Trails, lunar eclipses, solar eclipses, Meteor Showers, Moon-planet conjunctions, Moon-planet occultations, multiple planet conjunctions, comets, planet transits across the Sun...
The possibilities are endless.
But the problem is...
How are you going to photograph all these magical events if you don't know when they happen?
Well, you're in luck because I've done (almost) all the work for you! ;)
In this guide, you'll find everything you need to imagine, plan and shoot the best astronomical events in 2024.
Everything!
From a complete 2024 astronomy calendar (including the most important celestial events) and multiple inspiring images to step by step guides on how to plan your photo ideas with PhotoPills and on how to actually photograph each one of these events.
And the good news is that you'll be able to photograph most of the astronomical events on this calendar with your camera. Nevertheless, you may need a telescope for some of them (and/or a solar filter plus a pair of solar eclipse glasses!).
I have organized the events on the calendar by date. For every event, I also have included the time it happens in Coordinated Universal Time (UTC) as a base reference. So the actual date of the event may change to a day before or after, depending on your shooting location... ;)
Obviously, you can use the PhotoPills Planner to convert UTC times into your local time. All you have to do is:
- On the Planner, move the Red Pin and place it in Iceland, whose local time is always equivalent to UTC (GMT+0 time zone) and it has no winter/summer time (DST or Daylight Saving Time).
- Once the Red Pin is in Iceland, set the UTC time of the event using the Time Bar.
- Then, move the Red Pin to where you want to plan the photo. The UTC time will automatically convert to the local time of the location you choose.
So tell me!
Are you ready to experience some amazing and unique space events?
Feel free to use this guide as a reference and check it out as the year goes by!
"Do not look at stars as bright spots only. Try to take in the vastness of the universe." - Maria Mitchell
Get this ebook for free now!
Content
- The 2024 astronomy calendar highlights
- January 2024 astronomical events, one by one
- February 2024 astronomical events, one by one
- March 2024 astronomical events, one by one
- April 2024 astronomical events, one by one
- May 2024 astronomical events, one by one
- June 2024 astronomical events, one by one
- July 2024 astronomical events, one by one
- August 2024 astronomical events, one by one
- September 2024 astronomical events, one by one
- October 2024 astronomical events, one by one
- November 2024 astronomical events, one by one
- December 2024 astronomical events, one by one
- How to plan the best 2024 astronomical events
- How to photograph the best 2024 astronomical events
- Astronomical glossary
- Become a legend...
1.The 2024 astronomy calendar highlights
Before we begin...
Don't panic.
Even though throughout this guide you'll read about many astronomical terms, there's nothing to worry about! But if you see that there's still something you don't understand, I have written a glossary (section 16) in which you'll find all the explanations you need.
This way you'll increase your astronomy knowledge and you'll know exactly what you want to photograph and how you want to do it. It's key when you're imagining and planning the photo!
What's worth the effort in 2024?
From the celestial point of view, 2024 is a special year. Make the most out of it!
You have the possibility to photograph two solar eclipses (one total and one annular), two lunar eclipses (one penumbral and one partial), and two Supermoons. All are very special moments that can be the basis of unique and magical images...
In addition to this there is the Milky Way, of course. Its Galactic Center begins to be visible at the end of January in many parts of the world. And it becomes invisible in November from anywhere on Earth.
And don't forget the zodiacal light, visible in spring and fall in both hemispheres.
In 2024 the most promising meteor showers are the Eta Aquariids and the Delta Aquariids.
On the other hand, the Quadrantids, the Lyrids, the Orionids, the Leonids, the Geminids, and the Ursids will be peaking when there is a lot of Moon. But if you wait for the Moon to set you’ll be able to capture a bunch of meteors!
Use PhotoPills to know the Moonset times. Or even better, use the Meteor Shower Pill to figure out whether it's worth it to photograph them or not.
As has often been said, the only thing predictable about comets is their unpredictability… But if we're lucky, 3 comets might light up the skies in 2024:
- On March 1, Comet C/2021 S3 (PANSTARRS) reaches its brightest.
- On April 21, Comet 12P/Pons–Brooks reaches its brightest.
- On October 12, Comet C/2023 A3 (Tsuchinshan-ATLAS) passes perigee.
Finally, you can also try to capture some auroras!
If you happen to be in the Northern Hemisphere, here are a few tips:
- The Northern Lights season spans from mid-August until early April.
- The best times for spotting the Auroras are at the beginning and end of the season.
- Times around the spring and fall equinoxes (March and September, respectively) are most favorable for solar wind energy transmission to Earth’s near-space environment.
- However, fall is the best time of year for Northern Lights viewing. Reasons are simple and practical: skies tend to be clearer in fall than in winter, and nights are darker without snow.
- The best time is from mid-August, when the nights start getting dark, until first snow falls (in October or November). Snowfall characterizes much of early and midwinter, which means it’s cloudy most of the time.
- The nights are clear in spring, too, but they get brighter really quickly.
- In the fall, nights aren’t yet freezing, and many spots are more easily accessed with no snow. Bodies of water are still free of ice.
- The Northern Lights are best observed a couple of hours before dawn.
If you happen to be in the Southern Hemisphere, here are a few tips:
- The best time to see them is during the winter months (March to September) with the best months being June and July thanks to longer, darker nights.
- Theoretically speaking the spring equinox (in September) should be the best time for viewing the Southern Lights, but this isn’t always the case.
- The best views of the Southern Lights can be expected a couple of hours after dusk.
That said, let's go with what really matters ;)
A summary of the 2024 highlights
This table is a summary of the most important astronomical events of 2024.
Moreover, throughout this guide you will find a section detailing the most important events for each month of the year, including the areas where they are visible.
Your location on Earth will determine which events you'll be able to photograph and which you won't. So you should use PhotoPills to get out of doubt, to quickly find out if an event is visible or not in your location (or where you want to go to photograph it) and to plan your photo of the event down to the last detail (section 14).
| Date | Event | Comments |
|---|---|---|
| January 3-4 | Quadrantids Meteor Shower | Moon phase: 48.2%. |
| January 11 | New Moon | |
| January 12 | Manhattanhenge (Sunrise) | Best locations: 14th Street, 34th Street, 42nd Street, 57th Street y 79th Street. |
| January 12 | Mercury at Greatest Western Elongation | The best time to photograph Mercury is shortly before Sunrise. |
| January 25 | Full Moon | |
| February 9 | New Moon | The Milky Way season starts in February in the Southern Hemisphere. |
| February 24 | Full Moon | |
| March 1 | Comet C/2021 S3 (PANSTARRS) reaches its brightest. | |
| March 10 | New Moon | The Milky Way season starts in March in the Northern Hemisphere. |
| March 20 | Spring or fall equinox | This is the best time to photograph the zodiacal light. |
| March 24 | Mercury at Greatest Eastern Elongation | The best time to photograph Mercury is shortly after Sunset. |
| March 25 | Full Moon | |
| March 25 | Penumbral lunar eclipse | Visible from the Americas, Antarctica, Alaska and north-eastern Russia. |
| April 8 | Total solar eclipse | The path of totality will begin in the Pacific Ocean and move across parts of Mexico and the eastern United States and Nova Scotia. The total eclipse will be visible in parts of Texas, Arkansas, Missouri, Illinois, Indiana, Kentucky, Ohio, Pennsylvania, New York, Vermont, New Hampshire, and Maine. |
| April 8 | New Moon | |
| April 21 | Comet 12P/Pons–Brooks reaches its brightest. | |
| April 21-22 | Lyrids Meteor Shower | Moon phase: 96.8%. |
| April 23 | Full Moon | |
| May 5-6 | Eta Aquariids Meteor Shower | Moon phase: 5.5%. |
| May 8 | New Moon | |
| May 9 | Mercury at Greatest West Elongation | The best time to photograph Mercury is just before Sunrise. |
| May 23 | Full Moon | |
| May 30 | Manhattanhenge (Sunset) | Best locations: 14th Street, 34th Street, 42nd Street, 57th Street y 79th Street. |
| June 6 | New Moon | |
| June 20 | Summer or winter solstice | It marks the longest or shortest day of the year. |
| June 22 | Full Moon | |
| July 5 | New Moon | |
| July 12 | Manhattanhenge (Sunset) | Best locations: 14th Street, 34th Street, 42nd Street, 57th Street y 79th Street. |
| July 21 | Full Moon | |
| July 22 | Mercury at Greatest Eastern Elongation | The best time to photograph Mercury is shortly after Sunset. |
| July 30-31 | Delta Aquariids Meteor Shower | Moon phase: 19.6%. |
| August 4 | New Moon | |
| August 12-13 | Perseids Meteor Shower | Moon phase: 54.3%. |
| August 19 | Full Moon | |
| September 3 | New Moon | |
| September 5 | Mercury at Greatest Western Elongation | The best time to photograph Mercury is shortly before Sunrise. |
| September 8 | Saturn at opposition | It's brighter than at any other time of the year and is visible throughout the night. This is the best time to view and photograph Saturn and its rings. |
| September 18 | Full Moon (Supermoon) | |
| September 18 | Partial lunar eclipse | Visible from the Americas, Antarctica, Africa, Europe, Western Asia and south-western Russia. |
| September 21 | Neptune at opposition | It's brighter than at any other time of the year and is visible throughout the night. |
| September 22 | Fall or spring equinox | This is the best time to photograph the zodiacal light. |
| October 2 | Annular solar eclipse | The eclipse path will begin in the Pacific Ocean off the coast of South America and move across parts of southern Chile and Argentina. A partial eclipse will be visible throughout most of southern South America. |
| October 2 | New Moon | The Milky Way season ends in the Northern and Southern Hemisphere. |
| October 12 | Comet C/2023 A3 (Tsuchinshan-ATLAS) passes perigee. | |
| October 17 | Full Moon (Supermoon) | |
| October 21-22 | Orionids Meteor Shower | Moon phase: 71.4%. |
| November 1 | New Moon | |
| November 15 | Full Moon | |
| November 16 | Mercury at Greatest Eastern Elongation | The best time to photograph Mercury is shortly after Sunset. |
| November 17 | Uranus at opposition | It's brighter than at any other time of the year. You need a telescope. |
| November 16-17 | Leonids Meteor Shower | Moon phase: 97.0%. |
| November 30 | Manhattanhenge (Sunrise) | Best locations: 14th Street, 34th Street, 42nd Street, 57th Street y 79th Street. |
| December 1 | New Moon | |
| December 7 | Jupiter at opposition | It's brighter than at any other time of the year and is visible throughout the night. This is the best time to view and photograph Jupiter and its moons. |
| December 13-14 | Geminids Meteor Shower | Moon phase: 97.7%. |
| December 15 | Full Moon | |
| December 21 | Winter or summer solstice | It marks the shortest or longest day of the year. |
| December 22-23 | Ursids Meteor Shower | Moon phase: 51.4%. |
| December 25 | Mercury at Greatest Western Elongation | The best time to photograph Mercury is shortly before Sunrise. |
| December 30 | New Moon |
2.January 2024 celestial events, one by one
Although the Milky Way is visible every night, in January the core of the Milky Way is not yet visible.
It begins to be visible, although for a very short time, at the end of January in many parts of the world. You'll have to wait until February, or March depending on where you are, to begin to see it above the horizon at its peak... It will be when what we call the Milky Way season begins (ie. the Galactic Center becomes visible).
Unfortunately, this year the conditions to photograph the Quadrantids are not very good.
Having said that, this January is packed with cool photo opportunities!
But above all, don't miss...
- The Quadrantids Meteor Shower on January 3-4. During those nights the conditions to enjoy it might not be very good because of the Moonlight. But it all depends on your location!
- The chance to photograph some Star Trails. Take advantage of the New Moon week (January 11).
- The Manhattanhenge of January 12. It's a fantastic spectacle by which the Sun aligns itself during Sunrise with some of the streets that form a grid on the island of Manhattan in New York (USA).
- On January 12, you can photograph Mercury at greatest western elongation.
- The Full Moon on January 25 is always an opportunity to get a spectacular image.
Here you have the complete list of the most important celestial events happening in January 2024.
January 3-4: Quadrantids Meteor Shower.
The Meteor Shower runs from December 28 to January 12.
But the best night for photographing it is the one between January 3 and 4. The peak is on January 4 at 08:18 UTC with 110 meteors per hour. At this time the Moon phase is 48.2%, so the conditions to enjoy it might not be very good because of the Moonlight.
But this depends on where you are on the planet or plan to photograph it. To figure out whether it's worth it or not to photograph it, use the Meteor Shower Pill or the Meteor Shower Layer in the Planner to check local Moonset times, local peak time and forecasted local meteors/h.
Unfortunately, this Meteor Shower is only visible from the Northern Hemisphere.
You have all the information you need in our Meteor Showers guide.
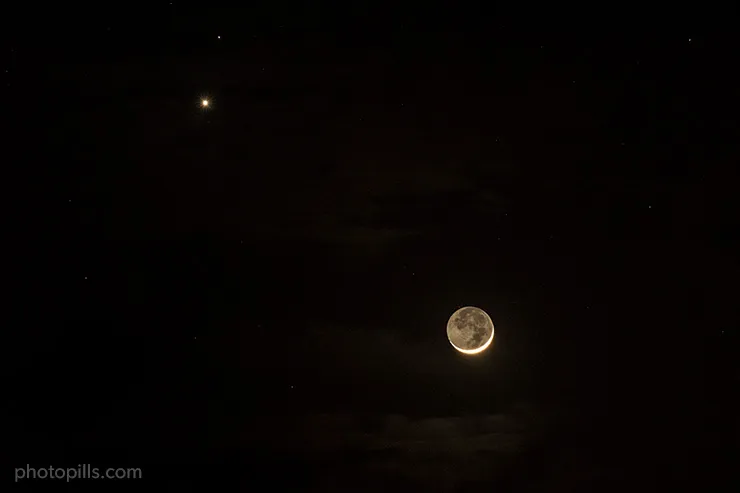
January 8: Conjunction of the Moon and Venus.
The Moon passes 5.4º to the south of Venus at 20:12 UTC. The Moon is at a magnitude of -10.1, and Venus at a magnitude of -4.0. At this time the Moon phase is 9.2%.
January 9: Conjunction of the Moon and Mercury.
The Moon passes 6.4º to the south of Mercury at 18:49 UTC. The Moon is at a magnitude of -9.3, and Mercury at a magnitude of -0.3. At this time the Moon phase is 4.1%.
January 10: Conjunction of the Moon and Mars.
The Moon passes 4.1º to the south of Mars at 08:32 UTC. The Moon is at a magnitude of -8.5, and Mars at a magnitude of 1.4. At this time the Moon phase is 2.0%.
January 11: New Moon.
The Moon is between the Earth and the Sun, so the bright side of the Moon is facing away from the Earth. The Moon phase is 0% at 11:59 UTC.
The days around New Moon are great for photographing the night sky, including the Milky Way.
But during this New Moon of January, the Galactic Center of the Milky Way is visible in very few areas of the world (the more to the south the more visible it is) and for very little time. The only thing that you can photograph is the thinnest part of the arch of our galaxy, which is always visible at night.
Shooting Star Trails images is also a great option. Its pattern depends on your latitude and the direction to which you point your camera at.
Use PhotoPills to learn more about the Milky Way and Star Trails in your location (section 14).
January 12: Manhattanhenge at Sunrise.
Manhattanhenge occurs when the Sun, at Sunrise, aligns with the grid formed by the streets of Manhattan Island in New York (USA).
On January 11 and 12 the Sun aligns with the streets of Manhattan. But on January 12 it’s perfectly aligned. So if the weather conditions are not ideal, you can always try the day before or the day after.
The best locations are 14th Street, 34th Street (where the Empire State Building is located), 42nd Street (where the Chrysler Building and Tudor City Bridge are located), 57th Street and 79th Street.
January 12: Mercury at Greatest Western Elongation.
When Mercury reaches its greatest elongation at 19:18 UTC, it's located 23.5º west of the Sun, and it's shining at a magnitude of -0.3.
Mercury's orbit is closer to the Sun than that of the Earth, which means that it always appears close to the Sun and is faded because of the Sun's brightness most of the time. You can only observe it for a few days each time it reaches its greatest separation from the Sun (greatest elongation).
This phenomenon repeats itself approximately once every 3-4 months and occurs alternately during the morning or afternoon, depending on whether Mercury is to the east or west of the Sun.
When it's located west of the Sun, it rises and sets just before the Sun, and it's visible before Sunrise. The best time to photograph Mercury is shortly before Sunrise.
January 14: Conjunction of the Moon and Saturn.
The Moon passes 2.1º to the south of Saturn at 09:33 UTC. The Moon is at a magnitude of -10.5, and Saturn at a magnitude of 0.8. At this time the Moon phase is 11.8%.
January 18: Conjunction of the Moon and Jupiter.
The Moon passes 2.5º to the south of Jupiter at 20:42 UTC. The Moon is at a magnitude of -12.1, and Jupiter at a magnitude of -2.5. At this time the Moon phase is 57.4%.
January 25: Full Moon.
The Moon is on the opposite side of the Earth so the Sun illuminates it completely. Full Moon is at 17:55 UTC.
Full Moon days are perfect for photographing it with an interesting subject. Get the most out of the Full Moon with this article.
3.February 2024 celestial events, one by one
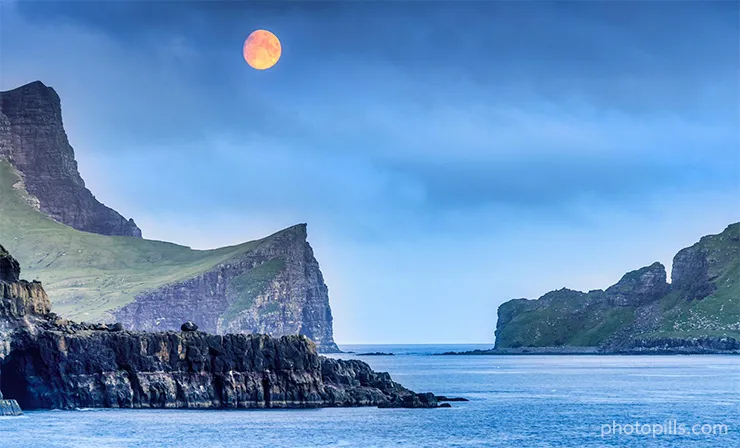
You can start photographing the Galactic Center of the Milky Way in many areas of the world!
However, in the Northern Hemisphere the Galactic Center is visible during a short period of time. You'll have to wait a little longer (until March) to see it completely above the horizon.
Note: The Galactic Center is visible at latitudes below 55ºN (more or less). But it depends on the time of year. I recommend you to use PhotoPills to find out what's going on with the Milky Way in the location you want (section 14). On the other hand, if you live at a latitude above 55ºN you won't be able to see the Galactic Center. But you can see part of the Milky Way core.
At the end of February the zodiacal light (reflection produced by the scattering of sunlight due to particles moving along the entire solar system) also begins to be visible. In the Northern Hemisphere at this time of year, it's visible to the west, at the end of the astronomical twilight, after Sunset, in the direction of the Sunset. On the contrary, in the Southern Hemisphere it's visible to the east, before the astronomical twilight begins, before dawn, in the direction of the Sunrise.
February is a relatively quiet month, but pay attention because the night sky always offers interesting photographic opportunities.
- The chance to photograph the Galactic Center. Take advantage of the New Moon week (February 9).
- The Full Moon on February 24 is always an opportunity to get a spectacular image.
Here you have the complete list of the most important celestial events happening in February 2024.
February 7: Conjunction of the Moon and Venus.
The Moon passes 5.3º to the south of Venus at 18:52 UTC. The Moon is at a magnitude of -9.9, and Venus at a magnitude of -4.0. At this time the Moon phase is 7.0%.
February 8: Conjunction of the Moon and Mars.
The Moon passes 4.1º to the south of Mars at 06:31 UTC. The Moon is at a magnitude of -9.4, and Mars at a magnitude of 1.3. At this time the Moon phase is 4.4%.
February 8: Conjunction of the Moon and Mercury.
The Moon passes 3.1º to the south of Mercury at 22:00 UTC. The Moon is at a magnitude of -8.5, and Mercury at a magnitude of -0.5. At this time the Moon phase is 1.8%.
February 9: New Moon.
The Moon is between the Earth and the Sun, so the bright side of the Moon is facing away from the Earth. The Moon phase is 0% at 23:00 UTC.
Depending on where you are on Earth, it’s on February 10.
The days around the New Moon are great for photographing the night sky.
If you're in the Southern Hemisphere, you can start hunting the Galactic Center of the Milky Way with your camera! And don't forget the Magellanic Clouds heading south.
Depending on your latitude, you can see the Galactic Center closest to the horizon (perfect for panoramas). And as you go to latitudes further south, you can photograph it more and more vertical. For example, in New Zealand you can almost capture it completely vertical.
In February, you can also capture the Galactic Center in the Northern Hemisphere: you see it low, near the horizon... although the conditions are not as good as in the Southern Hemisphere. And if you don't get it, you can always wait until March to start enjoying it.
In the Northern Hemisphere you can also photograph the Orion constellation and the Winter Triangle.
And also during the New Moon, you can capture Star Trails, whose pattern depends on your latitude and the direction to which you point your camera at.
Use PhotoPills to learn more about the Milky Way and Star Trails in your location (section 14).
February 11: Conjunction of the Moon and Saturn.
The Moon passes 1.5º to the south of Saturn at 00:40 UTC. The Moon is at a magnitude of -8.5, and Saturn at a magnitude of 0.9. At this time the Moon phase is 1.8%.
February 15: Conjunction of the Moon and Jupiter.
The Moon passes 3.1º to the north of Jupiter at 08:16 UTC. The Moon is at a magnitude of -11.6, and Jupiter at a magnitude of -2.3. At this time the Moon phase is 36.3%.
February 24: Full Moon.
The Moon is on the opposite side of the Earth so the Sun illuminates it completely. Full Moon is at 12:32 UTC.
Full Moon days are perfect for photographing it with an interesting subject. Get the most out of the Full Moon with this article.
4.March 2024 celestial events, one by one
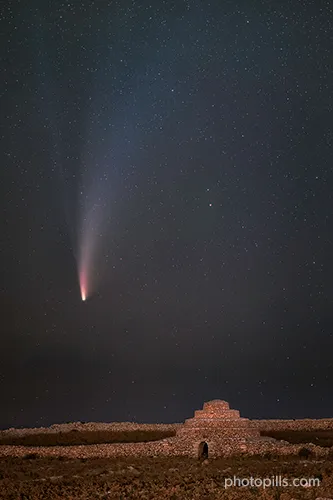
March... Finally! At last! Throughout the month, the visibility of the Galactic Center is longer all over the world, multiplying the photographic opportunities :)
You can also capture the zodiacal light. In the Northern Hemisphere, it's visible to the west, at the end of the astronomical twilight, after Sunset, in the direction of the Sunset. On the contrary, in the Southern Hemisphere it's visible to the east, before the astronomical twilight begins, before dawn, in the direction of the Sunrise.
Depending on your location, the Aurora Borealis season ends (Northern Hemisphere) and the Aurora Astralis season begins (Southern Hemisphere).
But above all, don't miss...
- On March 1 Comet C/2021 S3 (PANSTARRS) reaches its brightest.
- It's time to capture the Galactic Center of the Milky Way! Take advantage of the New Moon week (March 10).
- The spring or fall equinox on March 20 is the best time to photograph the zodiacal light.
- On March 24, you can photograph Mercury at greatest eastern elongation.
- The Full Moon on March 25 is always an opportunity to get a spectacular image.
- The penumbral lunar eclipse on March 24 or 25, depending on your location…
Here you have the complete list of the most important celestial events happening in March 2024.
March 1: Comet C/2021 S3 (PANSTARRS) reaches its brightest.
Comet C/2021 S3 (PANSTARRS) reaches its brightest. The comet coordinates are: right ascension 18h11m50s and declination 5°11'S.
With a magnitude of 8.7, this comet is not expected to be visible to the naked eye, but might be visible through bird-watching binoculars.
March 8: Conjunction of the Moon and Mars.
The Moon passes 3.3º to the south of Mars at 05:00 UTC. The Moon is at a magnitude of -9.9, and Mars at a magnitude of 1.2. At this time the Moon phase is 7.2%.
March 8: Conjunction of the Moon and Venus.
The Moon passes 3.1º to the south of Venus at 17:00 UTC. The Moon is at a magnitude of -9.4, and Venus at a magnitude of -3.9. At this time the Moon phase is 4.4%.
March 10: New Moon.
The Moon is between the Earth and the Sun, so the bright side of the Moon is facing away from the Earth. The Moon phase is 0% at 09:02 UTC.
The days around the New Moon are great for photographing the night sky.
In March, you can fully enjoy the Galactic Center of the Milky Way.
Depending on where you are, in India for example, you may find the Galactic Center near the horizon and capture a spectacular panorama. And if you're a little further south, like Australia's west coast where the skies have no light pollution, you can get an amazing vertical...
Always referring to locations in the Southern Hemisphere, two other galaxies that you can observe (with the naked eye!) and also photograph in clear skies are the Large Magellanic Cloud and the Small Magellanic Cloud.
They are relatively close to the south celestial pole, so from a certain latitude both can become circumpolar. They are located towards the south.
The New Moon also gives you the perfect opportunity to capture Star Trails. Did you know that depending on your location and the direction to which you point your camera at, Star Trails can change their shape?
Use PhotoPills to learn more about the Milky Way and Star Trails in your location (section 14).
March 14: Conjunction of the Moon and Jupiter.
The Moon passes 3.4º to the north of Jupiter at 01:03 UTC. The Moon is at a magnitude of -10.9, and Jupiter at a magnitude of -2.1. At this time the Moon phase is 18.5%.
March 20: March equinox.
The March equinox is at 03:08 UTC. This is also the first spring day (spring equinox) in the Northern Hemisphere and the first fall day (fall equinox) in the Southern Hemisphere.
It's the time when the Sun "crosses" the Earth's equator going from the Southern Hemisphere to the Northern Hemisphere. So it's perfect to photograph the zodiacal light.
In addition to this, there is a special beauty in chasing the Northern Lights during the equinox: they have more colors than the usual bright green!
March 24: Mercury at Greatest Eastern Elongation.
When Mercury reaches its greatest elongation at 17:54 UTC, it's located 18.7º east of the Sun, and it's shining at a magnitude of -0.3.
Mercury's orbit is closer to the Sun than that of the Earth, which means that it always appears close to the Sun and is faded because of the Sun's brightness most of the time. You can only observe it for a few days each time it reaches its greatest separation from the Sun (greatest elongation).
This phenomenon repeats itself approximately once every 3-4 months and occurs alternately during the morning or afternoon, depending on whether Mercury is to the east or west of the Sun.
When it's located east of the Sun, it rises and sets just after the Sun, and it's visible during the Sunset. The best time to photograph Mercury is shortly after Sunset.
March 24-25: Penumbral Lunar Eclipse (and Full Moon).
Full Moon is at 07:01 UTC.
Full Moon days are perfect for photographing it with an interesting subject. Get the most out of the Full Moon with this article.
Moreover, in certain areas of the Earth, the Moon passes through the Earth's penumbra, creating a penumbral lunar eclipse from 04:53 to 09:32 UTC.
It happens on May 24 or 25 depending on your longitude (e.g. in Australia, Eastern Indonesia, Papua New Guinea, New Zealand and Japan it happens on the 25th). The penumbral lunar eclipse is visible throughout much of Europe, North/East Asia, much of Australia, much of Africa, North America, South America, Pacific, Atlantic, Arctic, and Antarctica.
Use PhotoPills to learn more about the penumbral lunar eclipse in your location (section 14).
5.April 2024 celestial events, one by one
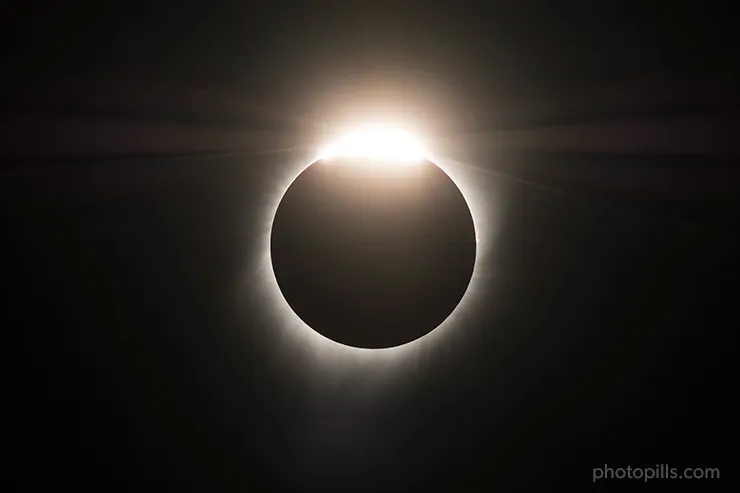
April is full of interesting events that you can photograph.
First and foremost, there is a total solar eclipse!
For starters, take advantage of the New Moon week to capture the Galactic Center of the Milky Way at its peak. Another very interesting option (and that will leave your friends with their mouths wide open) you can photograph are Star Trails.
Also, at the beginning of the month, you can still capture the zodiacal light. In the Northern Hemisphere, it's visible to the west, at the end of the astronomical twilight, after Sunset, in the direction of the Sunset. On the contrary, in the Southern Hemisphere it's visible to the east, before the astronomical twilight begins, before dawn, in the direction of the Sunrise.
Unfortunately, this year the conditions to photograph the Lyrids are not very good.
During April, make sure you don't miss...
- The total solar eclipse on April 8. Take advantage of this unique opportunity and travel to a place located in the path of totality. The next one won't be until August 12, 2026.
- Take advantage of the New Moon week (April 8) to capture the Galactic Center of the Milky Way shining in the sky.
- On April 21 Comet 12P/Pons–Brooks reaches its brightest.
- The Lyrids Meteor Shower on April 21-22. During those nights the conditions to enjoy it might not be very good because of the Moonlight. But it all depends on your location!
- The Full Moon on April 23.
Here you have the complete list of the most important celestial events happening in April 2024.
April 6: Conjunction of the Moon and Mars.
The Moon passes 1.6º to the south of Mars at 03:51 UTC. The Moon is at a magnitude of -10.3, and Mars at a magnitude of 1.2. At this time the Moon phase is 9.9%.
April 6: Conjunction of the Moon and Saturn (and occultation).
The Moon passes 1.1º to the south of Saturn at 09:23 UTC. The Moon is at a magnitude of -10.1, and Saturn at a magnitude of 1.0. At this time the Moon phase is 8.3%.
In addition to this, Saturn goes behind the Moon on what's called an occultation.
April 7: Conjunction of the Moon and Venus (and occultation).
The Moon passes 0.2º to the north of Venus at 16:38 UTC. The Moon is at a magnitude of -8.4, and Venus at a magnitude of -3.9. At this time the Moon phase is 1.7%.
In addition to this, Venus goes behind the Moon on what's called an occultation.
April 8: Total Solar Eclipse.
The Moon passes in front of the Sun, creating a total solar eclipse from 15:42 to 20:52 UTC. Totality occurs at 18:17 UTC. Although this information depends on your position within the path of totality. So use PhotoPills to plan in detail the total solar eclipse.
The path of totality runs through Mexico (from Sinaloa to Coahuila), the USA (from Texas to Maine), and Canada (from Ontario to Newfoundland). A partial eclipse will be visible across nearly all of North America, and a sliver of western Europe.
Please be cautious and use a solar filter along with a pair of solar eclipse glasses if you plan to observe or photograph the total solar eclipse of the Sun.
To learn how to plan and photograph the solar eclipse, take a look at our detailed guide to solar eclipses.
April 8: New Moon.
The Moon is between the Earth and the Sun, so the bright side of the Moon is facing away from the Earth. The Moon phase is 0% at 18:22 UTC.
The days around the New Moon are great for photographing the night sky.
In April the Galactic Center of the Milky Way is visible. Are you on the west coast of the USA? Or of Mexico? Then you have the perfect opportunity to capture it on the horizon thanks to a panorama.
And if you're in Chilean Patagonia, for example, you have the Milky Way forming a beautiful diagonal or even a vertical...
You can also capture Star Trails including the Polaris or the south celestial pole... You can create circumpolars, arches, diagonals... ;)
Use PhotoPills to learn more about the Milky Way and Star Trails in your location (section 14).
April 10: Conjunction of the Moon and Jupiter.
The Moon passes 3.6º to the north of Jupiter at 21:09 UTC. The Moon is at a magnitude of -10.3, and Jupiter at a magnitude of 1.2. At this time the Moon phase is 6.4%.
April 21: Comet 12P/Pons-Brooks reaches its brightest.
Comet 12P/Pons-Brooks reaches its brightest. The comet coordinates are: right ascension 03h29m20s and declination 9°33'N.
With a magnitude of around 4, this comet is expected to be visible to the naked eye.
April 21-22: Lyrids Meteor Shower.
The Meteor Shower runs from April 14 to 30.
But the best night for photographing it is the one between April 21 and 22. The peak is on April 22 at 03:19 UTC with 20 meteors per hour. At this time the Moon phase is 96.8%, so the conditions to enjoy it might not be very good because of the Moonlight.
This Meteor Shower is visible from both hemispheres. Although it's a little weaker in the Southern Hemisphere.
Use the Meteor Shower Pill and the Meteor Shower Layer in the Planner to figure out all the key Meteor Shower info for your location or place you wish to photograph it.
Learn how to photograph a Meteor shower with our Meteor Showers photography guide.
April 23: Full Moon.
The Moon is on the opposite side of the Earth so the Sun illuminates it completely. Full Moon is at 23:50 UTC.
Depending on where you are on Earth, it’s on April 24.
Full Moon days are perfect for photographing it with an interesting subject. Get the most out of the Full Moon with this article.
6.May 2024 celestial events, one by one
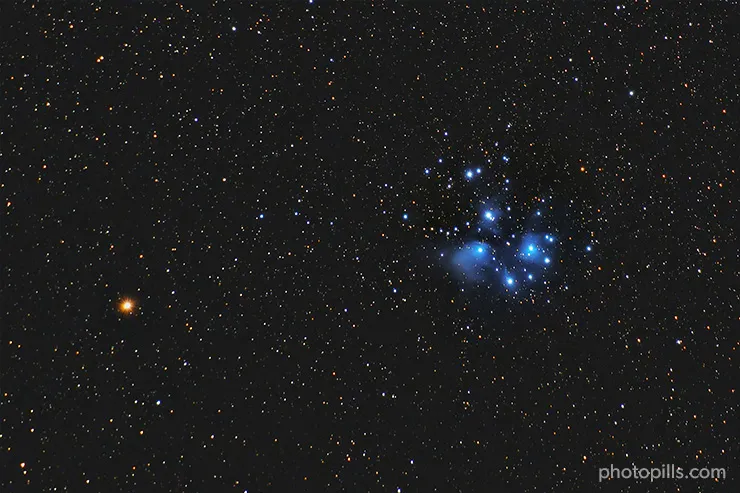
Stay tuned because May is a month full of astronomical events. Write them in your diary so you don't miss a single one... ;)
And don't forget to keep in mind the New Moon week. It offers a fantastic opportunity to capture the Galactic Center of the Milky Way (May is a great month for it!).
You can also try taking pictures of Star Trails. The results are amazing and you can play with your creativity in many ways.
Fortunately, this year the conditions to photograph the Eta Aquariids are very good.
And if you can treat yourself with a trip to New York, Manhattanhenge is a very curious and tremendously photogenic phenomenon that occurs approximately three weeks before and after the June solstice.
But above all, don't miss...
- The Eta Aquariids Meteor Shower on May 5-6. During those nights the Moon is pretty thin. So you don't have any Moonlight :)
- Take advantage of the New Moon week (May 9) to capture the Galactic Center of the Milky Way shining in the sky.
- On May 9, you can photograph Mercury at greatest western elongation.
- The Full Moon on May 23.
- The Manhattanhenge of May 30. It's a fantastic spectacle by which the Sun aligns itself during Sunset with some of the streets that form a grid on the island of Manhattan in New York (USA).
Here you have the complete list of the most important celestial events happening in May 2024.
May 3: Conjunction of the Moon and Saturn (and occultation).
The Moon passes at 0.5º to the south of Saturn at 22:31 UTC. The Moon is at a magnitude of -11.2, and Saturn at a magnitude of 1.0. At this time the Moon phase is 23.2%.
In addition to this, Saturn goes behind the Moon on what's called an occultation.
May 5: Conjunction of the Moon and Mars (and occultation).
The Moon passes 0.1º to the north of Mars at 02:25 UTC. The Moon is at a magnitude of -10.5, and Mars at a magnitude of 1.1. At this time the Moon phase is 12.7%.
In addition to this, Mars goes behind the Moon on what's called an occultation.
The Earth's orbit around the Sun lasts one year, and that of Mars lasts about two years. So the brightness of Mars in the sky alternates from year to year. In 2023 Mars appeared fainter in the sky. On the contrary, 2024 will be an excellent year for Mars and it will shine brightly.
May 5-6: Eta Aquariids Meteor Shower.
The Meteor Shower runs from April 19 to May 28.
But the best night for photographing it is the one between May 5 and 6. The peak is on May 6 at 03:42 UTC with 50 meteors per hour. At this time the Moon phase is 5.5%, so the conditions to enjoy it are very good (there is no Moon).
But this depends on where you are on the planet or plan to photograph it. To figure out whether it's worth it or not to photograph it, use the Meteor Shower Pill or the Meteor Shower Layer in the Planner to check local Moonset times, local peak time and forecasted local meteors/h.
This Meteor Shower is visible from both hemispheres. Although it's best visible in the Southern Hemisphere. In the Northern Hemisphere it has a lower intensity.
You have all the information you need in our Meteor Showers guide.
May 8: New Moon.
The Moon is between the Earth and the Sun, so the bright side of the Moon is facing away from the Earth. The Moon phase is 0% at 03:23 UTC.
The days around the New Moon are great for photographing the night sky.
In May the Galactic Center of the Milky Way is visible. From Spain for example, you can capture a beautiful diagonal with the Galactic Center shining. Or if you're in South Africa, try to work a composition with the Milky Way completely vertical.
You can also capture Star Trails. However, take care of your composition because oftentimes the foreground is as important (or more) than the background. So take a good look at the sky, how you're going to paint with the stars, and how you're going to combine those trails with a catching subject.
Use PhotoPills to learn more about the Milky Way and Star Trails in your location (section 14).
May 9: Mercury at Greatest Western Elongation.
When Mercury reaches its greatest elongation at 19:34 UTC, it's located 26.4º west of the Sun, and it's shining at a magnitude of 0.4.
Mercury's orbit is closer to the Sun than that of the Earth, which means that it always appears close to the Sun and is faded because of the Sun's brightness most of the time. You can only observe it for a few days each time it reaches its greatest separation from the Sun (greatest elongation).
This phenomenon repeats itself approximately once every 3-4 months and occurs alternately during the morning or afternoon, depending on whether Mercury is to the east or west of the Sun.
When it's located west of the Sun, it rises and sets just before the Sun, and it's visible before the Sunrise. The best time to photograph Mercury is shortly before the Sunrise.
May 23: Full Moon.
The Moon is on the opposite side of the Earth so the Sun illuminates it completely. Full Moon is at 13:54 UTC.
Full Moon days are perfect for photographing it with an interesting subject. Get the most out of the Full Moon with this article.
May 30: Manhattanhenge at Sunset.
Manhattanhenge occurs when the Sun, at Sunset, aligns with the grid formed by the streets of Manhattan Island in New York (USA).
On May 29 and 30 the Sun aligns with the streets of Manhattan. But on May 30 it’s perfectly aligned. So if the weather conditions are not ideal, you can always try the day before.
The best locations are 14th Street, 34th Street (where the Empire State Building is located), 42nd Street (where the Chrysler Building and Tudor City Bridge are located), 57th Street and 79th Street.
May 31: Conjunction of the Moon and Saturn (and occultation).
The Moon passes at 0.2º to the south of Saturn at 08:08 UTC. The Moon is at a magnitude of -11.8, and Saturn at a magnitude of 0.9. At this time the Moon phase is 43.0%.
In addition to this, Saturn goes behind the Moon on what's called an occultation.
7.June 2024 celestial events, one by one
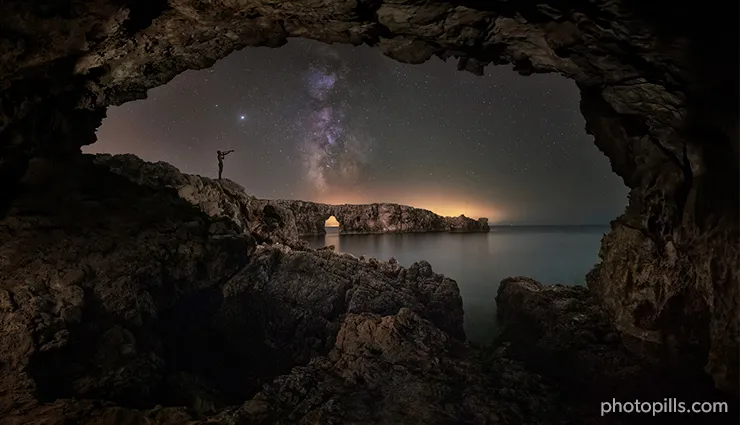
Even though the nights in the Northern Hemisphere are shorter than ever, you'll surely find the opportunity to photograph some of the astronomical events that occur.
Conversely, if you're in the Southern Hemisphere, make the most of the long winter nights. They're perfect for capturing tack sharp stars!
Oh, and remember to look at the date of the New Moon and look for locations to photograph the Galactic Center of the Milky Way and/or Star Trails. June is a perfect month to do so in both hemispheres.
But above all, don't miss...
- Take advantage of the New Moon week (June 6) to capture the Galactic Center of the Milky Way shining in the sky.
- The summer (or winter) solstice on June 20 marks the longest (or shortest) day of the year.
- The Full Moon on June 22 is always an opportunity to get a spectacular image.
Here you have the complete list of the most important celestial events happening in June 2024.
June 2: Conjunction of the Moon and Mars.
The Moon passes 2.2º to the north of Mars at 23:37 UTC. The Moon is at a magnitude of -10.7, and Mars at a magnitude of 1.0. At this time the Moon phase is 15.8%.
June 5: Conjunction of the Moon and Jupiter.
The Moon passes at 4.4º to the north of Jupiter at 14:26 UTC. The Moon is at a magnitude of -7.9, and Jupiter at a magnitude of -2.0. At this time the Moon phase is 1.2%.
June 6: New Moon.
The Moon is between the Earth and the Sun, so the bright side of the Moon is facing away from the Earth. The Moon phase is 0% at 12:39 UTC.
The days around the New Moon are great for photographing the night sky.
In June the Galactic Center of the Milky Way is visible. From Patagonia, where the skies are extremely clean, you can capture a beautiful vertical. And from the USA you have the option of capturing a panorama at the beginning of the night and a vertical one before Sunrise ;)
You can also capture Star Trails.
Use PhotoPills to learn more about the Milky Way and Star Trails in your location (section 14).
June 20: June solstice.
The June solstice is at 20:52 UTC. This is also the first summer day (summer solstice) in the Northern Hemisphere and the first winter day (winter solstice) in the Southern Hemisphere.
If you are in the Northern Hemisphere, take advantage of the longest golden hour and blue hour of the year!
June 22: Full Moon.
The Moon is on the opposite side of the Earth so the Sun illuminates it completely. Full Moon is at 01:09 UTC.
Full Moon days are perfect for photographing it with an interesting subject. Get the most out of the Full Moon with this article.
June 27: Conjunction of the Moon and Saturn (and occultation).
The Moon passes at 4.4º to the north of Saturn at 14:59 UTC. The Moon is at a magnitude of -12.2, and Saturn at a magnitude of 0.8. At this time the Moon phase is 64.7%.
In addition to this, Saturn goes behind the Moon on what's called an occultation.
8.July 2024 celestial events, one by one

Fortunately, this year the conditions to photograph the Delta Aquariids are very good.
Morever, you can make the most out of the days around the New Moon and look for locations: July is a great month to photograph the Galactic Center of the Milky Way.
Or would you prefer to work on creating Star Trails? Use the PhotoPills Night Augmented Reality view to decide in which direction you want to point your camera and work on different Star Trails' patterns.
But above all, don't miss...
- Take advantage of the New Moon week (July 5) to capture the Galactic Center of the Milky Way. It's the last month of optimal visibility!
- The Manhattanhenge of July 12. It's a fantastic spectacle by which the Sun aligns itself during Sunset with some of the streets that form a grid on the island of Manhattan in New York (USA).
- The Full Moon on July 21.
- On July 22 you can photograph Mercury at greatest east elongation.
- On the night of July 30-31, the peak of the Delta Aquariids Meteor Shower occurs. During those nights the Moon will be pretty thin. So you won't have any Moonlight :)
Here you have the complete list of the most important celestial events happening in July 2024.
July 1: Conjunction of the Moon and Mars.
The Moon passes 4.1º to the north of Mars at 18:27 UTC. The Moon is at a magnitude of -10.9, and Mars at a magnitude of 1.0. At this time the Moon phase is 19.8%.
July 3: Conjunction of the Moon and Jupiter.
The Moon passes 5.0º to the north of Jupiter at 08:29 UTC. The Moon is at a magnitude of -9.9, and Jupiter at a magnitude of -2.0. At this time the Moon phase is 7.9%.
July 5: New Moon.
The Moon is between the Earth and the Sun, so the bright side of the Moon is facing away from the Earth. The Moon phase is 0% at 22:59 UTC.
The days around the New Moon are great for photographing the night sky.
In July the Galactic Center of the Milky Way is visible. In the Northern Hemisphere the nights are short but if you take good advantage of them and you're in the south of Europe, for example, you can photograph the Galactic Center completely vertical. And if you're in Brazil, you can play with the elevation of the Galactic Center and place it almost anywhere you want... ;)
You can also capture Star Trails. Have you ever captured a circumpolar? No? Then it's a good time to try.
Use PhotoPills to learn more about the Milky Way and Star Trails in your location (section 14).
July 7: Conjunction of the Moon and Mercury.
The Moon passes 3.1º to the north of Mercury at 18:33 UTC. The Moon is at a magnitude of -9.0, and Mercury at a magnitude of -0.2. At this time the Moon phase is 3.7%.
July 12: Manhattanhenge at Sunset.
Manhattanhenge occurs when the Sun, at Sunset, aligns with the grid formed by the streets of Manhattan Island in New York (USA).
On July 11 and 12 the Sun aligns with the streets of Manhattan. But on July 12 it’s perfectly aligned. So if the weather conditions are not ideal, you can always try the day before.
The best locations are 14th Street, 34th Street (where the Empire State Building is located), 42nd Street (where the Chrysler Building and Tudor City Bridge are located), 57th Street and 79th Street.
July 21: Full Moon.
The Moon is on the opposite side of the Earth so the Sun illuminates it completely. Full Moon is at 10:18 UTC.
Full Moon days are perfect for photographing it with an interesting subject. Get the most out of the Full Moon with this article.
July 22: Mercury at Greatest Eastern Elongation.
When Mercury reaches its greatest elongation at 03:37 UTC, it's located 26.9º east of the Sun, and it's shining at a magnitude of 0.3.
Mercury's orbit is closer to the Sun than that of the Earth, which means that it always appears close to the Sun and is faded because of the Sun's brightness most of the time. You can only observe it for a few days each time it reaches its greatest separation from the Sun (greatest elongation).
This phenomenon repeats itself approximately once every 3-4 months and occurs alternately during the morning or afternoon, depending on whether Mercury is to the east or west of the Sun.
When it's located east of the Sun, it rises and sets just after the Sun, and it's visible during the Sunset. The best time to photograph Mercury is shortly after Sunset.
July 24: Conjunction of the Moon and Saturn (and occultation).
The Moon passes at 0.2º to the north of Saturn at 20:45 UTC. The Moon is at a magnitude of -12.5, and Saturn at a magnitude of 0.7. At this time the Moon phase is 84.4%.
In addition to this, Saturn goes behind the Moon on what's called an occultation.
July 30: Conjunction of the Moon and Mars.
The Moon passes 5.0º to the north of Mars at 10:38 UTC. The Moon is at a magnitude of -12.5, and Mars at a magnitude of 0.6. At this time the Moon phase is 25.4%.
July 30: Conjunction of the Moon and Jupiter.
The Moon passes 5.2º to the north of Jupiter at 23:54 UTC. The Moon is at a magnitude of -10.9, and Jupiter at a magnitude of -2.1. At this time the Moon phase is 12.5%.
July 30-31: Delta Aquariids Meteor Shower.
The Meteor Shower runs from July 12 to August 23.
But the best night for photographing it is the one between July 30 and 31. The peak is on July 30 at 02:15 UTC with 25 meteors per hour. At this time the Moon phase is 19.6%, so the conditions to enjoy it are very good (there is no Moon).
But this depends on where you are on the planet or plan to photograph it. To figure out whether it's worth it or not to photograph it, use the Meteor Shower Pill or the Meteor Shower Layer in the Planner to check local Moonset times, local peak time and forecasted local meteors/h.
This Meteor Shower is visible from both hemispheres. Although it's best visible in the Southern Hemisphere. In the Northern Hemisphere it has a lower intensity.
You have all the information you need in our Meteor Showers guide.
9.August 2024 celestial events, one by one
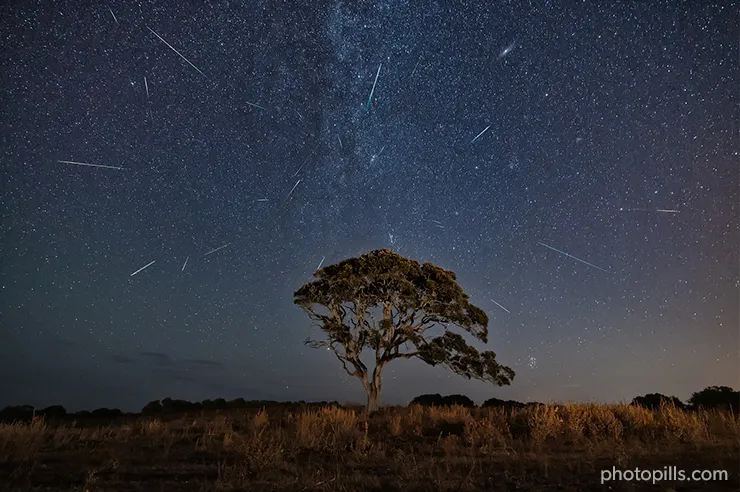
Good news! This year one of the most popular events photographically speaking, the Perseids, are in full bloom. During the peak date of this Meteor Shower there will be some Moonlight, but the sky is not too bright... :)
In August you can still photograph the Galactic Center of the Milky Way :P
At the end of August, the zodiacal light is visible again. In the Northern Hemisphere, it's visible to the east, before the morning astronomical twilight, in the direction of Sunrise. On the other hand, in the Southern Hemisphere it's visible to the west, at the end of the afternoon astronomical twilight, in the direction of the Sunset.
As for Star Trails, you know they are a photographic opportunity I love to play with. They are always the perfect excuse to go out and take pictures at night.
But above all, don't miss...
- Take advantage of the New Moon week (August 4) to photograph the Galactic Center of the Milky Way.
- The Perseids Meteor Shower on August 12-13. During those nights the Moon will be pretty intense, but it will set before the show starts. So you can get a good picture :)
- The Full Moon on August 19 is always an opportunity to get a spectacular image.
Here you have the complete list of the most important celestial events happening in August 2024.
August 4: New Moon.
The Moon is between the Earth and the Sun, so the bright side of the Moon is facing away from the Earth. The Moon phase is 0% at 11:14 UTC.
The days around the New Moon are great for photographing the night sky.
You can also capture Star Trails. Have you ever captured a circumpolar? No? Then it's a good time to try.
Use PhotoPills to learn more about the Milky Way and Star Trails in your location (section 14).
August 5: Conjunction of the Moon and Venus.
The Moon passes 1.4º to the north of Venus at 22:03 UTC. The Moon is at a magnitude of -8.4, and Venus at a magnitude of -3.9. At this time the Moon phase is 2.1%.
August 6: Conjunction of the Moon and Mercury.
The Moon passes 7.3º to the north of Mercury at 00:03 UTC. The Moon is at a magnitude of -8.5, and Mercury at a magnitude of 1.6. At this time the Moon phase is 2.4%.
August 12-13: Perseids Meteor Shower.
The Meteor Shower runs from July 17 to August 24.
But the best night for photographing it is the one between August 12 and 13. The peak is on August 13 at 01:36 UTC with 110 meteors per hour. At this time the Moon phase is 54.3%, so the conditions to enjoy it are not very good, but the Moon could be below the horizon.
Use the Meteor Shower Pill and the Meteor Shower Layer in the Planner to figure out all the key Meteor Shower info for your location or place you wish to photograph it.
This Meteor Shower is visible from both hemispheres. Although it's best visible in the Northern Hemisphere. In the Southern Hemisphere it has a lower intensity.
Learn how to photograph a meteor shower with our Meteor Showers guide.
August 19: Full Moon.
The Moon is on the opposite side of the Earth so the Sun illuminates it completely. Full Moon is at 18:27 UTC.
Full Moon days are perfect for photographing it with an interesting subject. Get the most out of the Full Moon with this article.
August 21: Conjunction of the Moon and Saturn (and occultation).
The Moon passes at 0.2º to the north of Saturn at 03:01 UTC. The Moon is at a magnitude of -12.7, and Saturn at a magnitude of 0.6. At this time the Moon phase is 97.3%.
In addition to this, Saturn goes behind the Moon on what's called an occultation.
August 27: Conjunction of the Moon and Jupiter.
The Moon passes 5.4º to the north of Jupiter at 12:45 UTC. The Moon is at a magnitude of -11.6, and Jupiter at a magnitude of -2.3. At this time the Moon phase is 37.9%.
August 28: Conjunction of the Moon and Mars.
The Moon passes 5.1º to the north of Mars at 00:23 UTC. The Moon is at a magnitude of -11.4, and Mars at a magnitude of 0.8. At this time the Moon phase is 32.9%.
10.September 2024 celestial events, one by one
In September the visibility of the Galactic Center of the Milky Way in both hemispheres becomes shorter and shorter until it's no longer visible in November.
You can also capture the zodiacal light. In the Northern Hemisphere, it's visible to the east, before the morning astronomical twilight, in the direction of the Sunrise. On the other hand, in the Southern Hemisphere it's visible to the west, at the end of the afternoon astronomical twilight, in the direction of the Sunset.
And, as always, don't forget the Star Trails... They'll help you get magical images!
Moreover, this month marks a change of season, from summer to fall in the Northern Hemisphere and from winter to spring in the Southern Hemisphere.
Depending on your location, the Aurora Borealis season begins (Northern Hemisphere) and the Aurora Astralis season ends (Southern Hemisphere).
But above all, don't miss...
- Take advantage of the New Moon week (September 3) to capture the Galactic Center of the Milky Way shining in the sky.
- On September 5, you can photograph Mercury at greatest western elongation.
- On September 8, you can photograph Saturn at opposition. It's brighter than at any other time of the year and is visible all night long.
- The Supermoon on September 18. It's the first of the two 2024 Supermoons. In addition, the Moon is at its closest point to Earth ("only" 357,581 kms or 222,191 mi away) so it seems larger than normal.
- The partial lunar eclipse on September 17 or 18, depending on your location...
- On September 21 you can photograph Neptune at opposition. It's brighter than at any other time of the year and is visible all night long.
- The fall or spring equinox on September 22 is the best time to photograph the zodiacal light.
Here you have the complete list of the most important celestial events happening in September 2024.
September 1: Conjunction of the Moon and Mercury.
The Moon passes 5.0º to the north of Mercury at 09:17 UTC. The Moon is at a magnitude of -8.7, and Mercury at a magnitude of 0.4. At this time the Moon phase is 2.8%.
September 3: New Moon.
The Moon is between the Earth and the Sun, so the bright side of the Moon is facing away from the Earth. The Moon phase is 0% at 01:57 UTC.
The days around the New Moon are great for photographing the night sky. In September the Galactic Center of the Milky Way is visible. You can also capture Star Trails.
Use PhotoPills to learn more about the Milky Way and Star Trails in your location (section 14).
September 5: Mercury at Greatest Western Elongation.
When Mercury reaches its greatest elongation at 02:24 UTC, it's located 18.1º west of the Sun, and it's shining at a magnitude of -0.3.
Mercury's orbit is closer to the Sun than that of the Earth, which means that it always appears close to the Sun and is faded because of the Sun's brightness most of the time. You can only observe it for a few days each time it reaches its greatest separation from the Sun (greatest elongation).
This phenomenon repeats itself approximately once every 3-4 months and occurs alternately during the morning or afternoon, depending on whether Mercury is to the east or west of the Sun.
When it's located west of the Sun, it rises and sets just before the Sun, and it's visible before Sunrise. The best time to photograph Mercury is shortly before Sunrise.
September 5: Conjunction of the Moon and Venus (and occultation).
The Moon passes 1.1º to the south of Venus at 10:16 UTC. The Moon is at a magnitude of -9.2, and Venus at a magnitude of -3.9. At this time the Moon phase is 4.9%.
In addition to this, Venus goes behind the Moon on what's called an occultation.
September 8: Saturn at opposition.
At 04:27 UTC, Saturn is at its closest approach to Earth and its visible face is completely illuminated by the Sun at a magnitude of 0.6.
It's brighter than at any other time of the year and is visible throughout the night. This is the best time to observe and photograph Saturn and its rings, which are inclined at an angle of 13º. This is almost the maximum inclination they can have so you can clearly observe them.
However, even being at its closest approach to the Earth, you can only distinguish Saturn as a star-shaped spot of light with the naked eye. Use a telescope to see the planet along with its rings.
September 17: Conjunction of the Moon and Saturn (and occultation).
The Moon passes at 0.1º to the north of Saturn at 10:21 UTC. The Moon is at a magnitude of -12.8, and Saturn at a magnitude of 0.6. At this time the Moon phase is 99.3%.
In addition to this, Saturn goes behind the Moon on what's called an occultation.
September 18: Full Moon (Supermoon).
First Supermoon of the year. The Full Moon is at 02:36 UTC.
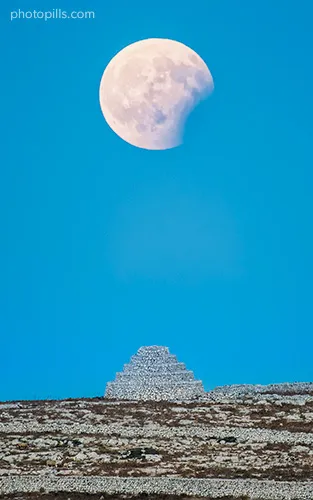
This Full Moon takes place when it's unusually near to that time of the month when it’s closest to Earth – the perigee. I mean, it's "only" 357,581 kms (222,191 mi) away. So the Moon appears slightly larger and brighter than on other occasions. This month it's larger than the Moon's annual mean size. That's why it's called a Supermoon.
Use PhotoPills to learn how to photograph the Supermoon in your location (section 14).
September 17-18: Partial Lunar Eclipse (and Full Moon).
The Moon is on the opposite side of the Earth so the Sun illuminates it completely. Full Moon is at 02:36 UTC.
Full Moon days are perfect for photographing it with an interesting subject. Get the most out of the Full Moon with this article.
Moreover, in certain areas of the Earth, the Moon passes through the Earth's shadow, creating a partial lunar eclipse from 00:41 to 04:47 UTC. The maximum lunar eclipse occurs at 02:44 UTC.
The partial lunar eclipse is visible throughout Europe, much of Asia, Africa, North America, South America, Pacific Ocean, Atlantic Ocean, Indian Ocean, Arctic Ocean, and Antarctica.
Use PhotoPills to learn more about the partial lunar eclipse in your location (section 14).
September 21: Neptune at opposition.
At 00:08 UTC, Neptune is at its closest approach to Earth and its visible face is completely illuminated by the Sun at a magnitude of 7.8.
It's brighter than at any other time of the year and is visible throughout the night. This is the best time to observe and photograph Neptune.
However, even being at its closest approach to the Earth, you can only distinguish Neptune as a star-shaped spot of light with the naked eye. Use a telescope to see the planet.
September 22: September equinox.
The September equinox is at 12:45 UTC. This is also the first fall day (fall equinox) in the Northern Hemisphere and the first spring day (spring equinox) in the Southern Hemisphere.
It's the time when the Sun "crosses" the Earth's equator going from the Northern Hemisphere to the Southern Hemisphere.
September 23: Conjunction of the Moon and Jupiter.
The Moon passes 5.5º to the north of Jupiter at 23:22 UTC. The Moon is at a magnitude of -12.1, and Jupiter at a magnitude of -2.5. At this time the Moon phase is 58.8%.
September 25: Conjunction of the Moon and Mars.
The Moon passes 4.5º to the north of Mars at 11:50 UTC. The Moon is at a magnitude of -11.7, and Mars at a magnitude of 0.5. At this time the Moon phase is 42.7%.
11.October 2024 celestial events, one by one
October is here. It's a month of transition and changes in both hemispheres.
After the September equinox, the different parts of the world are gradually changing seasons. In the Northern Hemisphere, first comes fall and then winter. Conversely, in the Southern Hemisphere first comes spring and then summer.
So light is decreasing in some parts of the world while increasing in others.
At the beginning of October you can still capture the zodiacal light. In the Northern Hemisphere, it's visible to the east, before the morning astronomical twilight, in the direction of the Sunrise. On the other hand, in the Southern Hemisphere it's visible to the west, at the end of the afternoon astronomical twilight, in the direction of the Sunset.
Unfortunately, this year the conditions to photograph the Orionids are not very good.
And finally, hurry up! This is the second-to-last month in which you can photograph the Galactic Center of the Milky Way above the horizon. When the season is over you'll have to wait 2-3 months before you can do it again.
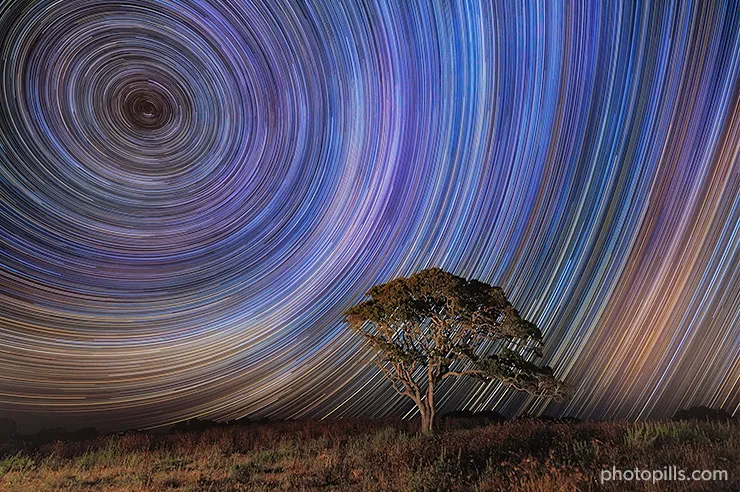
Although you can always capture Star Trails! ;)
But above all, don't miss...
- The annular solar eclipse on October 2 is the perfect opportunity to photograph a moment that rarely happens (the next one will be on February 17, 2026). Are you going to miss it?
- The New Moon week (October 2) to capture the Galactic Center of the Milky Way shining in the sky.
- On October 12 Comet C/2023 A3 (Tsuchinshan-ATLAS) passes perigee.
- The Supermoon on October 17. It's the second of the two 2024 Supermoons. In addition, the Moon is at its closest point to Earth ("only" 357,166 kms or 221,933 mi away) so it seems larger than normal.
- On the night of October 21-22, the peak of the Orionids Meteor Shower occurs. During those nights the conditions to enjoy it might not be very good because of the Moonlight. But it all depends on your location!
Here you have the complete list of the most important celestial events happening in October 2024.
October 2: Annular Solar Eclipse.
The Moon passes in front of the Sun, creating an annular solar eclipse from 15:42 to 21:47 UTC. The maximum annular eclipse occurs at 18:45 UTC.
The eclipse path will begin in the Pacific Ocean off the coast of South America and move across parts of southern Chile and Argentina. A partial eclipse will be visible throughout most of southern South America.
Use PhotoPills to learn more about the annular solar eclipse at your location (section 14).
October 2: New Moon.
The Moon is between the Earth and the Sun, so the bright side of the Moon is facing away from the Earth. The Moon phase is 0% at 18:51 UTC.
The days around the New Moon are great for photographing the night sky. In October the Galactic Center of the Milky Way is visible. You can also capture Star Trails.
Use PhotoPills to learn more about the Milky Way and Star Trails in your location (section 14).
October 5: Conjunction of the Moon and Venus.
The Moon passes 3.0º to the south of Venus at 20:26 UTC. The Moon is at a magnitude of -9.9, and Venus at a magnitude of -4.0. At this time the Moon phase is 8.3%.
October 12: Comet C/2023 A3 (Tsuchinshan-ATLAS) passes perigee.
Comet C/2023 A3 (Tsuchinshan-ATLAS) passes perigee. The comet coordinates are: right ascension 14h04m20s and declination 1°07'S.
With a magnitude of -2.2, this comet is expected to be visible to the naked eye.
October 14: Conjunction of the Moon and Saturn (and occultation).
The Moon passes at 6.5º to the north of Saturn at 18:12 UTC. The Moon is at a magnitude of -12.7, and Saturn at a magnitude of 0.6. At this time the Moon phase is 89.3%.
In addition to this, Saturn goes behind the Moon on what's called an occultation.
October 17: Full Moon (Supermoon).
Second and last Supermoon of the year. The Full Moon is at 11:28 UTC.
This Full Moon takes place when it's unusually near to that time of the month when it’s closest to Earth – the perigee. I mean, it's "only" 357,166 kms (221,933 mi) away. So the Moon appears slightly larger and brighter than on other occasions. This month it's larger than the Moon's annual mean size. That's why it's called a Supermoon.
Use PhotoPills to learn how to photograph the Supermoon in your location (section 14).
October 21: Conjunction of the Moon and Jupiter.
The Moon passes 5.5º to the north of Jupiter at 08:05 UTC. The Moon is at a magnitude of -12.5, and Jupiter at a magnitude of -2.6. At this time the Moon phase is 80.0%.
October 21-22: Orionids Meteor Shower.
The Meteor Shower runs from October 2 to November 17.
But the best night for photographing it is the one between October 21 and 22. The peak is on October 22 at 05:45 UTC with 20 meteors per hour. At this time the Moon phase is 71.4%, so the conditions to enjoy it might not be very good because of the Moonlight.
This Meteor Shower is visible and intense in both hemispheres.
Use the Meteor Shower Pill and the Meteor Shower Layer in the Planner to figure out all the key Meteor Shower info for your location or place you wish to photograph it.
Learn how to photograph a meteor shower with our Meteor Showers guide.
October 23: Conjunction of the Moon and Mars.
The Moon passes 3.5º to the north of Mars at 19:56 UTC. The Moon is at a magnitude of -12.0, and Saturn at a magnitude of 0.2. At this time the Moon phase is 55.3%.
12.November 2024 celestial events, one by one
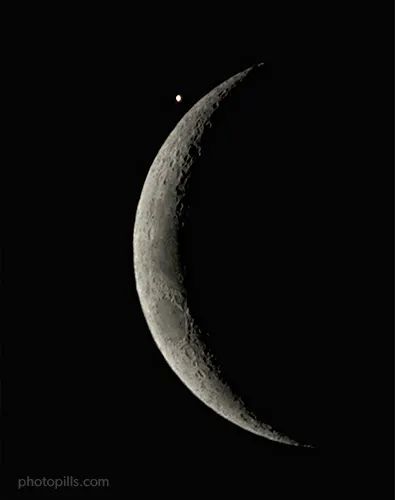
As I've already told you, November is the last month in which you can photograph the Galactic Center of the Milky Way.
So you have to take advantage of its reduced visibility time. Another option is to focus on other types of images, such as creating Star Trails.
Since the Leonids are relatively weak (15 meteors per hour) and there are no good conditions, this year it will be a challenge trying to capture them.
But most importantly, don't miss...
- The New Moon week (November 1) is your last chance to capture the Galactic Center of the Milky Way shining in the sky in 2024.
- The Full Moon on November 15.
- On November 16, you can photograph Mercury at greatest eastern elongation.
- On November 17 you can photograph Uranus at opposition. It's at its closest approach to Earth and its visible face is completely illuminated by the Sun at a magnitude of 5.6.
- The Leonids Meteor Shower on November 16-17. During those nights the conditions to enjoy it might not be very good because of the Moonlight. But it all depends on your location!
- The Manhattanhenge of November 30. It's a fantastic spectacle by which the Sun aligns itself during Sunrise with some of the streets that form a grid on the island of Manhattan in New York (USA).
Here you have the complete list of the most important celestial events happening in November 2024.
November 1: New Moon.
The Moon is between the Earth and the Sun, so the bright side of the Moon is facing away from the Earth. The Moon phase is 0% at 12:48 UTC.
The days around the New Moon are great for photographing the night sky. In November the Galactic Center of the Milky Way is visible during a shorter period of time. You can also capture Star Trails.
Use PhotoPills to learn more about the Milky Way and Star Trails in your location (section 14).
November 3: Conjunction of the Moon and Mercury.
The Moon passes 2.1º to the north of Mercury at 07:37 UTC. The Moon is at a magnitude of -8.8, and Mercury at a magnitude of -0.3. At this time the Moon phase is 3.1%.
November 5: Conjunction of the Moon and Venus.
The Moon passes 3.1º to the south of Venus at 00:16 UTC. The Moon is at a magnitude of -10.3, and Venus at a magnitude of -4.0. At this time the Moon phase is 11.4%.
In addition to this, Venus goes behind the Moon on what's called an occultation.
November 11: Conjunction of the Moon and Saturn (and occultation).
The Moon passes at 5.1º to the north of Saturn at 01:42 UTC. The Moon is at a magnitude of -12.4, and Saturn at a magnitude of 0.7. At this time the Moon phase is 70.1%.
In addition to this, Saturn goes behind the Moon on what's called an occultation.
November 15: Full Moon.
The Moon is on the opposite side of the Earth so the Sun illuminates it completely. Full Moon is at 21:30 UTC.
Full Moon days are perfect for photographing it with an interesting subject. Get the most out of the Full Moon with this article.
November 16: Mercury at Greatest Eastern Elongation.
When Mercury reaches its greatest elongation at 09:18 UTC, it's located 22.5º east of the Sun, and it's shining at a magnitude of -0.3.
Mercury's orbit is closer to the Sun than that of the Earth, which means that it always appears close to the Sun and is faded because of the Sun's brightness most of the time. You can only observe it for a few days each time it reaches its greatest separation from the Sun (greatest elongation).
This phenomenon repeats itself approximately once every 3-4 months and occurs alternately during the morning or afternoon, depending on whether Mercury is to the east or west of the Sun.
When it's located east of the Sun, it rises and sets just after the Sun, and it's visible during the Sunset. The best time to photograph Mercury is shortly after Sunset.
November 17: Uranus at opposition.
At 02:36 UTC, Uranus is at its closest approach to Earth and its visible face is completely illuminated by the Sun at a magnitude of 5.6.
It's brighter than at any other time of the year and is visible throughout the night. This is the best time to observe and photograph Uranus.
However, even being at its closest approach to the Earth, you can only distinguish Uranus as a star-shaped spot of light with the naked eye. Use a telescope to see the planet.
November 16-17: Leonids Meteor Shower.
The Meteor Shower runs from November 6 to 30.
But the best night for photographing it is the one between November 16 and 17. The peak is on November 17 at 07:26 UTC with 15 meteors per hour. At this time the Moon phase is 71.4%, so the conditions to enjoy it might not be very good because of the Moonlight.
Use the Meteor Shower Pill and the Meteor Shower Layer in the Planner to figure out all the key Meteor Shower info for your location or place you wish to photograph it.
This Meteor Shower is visible and intense in both hemispheres.
Learn how to photograph a meteor shower with our Meteor Showers guide.
November 17: Conjunction of the Moon and Jupiter.
The Moon passes 5.4º to the north of Jupiter at 14:54 UTC. The Moon is at a magnitude of -12.7, and Jupiter at a magnitude of -2.8. At this time the Moon phase is 95.7%.
November 20: Conjunction of the Moon and Mars.
The Moon passes 2.2º to the north of Mars at 22:27 UTC. The Moon is at a magnitude of -12.3, and Mars at a magnitude of -0.3. At this time the Moon phase is 70.7%.
November 30: Manhattanhenge at Sunrise.
Manhattanhenge occurs when the Sun, at Sunrise, aligns with the grid formed by the streets of Manhattan Island in New York (USA).
On November 29 and 30 the Sun aligns with the streets of Manhattan. But on November 30 it’s perfectly aligned. So if the weather conditions are not ideal, you can always try the day before.
The best locations are 14th Street, 34th Street (where the Empire State Building is located), 42nd Street (where the Chrysler Building and Tudor City Bridge are located), 57th Street and 79th Street.
13.December 2024 celestial events, one by one
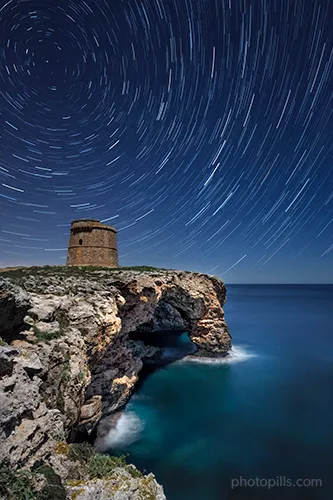
In 2024 December is full of surprises that go beyond the usual events that occur at this time of year... :)
December is a month with two interesting Meteor Showers: the Geminids and the Ursids. In 2024, none of them benefit from good conditions to be observed (and captured).
In December you can't photograph the Galactic Center of the Milky Way, so you have to do your best with the thinnest part of the arch of our galaxy. At this time of year the Galactic Center is above the horizon when it is daylight.
But don't be discouraged because this month brings other photographic opportunities that are worthwhile. Also, don't forget about Star Trails because it's a type of astrophotography that you can practice all year round.
But above all, don't miss...
- The chance to photograph some Star Trails. Take advantage of the New Moon week (December 1).
- On December 7, you can photograph Jupiter at opposition. It's at its closest approach to Earth and its visible face is completely illuminated by the Sun at a magnitude of -2.8.
- On the night of December 13-14, the peak of the Geminids Meteor Shower occurs. During those nights the conditions to enjoy it might not be very good because of the Moonlight. But it all depends on your location!
- The Full Moon on December 15 is always an opportunity to get a spectacular image.
- The winter (or summer) solstice on December 21 marks the shortest (or longest) day of the year.
- The Ursids Meteor Shower on December 22-23. Despite the Moonlight conditions, you can always go for the challenge to capture them!
- On December 25, you can photograph Mercury at greatest western elongation.
Here you have the complete list of the most important celestial events happening in December 2024.
December 1: New Moon.
The Moon is between the Earth and the Sun, so the bright side of the Moon is facing away from the Earth. The Moon phase is 0% at 06:23 UTC.
The days around New Moon are great for photographing the night sky and Star Trails. In December the Galactic Center of the Milky Way is no longer visible, but you can photograph the thinnest part of the arch of our galaxy.
Use PhotoPills to learn more about the Milky Way and Star Trails in your location (section 14).
December 4: Conjunction of the Moon and Venus.
The Moon passes 2.2º to the south of Venus at 22:41 UTC. The Moon is at a magnitude of -10.5, and Venus at a magnitude of -4.2. At this time the Moon phase is 14.0%.
December 7: Jupiter at opposition.
At 20:50 UTC, Jupiter is at its closest approach to Earth and its visible face is completely illuminated by the Sun at a magnitude of -2.8.
It's brighter than at any other time of the year and is visible throughout the night. This is the best time to observe and photograph Jupiter and its four largest moons, which appear as bright spots on both sides of the planet.
However, even being at its closest approach to the Earth, you can only distinguish Jupiter as a star-shaped spot of light with the naked eye. Use a pair of good binoculars to see the planet more clearly as a light spot along with its moons.
December 8: Conjunction of the Moon and Saturn (and occultation).
The Moon passes at 0.1º to the north of Saturn at 08:55 UTC. The Moon is at a magnitude of -11.9, and Saturn at a magnitude of 0.8. At this time the Moon phase is 47.1%.
In addition to this, Saturn goes behind the Moon on what's called an occultation.
December 13-14: Geminids Meteor Shower.
The Meteor Shower runs from December 4 to 17.
But the best night for photographing it is the one between December 13 and 14. The peak is on December 14 at 02:32 UTC with 120 meteors per hour. At this time the Moon phase is 97.7%, so the conditions to enjoy it might not be very good because of the Moonlight.
Use the Meteor Shower Pill and the Meteor Shower Layer in the Planner to figure out all the key Meteor Shower info for your location or place you wish to photograph it.
This Meteor Shower is visible in both hemispheres, although it's weaker in the Southern Hemisphere.
Learn how to photograph a meteor shower with our Meteor Showers guide.
December 14: Conjunction of the Moon and Jupiter.
The Moon passes 5.2º to the north of Jupiter at 19:42 UTC. The Moon is at a magnitude of -12.8, and Jupiter at a magnitude of -2.8. At this time the Moon phase is 99.4%.
December 15: Full Moon.
It's time to enjoy the last Full Moon of the year!
The Moon is on the opposite side of the Earth so the Sun illuminates it completely. Full Moon is at 09:03 UTC.
Full Moon days are perfect for photographing it with an interesting subject. Get the most out of the Full Moon with this article.
December 18: Conjunction of the Moon and Mars (and occultation).
The Moon passes at 0.5º to the north of Mars at 08:48 UTC. The Moon is at a magnitude of -12.6, and Mars at a magnitude of -0.9. At this time the Moon phase is 89.3%.
In addition to this, Mars goes behind the Moon on what's called an occultation.
December 21: December solstice.
The December solstice is at 09:22 UTC. This is also the first winter day (winter solstice) in the Northern Hemisphere and the first summer day (summer solstice) in the Southern Hemisphere.
If you are in the Southern Hemisphere, take advantage of the longest golden hour and blue hour of the year!
December 22-23: Ursids Meteor Shower.
The Meteor Shower runs from December 17 to 26.
But the best night for photographing it is the one between December 22 and 23. The peak is on December 22 at 18:59 UTC with 10 meteors per hour. At this time the Moon phase is 51.4%, so the conditions to enjoy it might not be very good because of the Moonlight.
But this depends on where you are on the planet or plan to photograph it. To figure out whether it's worth it or not to photograph it, use the Meteor Shower Pill or the Meteor Shower Layer in the Planner to check local Moonset times, local peak time and forecasted local meteors/h.
This Meteor Shower is visible in both hemispheres, although it's weaker in the Southern Hemisphere.
You have all the information you need in our Meteor Shower guide.
December 25: Mercury at Greatest Western Elongation.
When Mercury reaches its greatest elongation at 07:10 UTC, it's located 22.0º west of the Sun, and it's shining at a magnitude of -0.4.
Mercury's orbit is closer to the Sun than that of the Earth, which means that it always appears close to the Sun and is faded because of the Sun's brightness most of the time. You can only observe it for a few days each time it reaches its greatest separation from the Sun (greatest elongation).
This phenomenon repeats itself approximately once every 3-4 months and occurs alternately during the morning or afternoon, depending on whether Mercury is to the east or west of the Sun.
When it's located west of the Sun, it rises and sets just before the Sun, and it's visible before the Sunrise. The best time to photograph Mercury is shortly before the Sunrise.
December 29: Conjunction of the Moon and Mercury.
The Moon passes 6.2ºto the south of Mercury at 04:24 UTC. The Moon is at a magnitude of -9.0, and Mercury at a magnitude of -0.4. At this time the Moon phase is 3.5%.
December 30: New Moon.
The Moon is between the Earth and the Sun, so the bright side of the Moon is facing away from the Earth. The Moon phase is 0% at 22:28 UTC.
The days around New Moon are great for photographing the night sky and Star Trails. In December the Galactic Center of the Milky Way is no longer visible, but you can photograph the thinnest part of the arch of our galaxy.
Use PhotoPills to learn more about the Milky Way and Star Trails in your location (section 14).
And now that you know everything (absolutely everything!) that will happen in 2024 from an astronomical point of view, it's time to...
You've guessed it!
It's time to plan one (or more) astronomical highlights of 2024.
14.How to plan the best 2024 astronomical events
Imagine. Plan. Shoot!
That's what we PhotoPillers say (photography and PhotoPills freaks)...
We even designed a t-shirt so we don't forget it :P
And as expected, this workflow is the backbone of this guide.
With the help of the calendar, you chose the astronomical event you want to photograph... And you have let your imagination run wild, trying to create in your mind a great picture (a legendary one if possible).
Well, the time has come to go from the idea to reality, to check that the photo you dream of is possible!
And to find out the exact shooting spot and the exact moment the photo happens.
It's time to plan the photo :)
And to do so, the best thing is to use PhotoPills, a tool that you can easily master reading the super user guide and watching these video tutorials :P
Are you ready?
How to plan your Milky Way pictures (including the Galactic Center!)
Photographing the Milky Way is magical.
But if you manage to do it in the way and the location you want, the result is even more rewarding. That's why planning is so important.
But before we start, remember that,
- The Milky Way is visible every night. What's not visible every night is its center, the brightest part of our galaxy. That's why I always say that there is a Galactic Center hunting season.
- In many parts of the world the Galactic Center begins to be visible at the end of January and becomes invisible in November.
To plan the Milky Way in a location that I'm interested in, I use the PhotoPills Planner to work on the different compositions that I can get during each of the New Moons of the year.
In this video Rafa explains to you step by step the whole workflow that I follow. In addition to this, at the end of this section I have added a link to a video detailing another example of Milky Way planning.
Did you like the video?
Yes?
Great!
Now let's dive in a little more into the wonderful world of Milky Way planning with another example :)
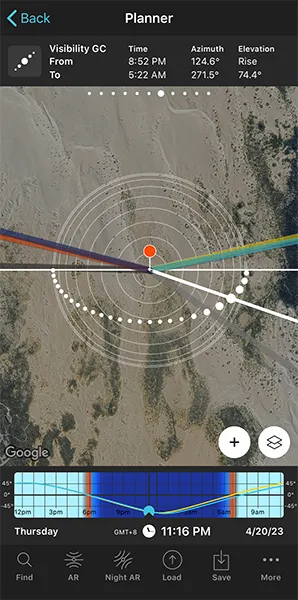
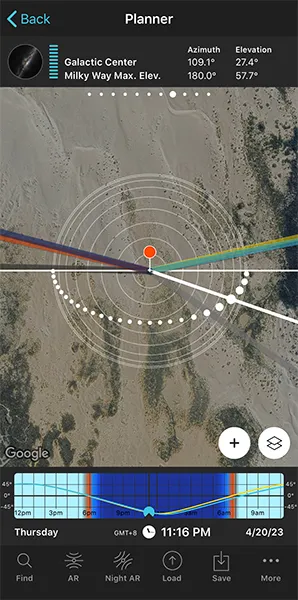
- Look for a location with no light pollution and an interesting subject. Imagine you are in Nambung National Park (Australia) to photograph some rock formations known as the Pinnacles along with the Milky Way arch.
- Open PhotoPills, tap Planner (Pills Menu) and then place the Red Pin right in the location where you want to plan the photo. If you don't know how to do it, this video shows you how to move the Red Pin.
- Now, on the Planner, make sure you have the Moon and Milky Way map layers turned on. Tap on the Map settings button, it's on the map, next to the (+) button.
- On the Map settings screen, check that the eye icon on the Moon and Milky Way map layers is not crossed out. If it is, tap on it to turn the layer on. Tap OK (upper right corner) in iOS or the arrow to go back in Android. If you want to have a cleaner view on the Planner, you can turn off the rest of the layers (tap on the eye icon to cross it out).
- Swipe the top panels to the left until you find the two Milky Way information panels (Panel 7 and Panel 8).
- On Panel 7 you can see when the Galactic Center becomes visible or not and the light grey line shows the direction in which it shows up.
- Take into account the Moon phase. It's easier to photograph the Milky Way if you avoid any light source. So try to plan your session during the New Moon day and the 4 days before and after.
- Tap on the center of the Time Bar twice to set the current date and time. Then, tap on the Milky Way icon on Panel 8. The date will jump to the next New Moon.
- Now it's time to play with the Time Bar and the Milky Way layer to see if you can capture the Milky Way slightly above the horizon, forming a nice diagonal or completely vertical. Swipe the time forwards (to the left) or backwards (to the right) until the white dotted arch is where you want it to be in the sky. Then, adjust the position of the Red Pin depending on the composition you want.
- Tap on the RA Night button to check the position of the Milky Way and the Galactic Center. You can also use Panel 8 to check the inclination angle of the Milky Way and the height of the energy bar: the higher and bluer, the more visible the Milky Way is (less impact of the Moon).
- If the composition you're looking for is not possible on the date you're planning, skip to the next New Moon and repeat the process until you find the photo you want!
- From the planning result you'll get the shooting spot (the position of the Red Pin) and the date and time of shooting (shown in the Time Bar) allowing you to capture the photo you want.
And that's it!
If you follow these steps, you can easily plan any Milky Way photo you want.
You'll finally be able to make that dream come true.
Anyway, if you need a more detailed explanation, you can read the planning section in the Milky Way guide.
Or if you prefer, you can see Rafa's explanation using a real case: the Milky Way rising next to Tangle Ridge in the Canadian Rockies.
How to plan your Full Moon (and Supermoon!) pictures
Would you like to photograph the next Full Moon? Or better yet... the next Supermoon!
But you don't know what to do to get the photo you've been dreaming about for days.
Don't worry!
I'm here to help you with the planning using a spectacular example ;)
But first, you should watch the following video:
Here's another example of all the steps you should follow to plan a Supermoon :P


- Choose a location with a special scenery, that has an interesting subject and where you can move around easily.
- In this case, I want one of the 2024 Supermoons to be behind the Kermorvan lighthouse in Le Conquet (France).
- Tap Planner (Pills Menu) and then place the Red Pin near the Kermorvan lighthouse. If you don't know how to do it, this video shows you how to move the Red Pin.
- Now let's find out the 2024 Supermoon dates. Exit the Planner tapping Back and then tap Moon (Pills Menu). Tap on the Calendar button. Supermoons have a yellow circle around them. Tap, for example, on the September 18, 2024 Supermoon. On the Moon screen, press the Action button (bottom right) and select Send to planner. The Supermoon date will be set on the Planner.
- On the Planner, zoom in on the map until you have enlarged the rooftop of the Kermorvan lighthouse as much as possible. Swipe the top panels to the right until you find the Black Pin information panel (Panel 2). Tap on the Red Pin and the Black Pin icon to turn on the Black Pin on the map. Drag the Black Pin to place it in the middle of the Kermorvan lighthouse's rooftop.
- It's time to determine the shooting spot from which the Moon will have the size you want compared to the subject (the Kermorvan lighthouse). Imagine you want it to be 5 meters.
- Tap on the Map settings button. It's on the map, next to the (+) button.
- On the Map settings screen, in the Map Tools section, tap on the Sun/Moon button. Tap OK (upper right corner) in iOS or the arrow to go back in Android.
- On the map, you can now see a grey circle. It tells you the shooting distance you need. Also, in the top box that just appeared, type the size you want the Moon to have (5 meters). The circle diameter changes according to the size you enter.
- Place the Red Pin on the grey circumference, so that the Moonrise line (thick light blue) or the Moonset line (thick dark blue) is not too far from the Black Pin. So, when the Moon rises or sets, it goes over your subject.
- Now, you have to take into account the Moon's elevation relative to the Kermorvan lighthouse. The building measures 20.35 meters. So it may be interesting that the Moon is higher than the top of the building. And that it's always aligned, of course.
- Look at the Panel 2, it displays the Moon's elevation relative to the Black Pin. So when the Supermoon happens, the Moon's elevation will be about 265 meters above the Black Pin.
- Now, adjust the position of the Red Pin on the grey circumference, taking into account the direction in which the Moon will move, so that the white dotted line (between the Red Pin and the Black Pin) and the thin blue line (direction of the Moon) match.
- While moving the Red Pin, the topography may have changed, so check the Moon's elevation over the Black Pin in Panel 2.
- If it hasn't changed, great, your planning job is done. Otherwise, repeat the process.
And that's it!
Now you know exactly where the shooting spot is and when you have to be there (date and time).
Of all the plans, Moon ones require you to work a bit harder while being accurate.
If this explanation is not enough and you need more details, you can read the planning section in the Moon guide.
Or if you prefer, you can see Rafa's explanation using a real case: a 10m Sun aligned and inside the Arc de Triomphe in Paris (France).
And if you already know the shooting spot and want to quickly find out when the Moon will be where you want it, use the Search option. In this article Rafa explains how to do it: 'How to find Moonrises and Moonsets'.
How to plan your Meteor Showers pictures
When you're planning any Meteor Shower picture, there's one element you need to consider: the radiant.
The radiant is a point in the sky from which meteors seem to radiate. Or, if you prefer, sprout XD.
Each radiant is located in the constellation that gives its name to the Meteor Shower. For example, the Perseids radiant is located in the Perseus constellation.
Our Meteor Showers guide let you know the radiants of the most spectacular Meteor Showers. And here's a video in which Rafa teaches you how to plan a Meteor Shower with PhotoPills (including how to locate the radiant in the Sky with the Augmented Reality view):
Did you know that meteors can appear randomly anywhere in the sky? This means that you could frame wherever you want and you could end up photographing meteors...
Regardless of that fun fact...
You should always make sure that you locate the radiant in the sky. Depending on the image you want to create, the radiant is the best indicator to find the shooting spot and where you should point your camera at:
- There is a cool effect that you can get in post-processing which is having all the meteors converging from one single spot in the sky. In order to create this image, you need to have the radiant in your frame. You can learn this technique by watching this video by David Kingham.
- The meteors that are far away from the radiant have longer tails than the rest. If you want to capture meteors with long tails, frame your camera as far away from the radiant as possible.
- Oh, and don't forget to use the shortest possible focal length (ideally, a wide angle lens) so you can capture the maximum number of meteors. Try to include as much sky as you can in the frame to have more meteors in your picture.
- And, finally, add a nice subject in the foreground. Your image will be much more powerful if you connect all the elements of your composition!
Even though you don't have to include the radiant in your composition, I like to do it because the effect you get is spectacular.
So let's see how to plan your photo, including how to locate the radiant in the sky. To do that, let's take the Perseids for example.
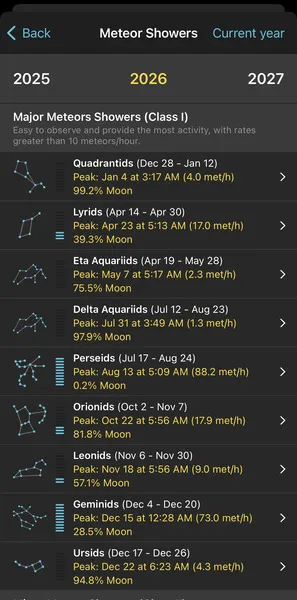
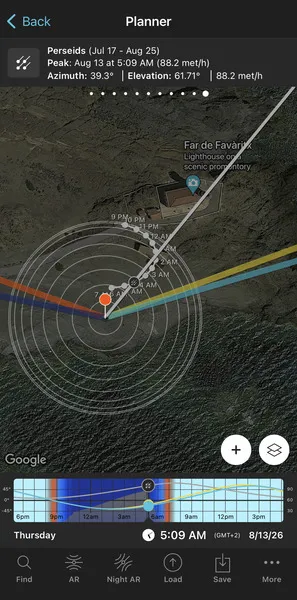
- Open PhotoPills, and tap Planner (Pills Menu).
- On the Planner, place the Red Pin where you want to plan the Meteor Shower.
- Tap the Map Settings button. You'll find it on the Map, next to the (+) button.
- Switch off the map layers you don't need (like the Sun layer for example). To do it, tap the eye icon you have next to each of the layers.
- Tap the Meteor Shower layer.
- Choose the Meteor Shower peak you want to plan (ie. the Perseids) from the calendar. Tap OK (upper right corner) in iOS or the arrow to go back in Android.
- On the map you can see:
- The path the radiant will follow during the night (the arch).
- The radiant position (the circle on the path).
- The elevation of the radiant (the concentric circumferences).
- Swipe the panels on the map to the left until you find the Meteor Showers information panel (Panel 11).
- Now you know that:
- The peak of the Perseids is on August 13, 2026 at 05:09 am.
- The Moon phase is 0.2% (the New Moon is on August 12, 2024 at 07:38 pm). So the conditions to take the photo are excellent.
- The radiant coordinates are: right ascension 03h 12m and declination +58.0º.
- When the Meteor Shower peak day arrives, go to the location and explore the surroundings to select one or more shooting spots. Imagine you are next to the Favàritx lighthouse, in Menorca (Spain).
- Now, position yourself at the shooting spot.
- Once there, open PhotoPills, tap Planner (Pills Menu) and make sure that your Perseids plan is loaded.
- Tap the RA Night button to find the right ascension and declination. It's very easy.
- But, throughout the night, the radiant moves across the sky. To see how it moves, drag your finger from right to left to move time forward.
- This way, you can know exactly where to frame so that the radiant is always in your photos throughout the session.
If you want to know more about Meteor Showers and the mysterious radiant, take a look at the Meteor Showers guide that we update every year.
How to plan your lunar eclipse pictures
The best way to learn how to plan lunar eclipses is to use an example.
And what better example than the total lunar eclipse that occurred on November 8, 2022? ;)
In the following video you'll learn how to plan the total lunar eclipse of November 8, 2022 and capture it from a location in New York (USA) ;)
Let's see another example... this time in the Atacama Desert (Chile)!
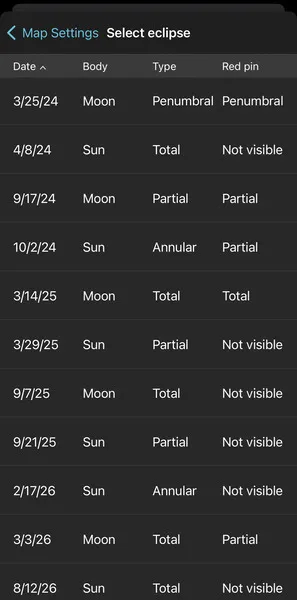
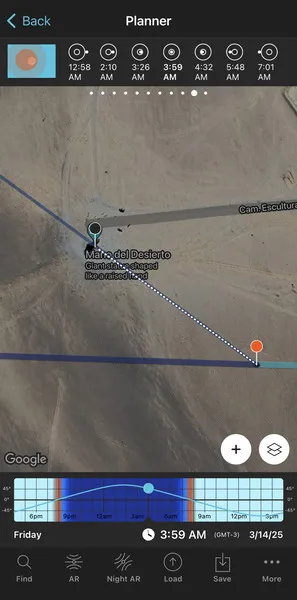
Let's get to work...
- The first thing you have to do is to select the eclipse you want to plan (and photograph). In this case, the total lunar eclipse of March 14, 2025.
- To do this, open PhotoPills, tap Planner (Pills Menu) and then tap the Map settings button, it's on the map, next to the (+) button.
- On the Map settings screen, tap the little arrow to the right of the Eclipse layer to go to the eclipse calendar.
- In the calendar, tap the 03/14/25 eclipse to select it.
- On the Map settings screen, make sure you have the Eclipse layer turned on (the eye icon doesn't have to be crossed out). If it is, tap it to activate the layer. Tap OK (upper right corner) in iOS or the arrow to go back in Android. If you want to have a cleaner view on the Planner, you can turn off the rest of the layers (tap the eye icon to cross it out).
- On the map, zoom out to see at a glance in which areas of the world the eclipse will be visible.
- You know that, if you are going to photograph a total lunar eclipse, you should go to a location from where you can see it...
- To find out where you need to go, look at the visibility zones you see on the map. Place the Red Pin in a location within the area where the eclipse is visible, for example in La Mano del Desierto located in the Atacama Desert (Chile). If you don't know how, this video shows you how to move the Red Pin.
- Swipe the panels on the map to the left until you find the two eclipse information panels (Panel 9 and Panel 10).
- Panel 10 displays which phases are visible at the Red Pin position. Keeping this panel visible, move the Red Pin wherever you want to quickly find out which phases will be visible and when.
- According to the panel and taking into account the Red Pin position, the March 14, 2024 eclipse begins at 12:58 am.
- Now you need to know the direction to which you need to point your camera to. Look at the map, the thin blue line coming out of the Red Pin tells you the Moon direction for the date and time selected in the Time Bar. And you know that the eclipse starts at 12:58 am.
- If you press the eclipse icon on Panel 10, you'll jump from phase to phase. The Time Bar will go forwards and the thin blue line will move.
- You also need to know the Moon's elevation. To do this, swipe the top panels to the right until you find the Sun/Moon position (azimuth and elevation) panel (Panel 3).
- According to Panel 3, the Moon will have an elevation of 59.66º at the beginning of the eclipse (12:58 am). And its azimuth will be exactly 24.4º.
- Once you're in the location, use the PhotoPills Augmented Reality view to check the exact position of the Moon and its path.
This is how you can plan the total lunar eclipse of March 14, 2025. If you follow these simple steps you will be able to plan (almost) any lunar eclipse photo you can imagine...
If you want to learn much more about how to plan your own photos of a lunar eclipse, take a look at the lunar eclipses guide.
How to plan your solar eclipse pictures
To learn how to plan the eclipses of the Sun it is best to use a real example.
And what better example than the hybrid solar eclipse that occurred on April 20, 2023? ;)
In the following video you'll learn how to plan the hybrid solar eclipse of April 20, 2023 visible in the North West Cape peninsula of Australia and parts of Southeast Asia ;)
Let's see another example... this time in Dallas (USA)!
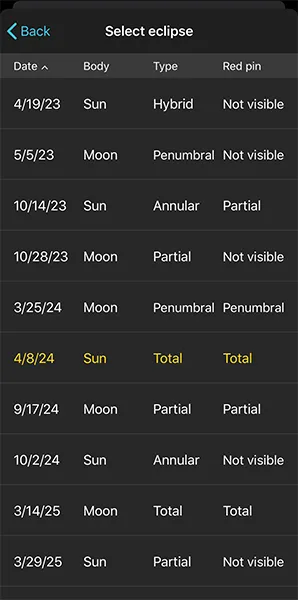
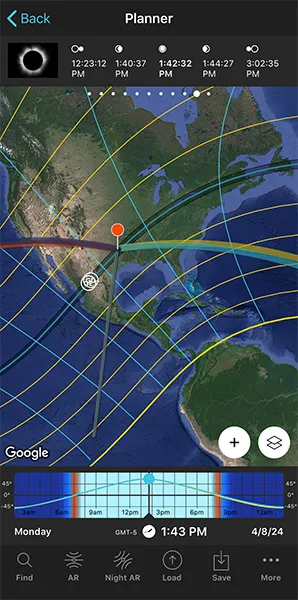
Come on, let's get to it...
- The first thing you have to do is to select the eclipse you want to plan (and photograph). In this case, the total solar eclipse of April 8, 2024.
- To do this, open PhotoPills, tap Planner (Pills Menu) and then tap the Map settings button, it's on the map, next to the (+) button.
- On the Map settings screen, tap the little arrow to the right of the Eclipse layer to go to the eclipse calendar.
- In the calendar, tap the 04/08/24 eclipse to select it.
- On the Map settings screen, make sure you have the Eclipse layer turned on (the eye icon doesn't have to be crossed out). If it is, tap it to activate the layer. Tap OK (upper right corner) in iOS or the arrow to go back in Android. If you want to have a cleaner view on the Planner, you can turn off the rest of the layers (tap the eye icon to cross it out).
- On the map, zoom out to see at a glance in which areas of the world the eclipse will be visible.
- You know that, if you are going to photograph a total solar eclipse, you should go to a location within the path of totality from where you can see (and photograph) the total solar eclipse.
- To find out where you need to go, look at the dark central band you see on the map. Place the Red Pin in a location within the path of totality, for example along the blue line near Dallas (USA). If you don't know how, this video shows you how to move the Red Pin.
- Swipe the panels on the map to the left until you find the two eclipse information panels (Panel 9 and Panel 10).
- Panel 10 displays which phases are visible at the Red Pin position. Keeping this panel visible, move the Red Pin wherever you want to quickly find out which phases will be visible and when.
- According to the panel and taking into account the Red Pin position, the April 8, 2024 eclipse begins at 12:23 pm.
- Now you need to know the direction to which you need to point your camera to. Look at the map, the thin orange line coming out of the Red Pin tells you the Sun direction for the date and time selected in the Time Bar. And you know that the eclipse starts at 12:23 pm.
- If you press the eclipse icon on Panel 10, you'll jump from phase to phase. The Time Bar will go forwards and the thin orange line will move.
- You also need to know the Sun's elevation. To do this, swipe the top panels to the right until you find the Sun/Moon position (azimuth and elevation) panel (Panel 3).
- According to Panel 3, the Sun will have an elevation of 60.55º at the beginning of the eclipse (12:23 pm). And its azimuth will be exactly 145.5º.
- Once you're in the location, use the PhotoPills Augmented Reality view to check the exact position of the Sun and its path.
This is how you can plan the total solar eclipse of April 8, 2024. If you follow these simple steps you will be able to plan (almost) any solar eclipse photo that you imagine...
If you want to learn in much more detail how to plan your own photos of a solar eclipse, take a look at the solar eclipses guide.
How to plan your Star Trails pictures
Planning a picture of Star Trails is very (very) easy. Seriously!
You don't believe me?
Ok, let me prove it...
Take a look at this video:
And here is the whole workflow step by step:
- Choose a location you're familiar with that has little light pollution.
- During daytime, go to the location and explore the surroundings to select one or more shooting spots.
- Now, position yourself at the shooting spot.
- Once there, open PhotoPills, tap Planner (Pills Menu) and then place the Red Pin right where you are. If you don't know how to do it, this video shows you how to move the Red Pin.
- Choose a night near the New Moon. This will prevent the Moonlight from influencing the exposure of your photos.
- Exit the Planner tapping Back and then tap Moon (Pills Menu). Tap on the Calendar button. Tap the next New Moon. On the Moon screen, press the Action button (bottom right) and select Send to planner.
- Tap the RA Night button to find the Polaris, the celestial equator and any potential Star Trails patterns. Depending on the shooting direction, you will get one pattern or another.
If you're an advanced PhotoPiller, you can also choose to plan it from home. It's a little more work, but it's not hard at all.
You can read everything about how to plan a Star Trails photo in the Star Trails guide.
How to plan your Moon-planet conjunction pictures
The conjunction between a planet and the Moon occurs when you have the impression that they are very close to each other while observing them from the Earth.
This phenomenon occurs because both stars are in the same celestial longitude. But because they're not at the same celestial latitude you suffer the optical illusion that they're close to each other.
Throughout 2024 there are many conjunctions between a planet and the Moon. You can find details of each one of them in this guide's monthly calendar.
If you want to photograph one of them, you should plan it first. It will help you know all the information you need to take the picture.
And to explain how you can plan this type of photos, the best thing is to use an example. So I'm going to focus on a conjunction that occurs on September 23, 2024 at 23:22 UTC between Jupiter and the Moon.
Since the Moon is involved in the conjunction, let's find out where the Moon will be on the day and time of the conjunction.
Let's look at this example...


- Open PhotoPills, tap Planner (Pills Menu) and then place the Red Pin in one of the areas where the Jupiter-Moon conjunction is visible. In this example, I'm going to put it in Amman (Jordan). If you don't know how to do it, this video shows you how to move the Red Pin.
- Now, on the Planner, make sure you have the Moon and Twilights map layers turned on. Tap on the Map settings button, it's on the map, next to the (+) button.
- On the Map settings screen, check that the eye icon on the Moon and Twilights map layers is not crossed out. If it is, tap on it to turn the layer on. Tap OK (upper right corner) in iOS or the arrow to go back in Android. If you want to have a cleaner view on the Planner, you can turn off the rest of the layers (tap on the eye icon to cross it out).
- Amman is in the GMT+3 time zone, so the conjunction occurs on September 24, 2024 at 02:22 am local time. This is the exact moment when the Moon and the planet are on the same celestial longitude, but a few hours before and a few hours after they will still be very close.
- On the Planner, tap the clock below the Time Bar. On the Date and time screen, tap Date and set September 24, 2024. Tap Time and set 02:22 am. Tap OK (upper right corner) in iOS or the arrow to go back in Android.
- If you're stuck with UTC times, you can always move the Red Pin to Iceland, change the time using UTC time (Iceland is always in the GMT+0 time zone and doesn't apply Daylight Save Time), and then move the Red Pin back to your location. The time will be automatically converted to local time.
- Swipe the top panels to the left until you find the two Sun and Moon information panels (Panel 3 and Panel 4).
- According to Panel 4, the Moon rises on September 23, 2024 at 10:17 pm so it will be above the horizon when the conjunction occurs.
- Moreover, Panel 3 tells you that at that time (02:22 am) it will have an elevation of 45.88º. The Moon phase is 58.8% so it will not be nice and round in your photo.
- Moreover, tap the RA button to use the Augmented Reality view and check in situ the position in which the Moon will be at all times during the conjunction. Remember that if in the Augmented Reality view you use your thumb to press and swipe to the left, you move time forward and the Moon moves ;)
- If at the exact time of the conjunction the Moon is below the horizon, you can move the Time Bar forwards or backwards until it's above the horizon.
- If the event occurs before the Moonrise, move time forwards until the Moon rises.
- If the event occurs after the Moonset, move time backwards until the Moon sets.
- In a conjunction, the planet and the Moon are close for several hours, so if you look for the closest instant to the conjunction, but having the Moon above the horizon, you can also capture both the Moon and the planet very close one from another. A good time to photograph a conjunction is during twilight, for example :)
See how easy that is?
Being able to use the Moon as a reference makes the process much easier ;)
How to plan your pictures of a conjunction of planets or planet conjunction with a Deep-Sky Object (DSO)
Unfortunately, PhotoPills doesn't have information about planets yet.
However, here's how we planned the 2020 Great Conjunction of Jupiter and Saturn.
Alternatively, you can use a free program called Stellarium to plan your photos before a conjunction of planets occurs.
How to plan your comet pictures
In the previous section I have recommended you Stellarium, a free program to make simulations of the celestial vault. You can observe all kinds of celestial bodies and astronomical objects: planets, satellites, asteroids, meteors and comets, among others.
Therefore, I recommend that you install it on your computer and look for the comet you want to photograph. Stellarium will give you the date and time when that particular comet will be visible (or not).
Here's a complete tutorial for you to set up Stellarium and search for comets.
In this video Rafa explains to you step by step the whole workflow that I follow to plan my comet pictures.
How to plan your pictures of a planet transit across the Sun
The transit of a planet across the Sun occurs when the planet passes between the Earth and the Sun, casting its shadow on the solar surface.
In fact, only Venus and Mercury transits can be observed from the Earth. So it's a very rare event that occurs once every many years.
Next November 13, 2032 Mercury will transit across the Sun. Will you be able to photograph it?
Let's find it out by planning it!
But before we start, a couple of facts:
- The Mercury transit across the Sun occurs from 06:40 to 11:08 UTC.
- This transit is completely visible, from start to finish, in Europe, Africa, the Middle East, western Russia and India. In South America, southeast Asia, China, Japan, Australia, and New Zealand only a portion of the transit will be visible, as the beginning or end of the transit will occur before Sunrise or after Sunset.
And now, it's time to plan.
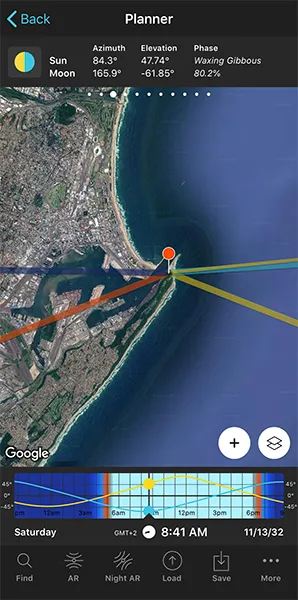
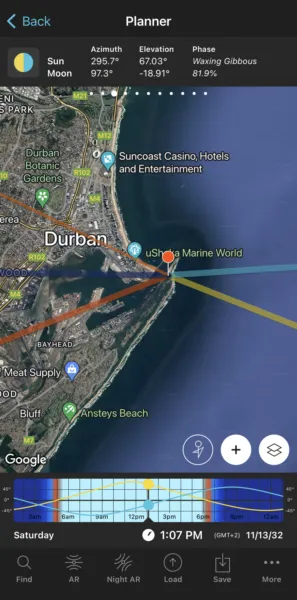
- Open PhotoPills, tap Planner (Pills Menu) and then place the Red Pin in one of the areas where the whole transit is visible. In this example, I'm going to put it in Durban (South Africa). If you don't know how to do it, this video shows you how to move the Red Pin.
- Now, on the Planner, make sure you have the Sun and Twilights map layers turned on. Tap on the Map settings button, it's on the map, next to the (+) button.
- On the Map settings screen, check that the eye icon on the Sun and Twilights map layers is not crossed out. If it is, tap on it to turn the layer on. Tap OK (upper right corner) in iOS or the arrow to go back in Android. If you want to have a cleaner view on the Planner, you can turn off the rest of the layers (tap on the eye icon to cross it out).
- Durban is in the GMT+2 time zone, so the November 13, 2032 transit begins at 08:41 am and ends at 01:07 pm.
- On the Planner, tap the clock below the Time Bar. On the Date and time screen, tap Date and set November 13, 2032. Tap Time and set 08:41 am. Tap OK (upper right corner) in iOS or the arrow to go back in Android.
- Swipe the top panels to the left until you find the two Sun and Moon information panels (Panel 3 and Panel 4).
- According to Panel 4, the Sun rises at 05:36 am so it will be above the horizon when the transit begins.
- Moreover, Panel 3 tells you that at that time (08:41 am) it will have an elevation of 36.77º.
- If you move time forward, to 01:07 pm, by swiping the Time Bar to the left, you'll see how the thin yellow line moves. It shows you the Sun direction. At that time its elevation will be 67.76º.
- Moreover, tap the RA button to use the Augmented Reality view and check in situ the position in which the Sun will be at all times during the conjunction. Remember that if in the Augmented Reality view you use your thumb to press and swipe to the left, you move time forwards and the Sun moves ;)
As you can see, it's very easy to check from where, when and in which direction you have to frame to capture the transit of a planet across the Sun.
PhotoPills rocks!
How to plan your zodiacal light pictures
The zodiacal light is a relatively unknown astronomical phenomenon.
And it's truly surprising because it can produce a spectacular effect on your images generating an almost surreal glow. Like in a science fiction movie!
But it's not. It's very real.
However, the zodiacal light is shy and elusive. You won't always be able to see and/or photograph it. In fact, as with the Milky Way, everything depends on the location from which you want to take the photo.
In the Northern Hemisphere, you can photograph it in:
- Spring, around the March equinox (late February, March and early April). The zodiacal light is visible to the west, at the end of the astronomical twilight, after Sunset and in the Sunset direction.
- Fall, around the September equinox (late August, September and early October). The zodiacal light is visible to the east, before the astronomical twilight, before dawn and in the Sunrise direction.
In the Southern Hemisphere, you can photograph it in:
- Fall, around the March equinox (late February, March and early April). The zodiacal light is visible to the east, before the astronomical twilight, before dawn and in the Sunrise direction.
- Spring, around the September equinox (end of August, September and beginning of October). The zodiacal light is visible to the west, at the end of the astronomical twilight, after Sunset and in the Sunset direction.
The zodiacal light starts on the horizon from the Sun position and extends up along the ecliptic. Its trajectory passes through all the constellations of the zodiac.
Moreover, depending on the time of day and the time of year, the zodiacal light orientation varies. This means that at the best observation moment, when the Sun is below -18º elevation, the zodiacal light may be more or less inclined.
Therefore, the zodiacal light can appear inclined above the horizon. And its inclination, height and width will vary throughout the night. The zodiacal light reaches its maximum height when the Sun elevation is -18º. Therefore, the lower the Sun elevation, the less height and width the zodiacal light will have.
During the equinoxes, just before Sunrise or after Sunset, the ecliptic is more vertical with respect to the horizon. Therefore, the days around these dates are the perfect time to photograph the zodiacal light: most of this light will be above the horizon.
At that time, the zodiacal light above the horizon can reach a width of about 40º and a height from the Sun of about 60º or 70º. It has a triangular shape.
To plan it, the first thing you have to do is to choose a time frame around the March or September equinox.
But let me explain it to you with an example...
Imagine you're in the Northern Hemisphere and the September equinox is coming up.
So you need to determine a shooting date from late August, September or early October. Remember that in this case, in the Northern Hemisphere, the zodiacal light is visible before the astronomical twilight (i.e. before Sunrise) and in the Sunrise direction.
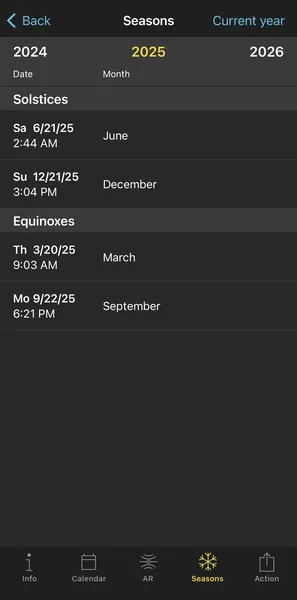
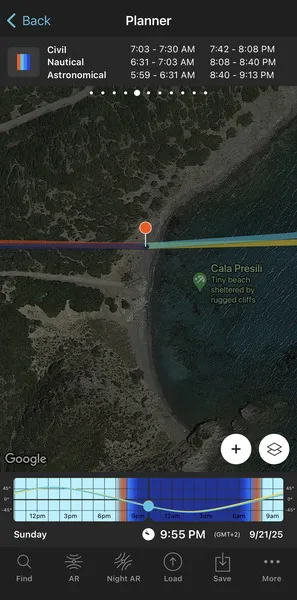
In this example, follow these steps to plan the zodiacal light:
- Choose the shooting date. Keep in mind that it should be a day around the September equinox and, if possible, there should be a New Moon to avoid any light source so the zodiacal light is as visible as possible.
- Open PhotoPills, tap Sun (Pills Menu) and then tap Seasons. This screen tells you that the September equinox is on 09/22/25 at 06:21 pm (current time of your current position, not the Red Pin).
- Tap the date and time of the September equinox. Now, on the main Sun screen, tap Action and select Send to planner from the drop-down menu.
- Pn the Planner, move the Red Pin to a location with:
- Little light pollution. This is essential because zodiacal light is very weak and any light pollution can make it disappear completely.
- A clean horizon in the Sunrise direction, in this case. This way you make sure you can include as much zodiacal light as possible in the frame.
- In this example, place the Red Pin in Cala Presili, a beautiful beach to the west of the island of Menorca (Spain). If you don't know how to do it, this video shows you how to move the Red Pin.
- Swipe the top panels to Panel 3. On September 22 the Moon is increasing and its phase is 0.7%.
- You're interested in locating the shooting date on the closest New Moon in time. To do this, swipe the top panels to the left until you see Panel 4. Then, tap twice the Moon icon to make PhotoPills jump backward to the previous Moon phase. Do it again until you get to the New Moon of 09/21/25 at 09:55 pm.
- Now you have to swipe the Time Bar until the beginning of the astronomical twilight of the previous or next morning. It's the deadline from which the sunlight starts, making the zodiacal light disappear. As the potential shooting date approaches, check the weather forecast. It will help you choose the final shooting date. Any night when there is no Moon before the astronomical twilight is fine.
- But first, swipe the top panels to the left to get to Panel 5. It tells you the hours of the astronomical twilight.
- Panel 5 has been updated with the twilight hours of 09/21/25. And it tells you that the morning astronomical twilight starts at 05:59 am. Now you know that your photo session will end on 09/21/25 at 05:59 am :)
- Moreover, the thick yellow line tells you the direction in which you should point your camera to. In this case, to the direction in which the zodiacal light is centered with the beach.
Well, that's it.
You've just planned your next photo of zodiacal light ;)
Great! Now you should be an expert in planning (almost).
Learning to plan requires some study and practice. But it's easier than it looks. I plan my photos in seconds... And so can you!
Once the photo is planned, let's see how to successfully capture it.
Keep reading!
15.How to photograph the best 2024 astronomical events
You just learnt how to plan one of these amazing space events.
Now, it's time to find out how to shoot it!
How to photograph the Milky Way (including the Galactic Core!)
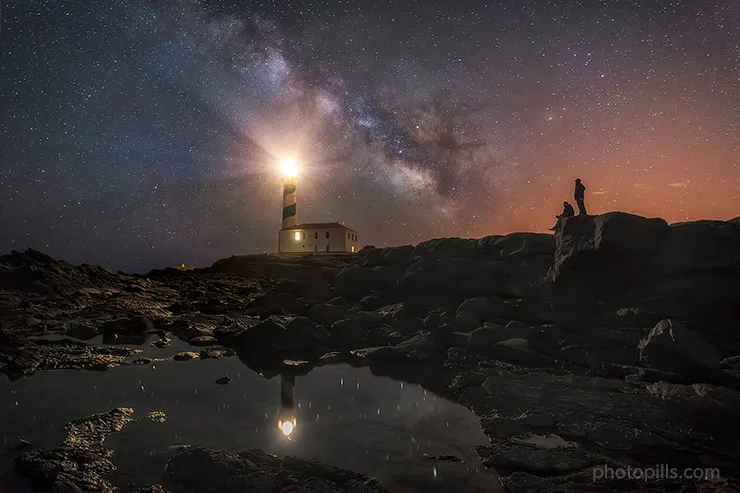
You had the idea, you planned it, maybe a few months ago, and finally you find yourself in a spectacular location, outdoors, in the middle of the night, ready to live and photograph the moment...
But before pressing the shutter button, you have to prepare everything thoroughly.
Follow the steps below to photograph the Milky Way:
- Use the PhotoPills Night Augmented Reality view to check you're in the right place.
- Place the tripod on a solid surface and make sure the equipment is stable.
- If you have it on, remove the ultraviolet (UV) filter.
- If there is light pollution in your scene from sodium vapor light sources (they generate a yellowish glow), you should use a light pollution filter.
- Turn off the image stabilization system.
- If your camera has it, turn off the long exposure noise reduction option.
- Shoot in RAW.
- Use the shortest focal length you can (14mm, 18mm, 24mm,...). Try to keep it below 35mm.
- Select the Manual shooting mode (M).
- Use the largest aperture you can to capture as much light as possible.
- Focus at the hyperfocal distance to maximize the depth of field.
- Frame at night cranking up the ISO to 3200 or 6400.
- Take a test shot to check that the framing is correct.
- Use the NPF rule to adjust the shutter speed and avoid Star Trails. It's easy with PhotoPills and the Spot stars calculator.
- Adjust the ISO depending on how much noise your camera produces.
- Set the white balance to manual. Set it between 3400 and 3900K. If you use a light pollution filter, I suggest you adjust the color temperature to 5000K as this type of filter usually generates a bluish cast.
- Frame and take a couple of test shots to check if you like what you see and adjust accordingly.
- Depending on the light pollution you find in the location, illuminate the foreground with an artificial light (optional).
- Take the picture. Check the histogram and adjust the exposure accordingly.
That's it!
Once you find an exposure you like, simply enjoy photographing the fantastic moment nature is offering you.
You can find the whole workflow explained in great detail in our super guide on how to photograph the Milky Way.
And in this video Rafa teaches you how to photograph the Milky Way.
How to photograph a Full Moon (and a Supermoon!)
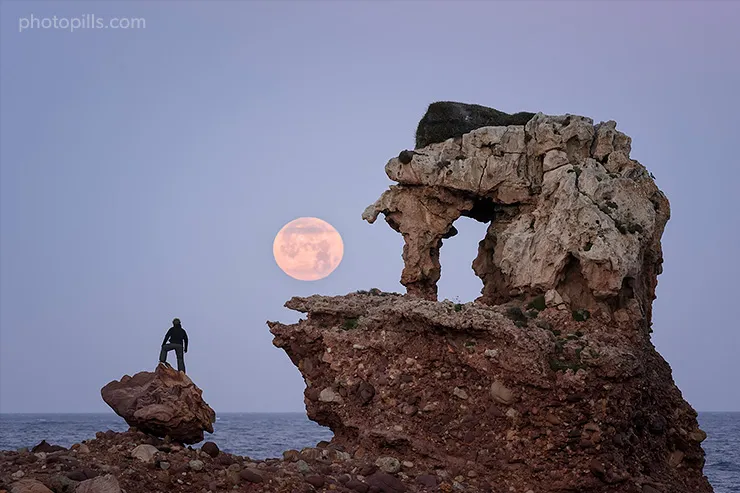
Photographing the Full Moon is a challenge. But the prize you can get in return is so rewarding that you shouldn't have cold feet.
That's why it's important that you follow these recommendations carefully. A slight deviation when positioning yourself at the shooting spot can be fatal!
Follow the steps below to photograph a Full Moon:
- Use the PhotoPills Planner to check that you are in the right place. You can activate the option to see your position on the map by pressing the (+) button on the map. Then, press the eighth toolbar button that shows up (it's a compass icon). Now you see a blue circle on the map: it displays your current position. Walk to the Red Pin location. To do this, it's important to zoom in on the map and check that the blue dot is actually aligned with the base of the Red Pin (where the stick is pinned).
- Place the tripod on a solid surface and make sure the equipment is stable.
- If you have it on, remove the ultraviolet (UV) filter.
- If your lens has an image stabilization system, turn it off.
- Shoot in RAW.
- Select the focal length depending on the composition:
- Moon as a dot, use a wide-angle lens (10-35mm).
- Small Moon, use intermediate focal lengths (35-200mm).
- Large (or huge!) Moon, select long focal lengths (>200mm).
- Select the Manual shooting mode (M).
- The exposure will depend on the natural light you have at the time of the photo (and the photo you want to capture). Imagine, for example, that it's golden hour before Sunset (the elevation Sun is between 6º and 0º).
- In this case, use a medium (f/8) or slightly large (f/5.6) aperture.
- Frame and focus.
- With a wide angle lens, focus at the hyperfocal distance.
- With intermediate/long focal lengths (foreground in the composition), focus on the subject as long as the hyperfocal distance is shorter than the distance to the subject. If not, focus directly on your subject and leave the Moon slightly out of focus.
- With long focal lengths (no foreground in the composition), focus directly on the Moon.
- Take a test shot to check that the framing and the focus are correct.
- The shutter speed can range from 1/200s to 1/8s.
- Use an ISO as low as possible considering the exposure triangle. Start with ISO 100 and crank it up depending on the light conditions (usually between 100 and 1600).
- Set the white balance to manual. Set it between 3400 and 5000K to boost blue tones or between 6000 and 7500K to boost golden ones.
- Take the picture. Check the histogram and adjust the exposure accordingly.
- Do a 1-stop bracketing of 3 shots to get the perfect shot.
If you want to learn (or review) the whole shooting workflow, especially when deciding the exposure triangle according to the light conditions, take a look at the Moon guide where I explain it step by step.
And in this video Rafa teaches you how to photograph the Moon with a foreground.
If a Supermoon is approaching, the shooting workflow is very similar. You just need an idea, a powerful location, and the right gear.
Moreover, PhotoPills will give you all the information you need so you can nail your shot ;)
And in this video Rafa teaches you how to photograph the Supermoon.
How to photograph a Meteor Shower
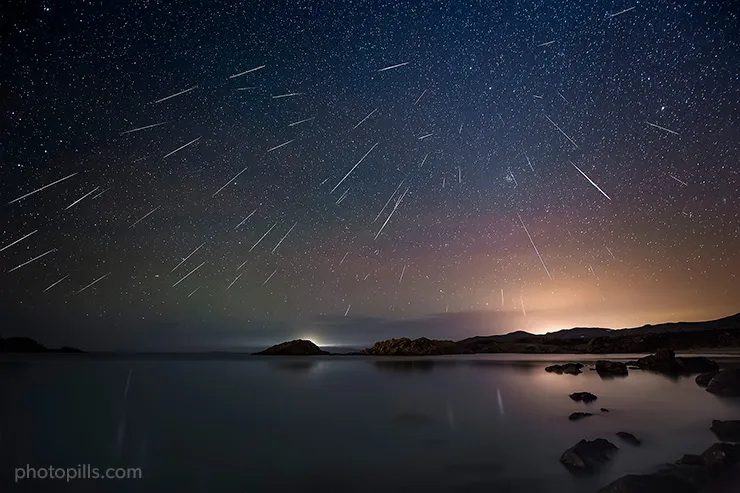
Photographing a Meteor Shower is a magical experience. You're outdoors, in a beautiful location, enjoying the sky waiting for the show to begin.
But it can also be a very profitable shooting session from a creative point of view.
You can take advantage of the shots to:
- Stack them and create an effect like the one in the cover photo of 'The Definitive Photography Guide of the 2024 Meteor Showers'.
- Stack them and get a spectacular Star Trails picture. Later on, I'll explain to you step by step how to photograph them.
- Create a timelapse to have a more dynamic scene.
Meteor Showers require long shooting sessions because you need several hours to capture in full swing what is happening. But they are very profitable if the weather conditions are good.
The idea is that you don't stop taking pictures during the whole session. Well, not you, your camera... So I recommend you to use an intervalometer, program it and stop worrying ;)
Follow the steps below to photograph a Meteor Shower:
- Before leaving home, check the weather forecast to make sure there will be no clouds.
- Use the PhotoPills Night Augmented Reality view to check you're in the right place and find out the Meteor Shower radiant in the sky.
- Place the tripod on a solid surface and make sure the equipment is stable.
- If you have it on, remove the ultraviolet (UV) filter.
- If there is light pollution in your scene from sodium vapor light sources (they generate a yellowish glow), you should use a light pollution filter.
- Turn off the image stabilization system.
- If your camera has it, turn off the long exposure noise reduction option.
- Shoot in RAW.
- Use the shortest focal length you can (14mm, 18mm, 24mm,...). Try to keep it below 35mm.
- Select the Manual shooting mode (M).
- Use the largest aperture you can to capture as much light as possible.
- Crank up the ISO as much as possible without your camera producing a lot of noise (ideally an ISO higher than 1600).
- Focus at the hyperfocal distance to maximize the depth of field.
- Use the NPF rule to adjust the shutter speed and avoid Star Trails (between 20 and 35 seconds). It's easy with PhotoPills and the Spot stars calculator.
- Set the white balance to manual. Set it between 3400 and 3900K. If you use a light pollution filter, I suggest you adjust the color temperature to 5000K as this type of filter usually generates a bluish cast.
- Take a test shot. Check the composition, the focus, and the exposure (for the latter, use the histogram) and adjust accordingly.
- Select the Bulb shooting mode.
- Use an intervalometer to select the shutter speed and the time frame between the end of one photo and the beginning of the next one.
- Turn off the LCD before starting the shooting session to save battery.
- Light paint the foreground in the last pictures of the shooting session (optional).
- Take a couple of dark frames (just cover the lens with the lens cover) at the end of the session. Use them during post-processing to reduce the noise of the final image.
Anyway, if you want to learn (or review) the whole shooting workflow, take a look at 'The Definitive Photography Guide of the 2024 Meteor Showers' where I explain it step by step...
And in this video Rafa teaches you how to photograph a Meteor Shower.
How to photograph a lunar eclipse
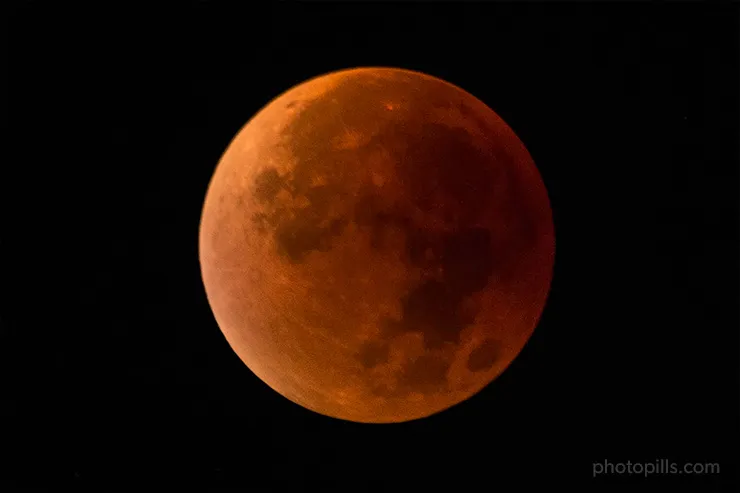
There are actually several ways to photograph a lunar eclipse.
In other words, you can get different types of photos, depending on the type of lunar eclipse it is and the phase you want to capture.
A lunar eclipse can be total, partial or penumbral. And it can have up to 7 phases:
- Penumbral eclipse begins (P1).
- Partial eclipse begins (U1).
- Total eclipse begins (U2).
- Greatest eclipse (Max.).
- Total eclipse ends (U3).
- Partial eclipse ends (U4).
- Penumbral eclipse ends (P4).
Let's see how you can capture, for example, the Blood Moon – the moment of the eclipse during which the Moon turns red. It's spectacular!
Follow the steps below to photograph a Blood Moon:
- Use the PhotoPills Planner to check that you are in the right place.
- Place the tripod on a solid surface and make sure the equipment is stable.
- If you have it on, remove the ultraviolet (UV) filter.
- If there is light pollution in your scene from sodium vapor light sources (they generate a yellowish glow), you should use a light pollution filter.
- If your lens has an image stabilization system, turn it on.
- Shoot in RAW.
- Use the longest focal length you can (300mm, 450mm, 600mm,...).
- Focus directly on the Moon. Use the Live View function. And if your camera has the Focus Peaking and/or Focus Magnifier functions, turn them on too because they will help you to be even more precise.
- Take a test shot to check that the framing and the focus are correct.
- Use the spot metering mode and meter light directly on the surface of the Moon before the eclipse begins. If you have a mirrorless camera, now is the time to use the live histogram option.
- Select the Manual shooting mode (M).
- Use the largest aperture you can to capture as much light as possible.
- Use a shutter speed from 1/2s. Make sure it is not slower than 1s to avoid capturing the Moon in motion.
- Select the lowest ISO possible taking into account that, since you can't exceed a shutter speed of 1s, you may have to crank it up to 1600 or even more.
- Set the white balance to manual. Set it to a temperature between approximately 4300K and 5500K.
- To make sure you get a properly exposed final photo, do a 1-stop bracketing. Again, if you have a mirrorless camera, now is the time to use the live histogram option.
- Take the picture. Check the histogram and adjust the exposure accordingly.
Anyway, if you want to learn (or review) the whole shooting workflow of any of the phases of a lunar eclipse, take a look at the guide to the best lunar eclipses where I explain it to you step by step!
And in this video Rafa teaches you how to photograph a total lunar eclipse.
So don't miss the next chance and do your best to photograph a Moon eclipse. PhotoPills will help you to be in the right place at the right time.
In 2024, you actually have 2 chances: a penumbral one on March 24-25, and a partial one on September 17-18.
How to photograph a solar eclipse
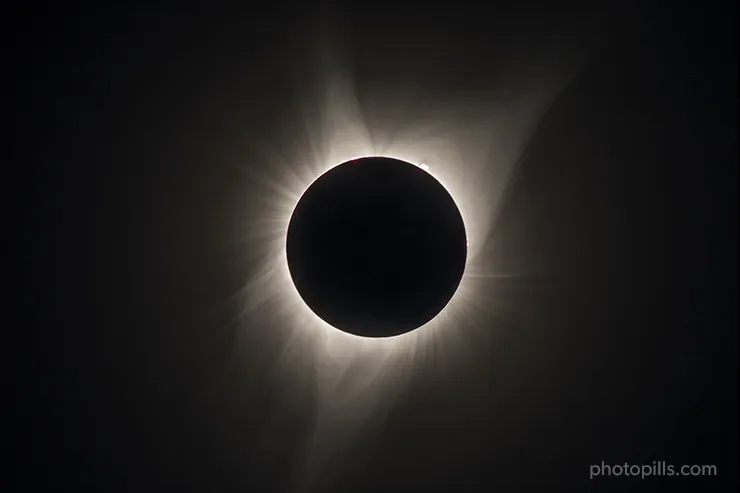
Photographing a solar eclipse is an adventure... And a great challenge!
It's a magical event that nature rarely offers you and that happens for a very short time. So you have to be nimble and fast. And don't stress out while trying, of course... ;)
Similarly to a lunar eclipse, you can get different types of photos, depending on the type of solar eclipse it is and the phase you want to capture.
A solar eclipse can be total, partial or annular. And it can have up to 5 phases:
- Partial eclipse begins (1st contact - C1).
- Total eclipse begins (2nd contact - C2).
- Total and maximum eclipse (Max.).
- Total eclipse ends (3rd contact - C3).
- Partial eclipse ends (4th contact - C4).
Let's see how you can capture, for example, totality – the moment of the eclipse when the Moon covers the Sun completely. It's spectacular!
Follow the steps below to photograph totality:
- Before leaving home, check the weather forecast to make sure there will be no clouds.
- Use the PhotoPills Planner to check that you are in the right place.
- Place the tripod on a solid surface and make sure the equipment is stable.
- Before the solar eclipse starts, put the solar filter.
- Turn off the image stabilization system.
- Shoot in RAW.
- Use the longest focal length you can (300mm, 450mm, 600mm,...).
- Frame and focus directly on the Sun's edge. Use the Live View function. And if your camera has the Focus Peaking and/or Focus Magnifier functions, turn them on too because they will help you to be even more precise.
- If it's on, remove the solar filter a few seconds before the partial eclipse ends.
- You don't have time to meter... We'll see right away how you can complete the exposure triangle. If you have a mirrorless camera, now is the time to use the live histogram option.
- Select the Manual shooting mode (M).
- Use a relatively small aperture (f/8) to get the Sun and the Moon tack sharp.
- Select the lowest ISO you can (nominal, that is 100 or 200).
- You haven't metered. Nor do you have time to calculate the shutter speed. To calculate the exposure you can use Fred Espenak's exposure table to choose a base shutter speed (1/30s for example) and then do a 1-stop bracketing. Again, if you have a mirrorless camera, now is the time to use the live histogram option.
- Set the white balance to manual. In this particular case, I used a color temperature of 6450K. There is no time to take test shots during totality, so I chose this particular temperature as a base and then I could adjust it in post-processing if necessary.
- Take the photos.
I've explained to you the shooting workflow that you should follow during totality (the Sun's corona).
But during a solar eclipse you can capture bands of shadows, the partial eclipse, the diamond ring, the Baily's beads and the chromosphere. Take a look at the guide to the best solar eclipses where I explain step by step how to take each photo!
So don't miss the next opportunity and make the most of PhotoPills so that solar eclipse becomes a unique experience you'll never forget.
In 2024, you actually have 2 chances: a total one on April 8 and an annular one on October 2.
How to photograph Star Trails
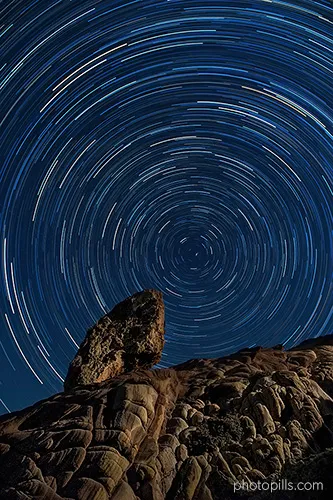
People can't help but look at any Star Trails picture. Because it's something that's happening out there in the universe, but no one can see it with the naked eye.
And as difficult as it may seem, it's not.
You just need a good location with an interesting foreground, a clear night with no Moon and to decide the Star Trails pattern you want to capture.
To capture Star Trails, you can do it in two ways:
I almost always use this second option. So let's use it as an example to explain the workflow you should follow.
Follow these steps to photograph Star Trails with multiple exposures (the more shots you take, the longer the trails):
- Before leaving home, check the weather forecast to make sure there will be no clouds.
- Use the PhotoPills Night Augmented Reality view to check you're in the right place to get the Star Trails pattern and composition that you have in mind.
- Place the tripod on a solid surface and make sure the equipment is stable.
- If you have it on, remove the ultraviolet (UV) filter.
- If there is light pollution in your scene from sodium vapor light sources (they generate a yellowish glow), you should use a light pollution filter.
- Turn off the image stabilization system.
- If your camera has it, turn off the long exposure noise reduction option.
- Shoot in RAW.
- Use the focal distance you prefer depending on the composition you like.
- Select the Manual shooting mode (M).
- It's not mandatory, but I like to use the same exposure time that I use when photographing the Milky Way. So I use PhotoPills and the Spot stars calculator to calculate it.
- Crank up the ISO to 1600 or 3200. If you want to capture the true color of the stars don't use an ISO higher than 1600.
- Use the largest aperture you can to capture as much light as possible.
- Focus at the hyperfocal distance to maximize the depth of field.
- Set the white balance to manual. Set it between 3400 and 3900K. If you use a light pollution filter, I suggest you adjust the color temperature to 5000K as this type of filter usually generates a bluish cast.
- Frame and level the camera.
- Depending on the light pollution you find in the location, illuminate the foreground with an artificial light (optional).
- Take a test shot. Check the histogram and adjust the exposure by changing the exposure time or ISO.
- Set the Bulb shooting mode.
- Use an intervalometer to select the shutter speed and the time frame between the end of one photo and the beginning of the next one.
- Take a few test shots until you get the light in the scene that you want.
- Turn off the LCD before starting the shooting session to save battery.
- Before the end of the shooting session, light again the foreground and take the last shot to have two foreground shots to choose from.
- Take a couple of dark frames (just cover the lens with the lens cover) at the end of the session. Use them during post-processing to reduce the noise of the final image.
- Include a model in the photo (optional).
- Use a second camera during the session to capture the Milky Way.
Anyway, if you want to learn (or review) the whole shooting workflow, take a look at the Star Trails guide where I explain it to you step by step!
How to photograph a Moon-planet conjunction
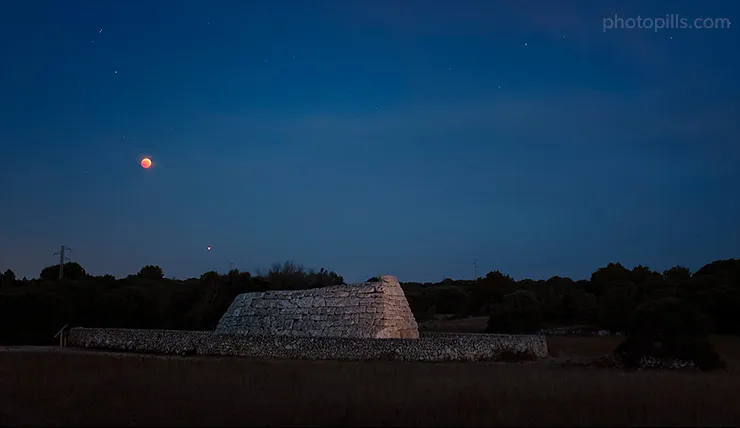
This type of photography has a great advantage: you can always use the Moon as a reference. So the planning (section 14) is easier than for other images.
The nice thing about a conjunction between the Moon and a planet is that you have the opportunity to capture a star that is not always visible in the night sky. Also, depending on its magnitude (ie. how much it shines), it may stand out strongly in the sky.
So the result, if you combine it with an interesting scene and subject, can be striking.
Follow the steps below to photograph a Moon-planet conjunction:
- Use the PhotoPills Night Augmented Reality view to check you're in the right place.
- Place the tripod on a solid surface and make sure the equipment is stable.
- If you have it on, remove the ultraviolet (UV) filter.
- If there is light pollution in your scene from sodium vapor light sources (they generate a yellowish glow), you should use a light pollution filter.
- Turn off the image stabilization system.
- If your camera has it, turn off the long exposure noise reduction option.
- Shoot in RAW.
- Depending on what you want to include in the frame, use the shortest focal length you can (14mm, 18mm, 24mm,...) to have the landscape or use a longer focal length (200mm, 300mm, 400mm,...) if you only want to have the stars in your composition.
- Select the Manual shooting mode (M).
- Use the largest aperture you can to capture as much light as possible.
- Focus at the hyperfocal distance to maximize the depth of field if you include the landscape and shoot with a wide angle or short lens. If you use a telephoto lens, focus directly on your subject or on the Moon.
- Crank up the ISO to 3200 or 6400.
- Take a test shot to check that the framing is correct.
- The Moon will probably be the brightest object in your scene. In this case use the spot metering mode and meter directly on the surface of the Moon to calculate the shutter speed. Overexpose by 1 or 2 stops (+1EV or +2EV), or respecting your camera's overexposure limit. Avoid using a speed greater than 1s. Otherwise you risk getting a blurred Moon. If you need to use a slower speed (more exposure time), as you're already using the maximum aperture, you'll have to crank up the ISO (remember how the exposure triangle works).
- Adjust the ISO depending on how much noise your camera produces.
- Set the white balance to manual. Set it between 3400 and 3900K. If you use a light pollution filter, I suggest you adjust the color temperature to 5000K as this type of filter usually generates a bluish cast.
- Frame and take a couple of test shots to check if you like what you see and adjust accordingly.
- Depending on the light pollution you find in the location, illuminate the foreground with an artificial light (optional).
- Take the picture. Check the histogram and adjust the exposure accordingly.
How to photograph a planets conjunction or a planet conjunction with a Deep-Sky Object (DSO)

The workflow is very similar to the one I described in the previous photo. The added difficulty in this case is that you can't use the Moon as a reference.
But, as I explained in the plan (section 14), there are tricks to know where to point the camera to.
Follow the steps below to photograph a planets conjunction:
- Place the tripod on a solid surface and make sure the equipment is stable.
- If you have it on, remove the ultraviolet (UV) filter. If you use a motorized equatorial mount (with tracking) with a telephoto lens it may be interesting to leave it on: in some cases it removes the purple halos around the stars. You can also remove them with Photoshop.
- If there is light pollution in your scene from sodium vapor light sources (they generate a yellowish glow), you should use a light pollution filter.
- Turn off the image stabilization system.
- If your camera has it, turn off the long exposure noise reduction option.
- Shoot in RAW.
- Depending on what you want to include in the frame, use the shortest focal length you can (14mm, 18mm, 24mm,...) to have the landscape or use a longer focal length (200mm, 300mm, 400mm,...) if you only want to have the stars in your composition. If you use a long focal length, you should use a motorized equatorial mount (with tracking) to increase the exposure time (use a slower shutter speed) without producing Star Trails.
- Select the Manual shooting mode (M).
- Use the largest aperture you can to capture as much light as possible. If you use a motorized equatorial mount (with tracking), close the maximum aperture 1 or 2 stops, to get a better image quality. Thanks to this mount and its tracking system, the shutter speed will no longer be a problem.
- If you use a wide angle lens and you include the landscape in the frame, focus at the hyperfocal distance to maximize the depth of field.
- If you use a telephoto lens you can focus directly on the planets. Use the Live View function on the LCD of your camera to focus accurately. And if your camera has the Focus Peaking and/or Focus Magnifier functions, turn them on too because they will help you to be even more precise. Zoom in the image, always with the Live View function on, until you see the planet. Then, turn the focus ring of the lens slowly until the planet is a tack sharp spot. If you're not used to focusing manually, turn the focus ring very subtly and when you notice that your subject (the planet) is focused, keep turning the ring until you go a little out of focus and then, turn the ring in the opposite direction to get everything in focus again. This way you'll see very clearly how everything is now in focus again.
- Crank up the ISO to 3200 or 6400. You may have to crank it up to 10000 if your camera allows it and you don't use a star tracking system.
- Take a test shot to check that the framing is correct.
- If you don't use a motorized equatorial mount (with tracking), use the NPF rule to adjust the shutter speed and avoid Star Trails. It's easy with PhotoPills and the Spot stars calculator.
- If you use a motorized equatorial mount (with tracking), you need to take a test shot to calculate the shutter speed. Follow the same workflow as for capturing a Star Trails picture with a single exposure:
- Crank up the ISO to maximum, use the maximum aperture and select a shutter speed of about 10 seconds.
- Take a picture.
- If the photo is too dark, use a slower shutter speed. If the stars are overexposed, increase the shutter speed (reduce the exposure time).
- Repeat the process until you get the correct exposure.
- As soon as you have it, apply the reciprocity law by lowering ISO and increasing the exposure time (you can use the PhotoPills Exposure calculator to do the math).
- Adjust the ISO depending on how much noise your camera produces.
- Set the white balance to manual. Set it between 3400 and 3900K. If you use a light pollution filter, I suggest you adjust the color temperature to 5000K as this type of filter usually generates a bluish cast.
- Frame and take a couple of test shots to check if you like what you see and adjust accordingly.
- Take the picture. Check the histogram and adjust the exposure accordingly.
And in this video Rafa teaches you how to photograph the great conjunction of Jupiter and Saturn.
How to photograph a comet
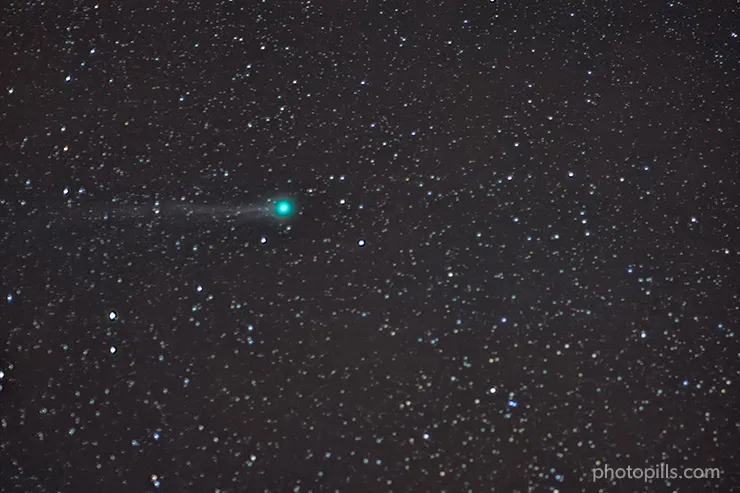
Photographing a comet is a challenge. For starters because comets are celestial bodies whose behaviour, and above all their brightness, is quite unpredictable.
Actually, the most important thing is to find out in which direction you have to point your camera so that you can get a better framing. And since that's something you already found out during the planning (section 14), all you have to do is take the picture... ;)
Follow the steps below to photograph a comet:
- Place the tripod on a solid surface and make sure the equipment is stable.
- If you have it on, remove the ultraviolet (UV) filter. If you use a motorized equatorial mount (with tracking) with a telephoto lens it may be interesting to leave it on: in some cases it removes the purple halos around the stars. You can also remove them with Photoshop.
- If there is light pollution in your scene from sodium vapor light sources (they generate a yellowish glow), you should use a light pollution filter.
- Turn off the image stabilization system.
- If your camera has it, turn off the long exposure noise reduction option.
- Shoot in RAW.
- Use a medium (70mm, 85mm,...) or long (100mm, 150mm...) focal length. The longer the focal length, the bigger the stars will come out. But, at the same time, you'll have to use a faster shutter speed to avoid Star Trails. So for this type of photography you should use a motorized equatorial mount (with tracking) to increase the exposure time (use a slower shutter speed). Depending on the equatorial mount, you can use focal lengths between 200mm and 500mm without a problem thanks to its tracking system.
- Select the Manual shooting mode (M).
- Use the largest aperture you can to capture as much light as possible. If you use a motorized equatorial mount (with tracking), close the maximum aperture 1 or 2 stops, to get a better image quality. Thanks to this mount and its tracking system, the shutter speed will no longer be a problem.
- Crank up the ISO to 3200 or 6400. You may have to crank it up to 10000 if your camera allows it and you don't use a star tracking system.
- Focus directly on the stars. Use the Live View function on the LCD of your camera to focus accurately. And if your camera has the Focus Peaking and/or Focus Magnifier functions, turn them on too because they will help you to be even more precise. Zoom in the image, always with the Live View function on, until you see the star. Then, turn the focus ring of the lens slowly until the planet is a tack sharp spot. If you're not used to focusing manually, turn the focus ring very subtly and when you notice that your subject (the star) is focused, keep turning the ring until you go a little out of focus and then, turn the ring in the opposite direction to get everything in focus again. This way you'll see very clearly how everything is now in focus again.
- Take a test shot to check that the framing and the focus are correct.
- If you don't use a motorized equatorial mount (with tracking), use the NPF rule to adjust the shutter speed and avoid Star Trails. It's easy with PhotoPills and the Spot stars calculator.
- If you use a motorized equatorial mount (with tracking), you need to take a test shot to calculate the shutter speed. Follow the same workflow as for capturing a Star Trails picture with a single exposure:
- Crank up the ISO to maximum, use the maximum aperture and select a shutter speed of about 10 seconds.
- Take a picture.
- If the photo is too dark, use a slower shutter speed. If the stars are overexposed, increase the shutter speed (reduce the exposure time).
- Repeat the process until you get the correct exposure.
- As soon as you have it, apply the reciprocity law by lowering ISO, adjusting the aperture (I suggest you to use an aperture 1 or 2 stops smaller than your lens' widest one because the stars will come out as spots thanks to the equatorial mount tracking) and increasing the exposure time (you can use the PhotoPills Exposure calculator to do the math).
- Adjust the ISO depending on how much noise your camera produces.
- Set the white balance to manual. Set it between 3400 and 3900K. If you use a light pollution filter, I suggest you adjust the color temperature to 5000K as this type of filter usually generates a bluish cast.
- Frame and take a couple of test shots to check if you like what you see and adjust accordingly.
- Take the picture. Check the histogram and adjust the exposure accordingly.
And in this video Rafa teaches you how to photograph a comet.
How to photograph a planet transit across the Sun
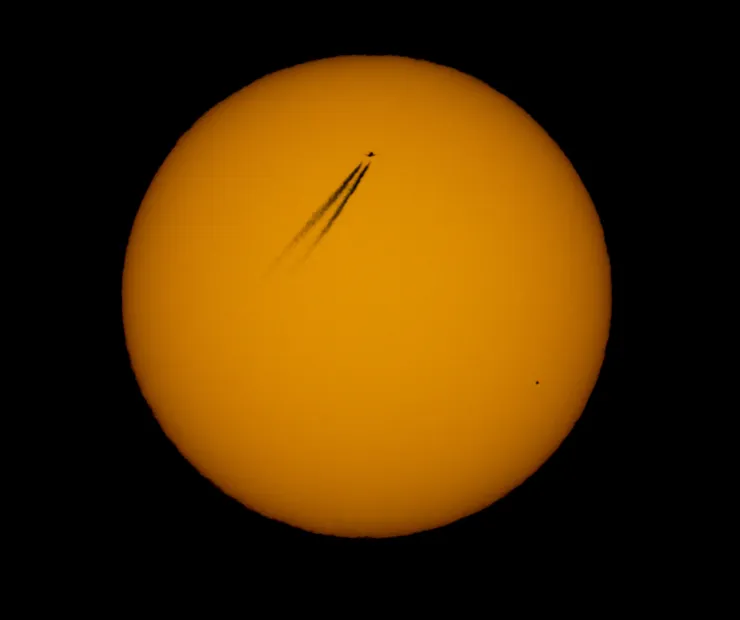
As with a conjunction between the Moon and a planet, if you want to capture the transit of a planet through the Sun you have a very clear reference: the Sun.
From there, it's much easier to work on the composition and also get the right focus and exposure.
Keep in mind that the size of the planet compared to the Sun will be teeny-tiny. So you need a very long focal length.
The shooting workflow of this type of shot is very similar to a partial eclipse of the Sun shooting workflow. So don't forget the solar filter and your solar eclipse glasses at home!
Follow the steps below to photograph a planet transit across the Sun:
- Before leaving home, check the weather forecast to make sure there will be no clouds.
- Use the PhotoPills Augmented Reality view to check that you are in the right place to get the composition you want.
- Place the tripod on a solid surface and make sure the equipment is stable.
- Before the solar eclipse starts, put the solar filter.
- Turn off the image stabilization system.
- Shoot in RAW.
- Use the longest focal length you can (300mm, 450mm, 600mm,...).
- Frame and focus directly on the Sun's edge. Use the Live View function. And if your camera has the Focus Peaking and/or Focus Magnifier functions, turn them on too because they will help you to be even more precise.
- Use the spot metering mode and meter light directly on the surface of the Sun before the transit begins. If you have a mirrorless camera, now is the time to use the live histogram option.
- Select the Manual shooting mode (M).
- Use a relatively small aperture (f/8) to get the Sun and the planet tack sharp.
- Select the lowest ISO you can (nominal, that is 100 or 200).
- Taking into account the metering, the aperture and the ISO, adjust the shutter speed to have the light meter centered at zero (correctly exposed). Then, do a 1-stop bracketing of several exposures. Again, if you have a mirrorless camera, now is the time to use the live histogram option.
- Set the white balance to manual. The color temperature depends on the filter you use. Select a neutral temperature of 5500K, check the color you get and adjust. If the Sun is very yellow, use a lower temperature (about 4300K) to make it whiter. On the other hand, if you want to intensify the yellow, increase the color temperature (about 6500K).
- Take the photos.
If you need a complete explanation on the matter, have a look at the blog post I wrote about the 2019 Mercury transit.
How to photograph the zodiacal light
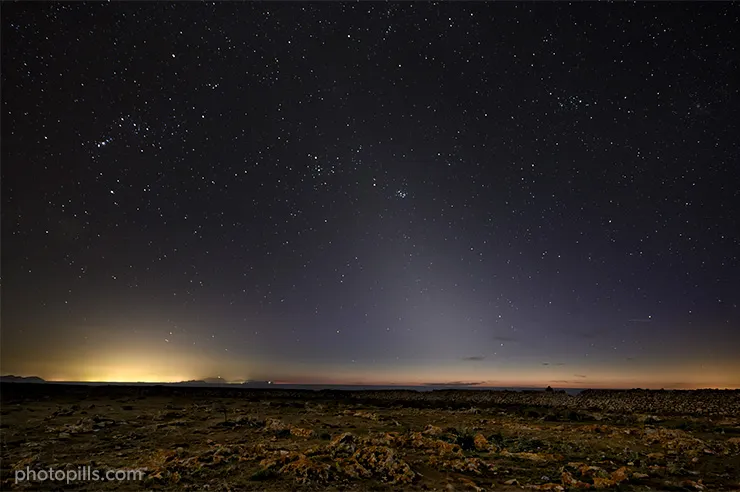
As I told you in section 14, the zodiacal light is a difficult phenomenon to photograph. You need very specific conditions for it to happen.
Moreover, it's crucial that you look for a location without light pollution. Zodiacal light is very dim and you need as much darkness as possible in order to photograph it successfully.
And speaking of pictures, do you want to know how you can capture it?
Fine, I'll explain it to you in a second.
Follow the steps below to photograph the zodiacal light:
- Use the PhotoPills Planner or the Augmented Reality (RA) button to check that you are in the right place. To photograph the zodiacal light you need to know the Sunrise or Sunset direction (depending on the case).
- Place the tripod on a solid surface and make sure the equipment is stable.
- If you have it on, remove the ultraviolet (UV) filter.
- If there is light pollution in your scene from sodium vapor light sources (they generate a yellowish glow), you should use a light pollution filter.
- Turn off the image stabilization system.
- If your camera has it, turn off the long exposure noise reduction option.
- Shoot in RAW.
- Use the shortest focal length you can (14mm, 18mm, 24mm,...). Try to keep it below 35mm.
- Select the Manual shooting mode (M).
- Use the largest aperture you can to capture as much light as possible.
- Focus at the hyperfocal distance to maximize the depth of field.
- Crank up the ISO to 3200 or 6400.
- Take a test shot to check that the framing is correct.
- Use the NPF rule to adjust the shutter speed and avoid Star Trails. It's easy with PhotoPills and the Spot stars calculator.
- Adjust the ISO depending on how much noise your camera produces.
- Set the white balance to manual. Set it between 3400 and 3900K. If you use a light pollution filter, I suggest you adjust the color temperature to 5000K as this type of filter usually generates a bluish cast.
- Frame and take a couple of test shots to check if you like what you see and adjust accordingly.
- Depending on the light pollution you find in the location, illuminate the foreground with an artificial light (optional).
- Take the picture. Check the histogram and adjust the exposure accordingly.
And in this video Rafa teaches you how to photograph the zodiacal light.
Sometimes it's known as false Sunrise or false Sunset, but I'm sure you'll photograph it as soon as you aim for it.
I could hardly believe it when I saw it there, on the LCD of my camera!
Now you can photograph any of the astronomical events taking place in 2024.
You no longer have any excuse for not going out and hunting one of these wonders!
16.Astronomical glossary
Throughout this guide I've been introducing a series of words and names that I had not explained before.
So I thought that the easiest way to help you understand everything in a clear and simple way is to include this section: a glossary with definitions and explanations.
Let's go for it!
Bulge - The bulge is the area of the Milky Way (or any other galaxy) with the highest concentration of stars. It's located around the galactic center.
Conjunction - From the point of view of an observer on Earth, two stars are in conjunction when they are in the same celestial longitude. However, since they're not at the same celestial latitude, you have the impression that they are very close in the sky. That is why one passes over the other and in each of the events I tell you which one is north or south of the other.
Ecliptic - It's the Earth's orbital plane around the Sun in the sky (or celestial sphere). It's the line by which the Sun "moves" around the Earth, seen from the Earth.
Elongation - In astronomy, a planet's elongation is the angle between the Sun and a planet, using the Earth as the reference point. In fact, it measures the distance between the Sun and that planet, using the Earth as the reference point. Therefore, the maximum elongation of a planet means that its separation from the Sun is the maximum possible. Furthermore, being as far away from the Sun means that it's the brightest moment in the sky.
Galactic Center - The Galactic Center is the rotational center of the Milky Way. It's also its brightest area.
Magnitude - In astronomy, magnitude is the measure of a star's brightness. Although in this guide I always mention the apparent magnitude, which is the brightness measure of a star as you can perceive it observing it from the Earth. The smaller the number, the brighter a star looks to you. The Sun, for example, has an apparent magnitude of -27. The smaller the magnitude number the brighter the object and vice versa, the larger the number the less bright it is.
Magellanic Clouds - Magellanic Clouds are two very small galaxies. The largest one is called the Large Magellanic Cloud and the smallest one is the Small Magellanic Cloud. You can see them if you are in the Southern Hemisphere. They appear in the sky as two small whitish spots, opposite the Southern Cross (or Crux constellation) if you take the South Celestial Pole as a reference point.
Opposition - From the point of view of an observer on Earth, two stars are in opposition when they meet at two diametrically opposed points in the sky. When opposition occurs near the perihelion, their distance from the Earth is the least possible. Therefore, you can observe it more easily.
Path of totality - A total solar eclipse happens when the Moon completely covers the Sun. This event can only take place when the Moon is near perigee, the point of the Moon's orbit closest to Earth. But because the full shadow of the Moon (also called umbra) is not big enough to cover the Earth completely, it only covers a portion. This area or path is called the path of totality. In other words, it's the area from which the total solar eclipse can be seen.
Perigee - The perigee is the closest point to the Earth in the orbit of the Moon or any artificial satellite.
Perihelion - The perihelion of a star is the nearest point in its orbit around the Sun. In the case of a comet, for example, the fact of being in the perihelion facilitates its observation.
Summer Triangle - This is a triangle formed by the following stars: Vega of Lyra, Deneb of Cygnus and Altair of Aquila. Each one is the main star of its constellation. In the Northern Hemisphere, you can see it during most of the nighttime in summer. In the Southern Hemisphere, you can see it upside down and at a lower elevation.
UTC - All dates and times in this guide are according UTC. That is, coordinated universal time. It's the main worldwide time standard and it's based on the international atomic time. This is a time standard calculated from a weighted average of the signals of the atomic clocks located in 70 national labs around the world.
Winter Triangle - This is a triangle formed by the following stars: Betelgeuse of Orion, Sirius of Canis Major and Procyon of Canis Minor. Each one is the main star of its constellation. In the Northern Hemisphere, you can see it during most of the nighttime in winter. In the Southern Hemisphere, you can see it upside down and at a lower elevation.
Zodiac - In astronomy, the zodiac is an 18º wide band of the sky through which the Sun traces its course each year. That is, it's centered on the ecliptic.
Zodiacal light - The zodiacal light is a cone of very dim light that you can see before dawn or after dusk is over. Regardless of your location, you can see it in the west in late winter or early spring (known as false Sunset). While in the east you can see it before Sunrise in late summer or early fall (called false Sunrise). In fact, zodiacal light is the result of the reflection produced by a large interplanetary cloud along the zodiac.
17.Become a legend...
Well dear PhotoPiller, as you can see, this year is full of amazing astronomical events.
Each of them is an opportunity to test your creativity and your photographic skills. They are a challenge to improve and to get that image you've been dreaming about for weeks, months (or years?)...
And since I know that nothing eludes you, I want to make you a proposal.
Or rather, I'd like to challenge you.
How does it feel?
I see... That look says it all ;)
Well, this is my proposal:
"Your mission, should you choose to accept it, is to make a photo album with at least the following events: a Milky Way panorama, a vertical Milky Way, a Full Moon (or Supermoon), a Meteor Shower, a solar or lunar eclipse, a Star Trails, a conjunction (Moon-planet or of planets) and a zodiacal light.
To do this, you'll have to give everything you've got.
Whether traveling to remote and inaccessible places or staying close to home... You must push your creativity to the limit. You'll need to use all the tools (including PhotoPills) to always be in the right place, at the right time, and to capture the scene you dream of.
Actually, it won't be a single photo.
But a few ones. One per event.
Each of them will become a challenge...
A small challenge within a larger one: the PhotoPills 2024 Marathon.
And to complete it you have till the end of the year :P
As always, should you or any member of your team be caught in the attempt, the PhotoPills team will disavow any knowledge of your actions.
This message will self-destruct in five seconds.
Good luck PhotoPiller."
Are you ready for what's coming to you?
How exciting!
It's going to be a year full of legendary photos. Don't forget to send them to the PhotoPills Awards... You might even become a legend! :P
And as always, if you need help, I'm here for you. Just whistle or leave a comment below. I'll do my best to solve your problem.
Imagine. Plan. Shoot!
Note: Some links on this page are affiliate links. What does this mean? If you buy/rent using these links you're helping support us and it costs you nothing extra. Thank you for your support.
Get this ebook for free now!
