How To Plan The Next Full Moon
All the tutorials we’ve written until now try to help you learn, for a desired shooting spot and composition, how to use the Find tool of PhotoPills’ Planner to calculate the exact date and time the sun or the moon would be right where you desire.
The Find tool is cool for planning future moon alignments, but what if you wish to plan a shoot with the next full moon, for example on August 10th 2014? In this case, you already know the date of the shot and need to figure out: shooting spot and shooting time.
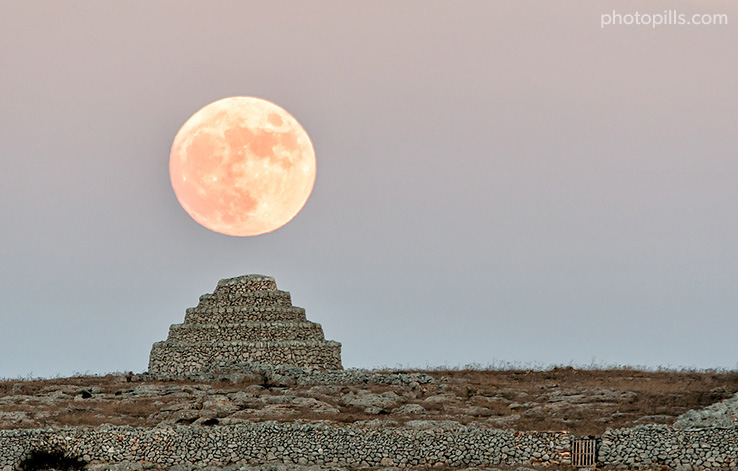
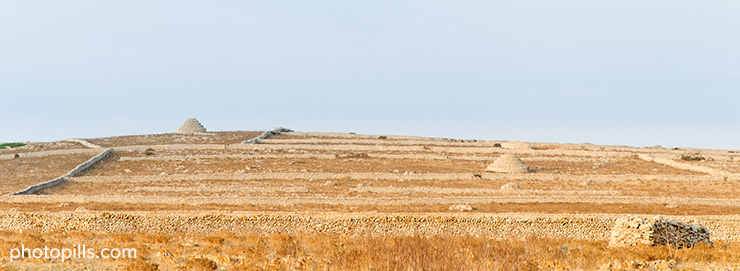
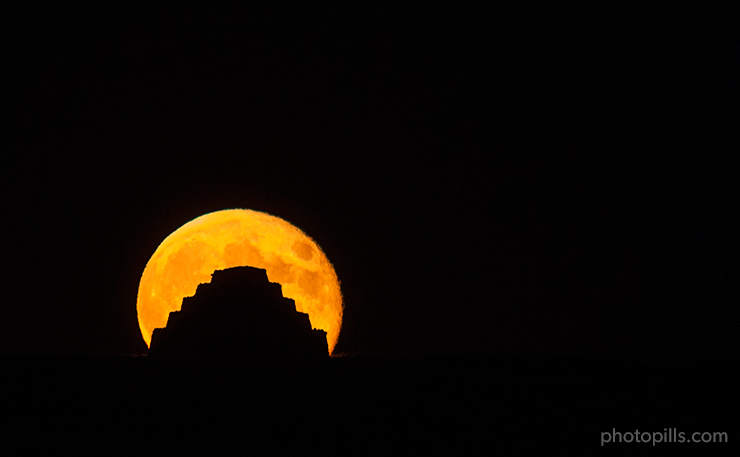
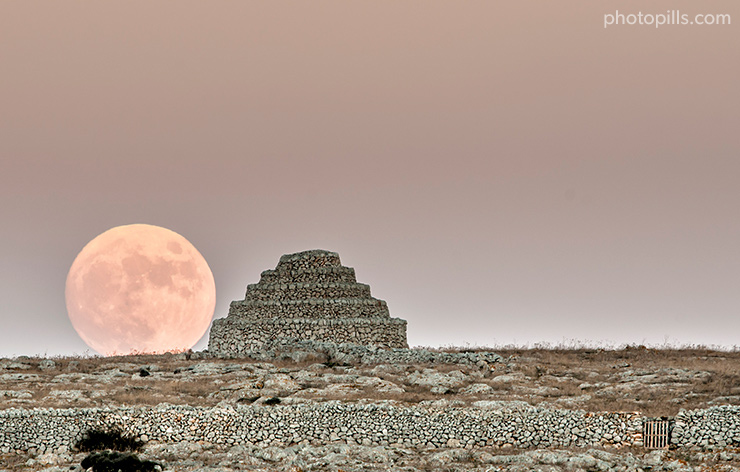
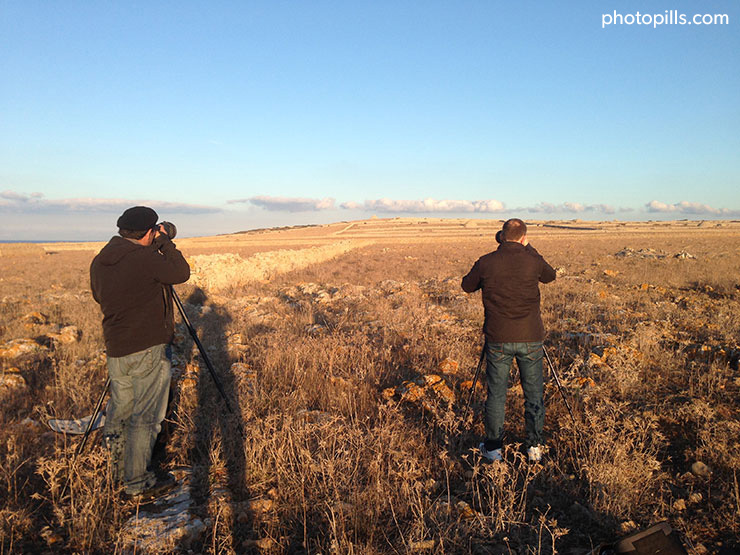
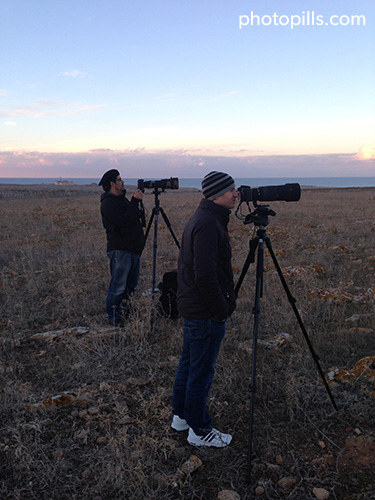
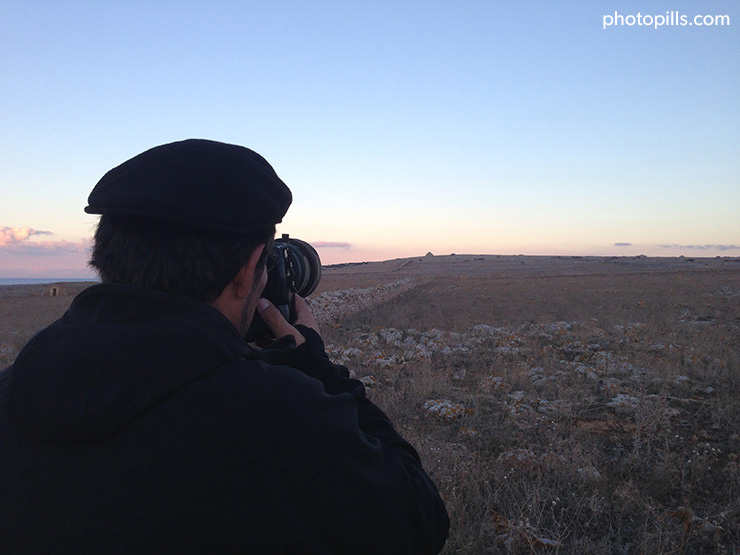
Imagine that you want to shoot the next full moon rising just behind the old stone construction you see in the cover photo. It’s a long distance shot, so you’ll need to work out the shooting spot conveniently to capture a moon bigger than the construction. Let’s see how to plan it, step by step.
Steps
- Choose a location with room to maneuver and reduce trial and error
- Look for the best light
- Assess the elevation of the moon
- Find the shooting spot
- Check whether the moon is large enough
- Timelapse
- Photos
1Choose a location with room to maneuver and reduce trial and error
Why did we choose this old stone construction for our upcoming shot? Simple, because it's located in an open area, where we can freely move, from north to south, and make sure that we can have the moon aligned with the construction.
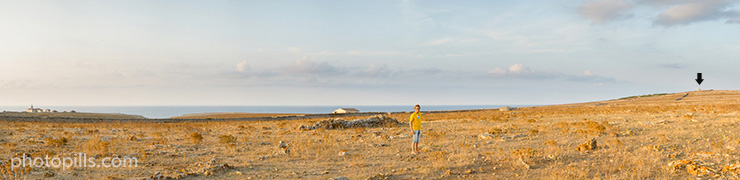
Also, as we want to capture a big moon behind the construction, we need the shooting spot to be far from it. This way will manage to capture a moon bigger than the construction.
If you choose a location with no room to maneuver, it's likely that you’ll not be able to find a spot from where to shoot the moon aligned with your subject, forcing you to jump from location to location in an eternal trial and error. In these cases, with little space to move, it’s better to use the Find tool to calculate a future alignment.
So, be clever and start your planning in a location with a wide range of possible spots from where to shoot.
2Look for the best light
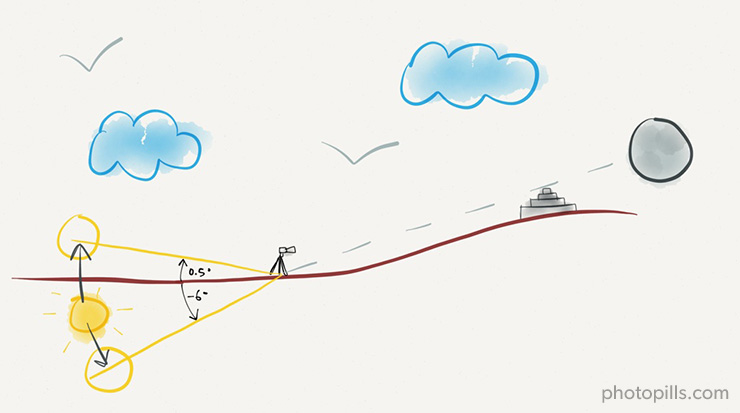
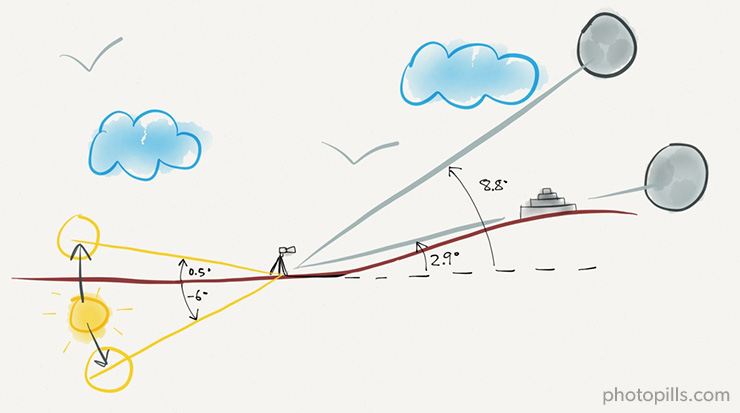
This is a fact: the elevation of the sun determines the time of the shot.
According to our experience, the best time to shoot the moon is when the sun is at an elevation between 0.5⁰ and -6⁰.
This occurs during civil twilight, when the landscape is illuminated by sunlight and, close to the horizon, Earth’s turbulent atmosphere blurs and softens the Moon’s outline and filters its normal cool gray tones into a warmer, yellow glow.
Under these conditions, you’ll get the correct exposure for both, landscape and moon, with a single shot… the moon is not too bright nor too light.
When the sun is above 0.5⁰, the moon will be less visible and, therefore, you’ll not capture all the details of its surface, although, in our opinion, it keeps all the beauty.
When the sun is below -6⁰, the sky begins to darken considerably, getting a dark blue hue. The horizon line can still be distinguished and many more stars become visible.
It's also possible to capture the full moon at the horizon, just when rising or setting. It's an interesting choice because, although you cannot get a correct exposure of the moon and the landscape with a single shot, you can still create beautiful moon silhouettes.
For a thoughtful explanation of natural light behavior, the factors that influence it and how you can assess what type of photography is more suitable for each moment of the day, please, have a look at the following article: Understanding Golden Hour, Blue Hour and Twilights.
3Assess the elevation of the moon
Now you know that to capture a nice full moon, you need the sun to be at an elevation between 0.5⁰ and -6⁰. Next step is to find the elevation of the moon for these two moments, which will give you the shooting time. Let’s see how to do it.
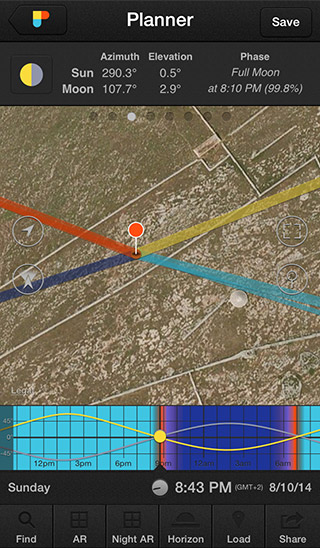
Go to the Planner, place the Observer’s Pin near the old construction (40.046697⁰, 3.838521⁰) and tap on the picture of the moon, the one you see on the sun/moon rise/set top information panel, until the date is set to the next full moon: August 10th 2014.
Drag the top panel to the right to go to the sun/moon azimuth/elevation information panel and use the time bar to move time until the elevation of the sun you read on the top panel is 0.5⁰. This happens at 8:43pm. Now, jot down the elevation of the moon: 2.9⁰.
Keep moving time until the elevation of the sun is -6⁰, which happens at 9:17pm. Now, the elevation of the moon is 8.8⁰.
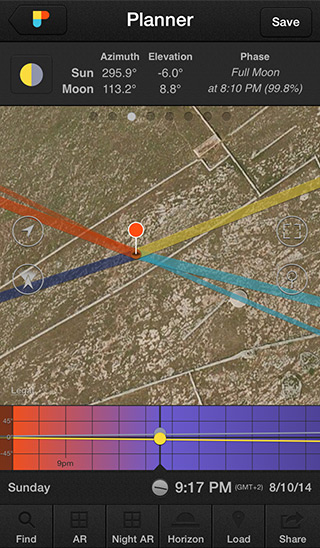
In conclusion, the best light moments to shoot the moon happen between 8:43 pm and 9:17pm. The moon will be at an elevation between 2.9⁰ and 8.8⁰ and the sun between 0.5⁰ and -6⁰.
The terrain is fairly flat. Therefore, you need the moon to be low in the sky, as closer to the horizon as possible.
Clearly, the shooting time is 8:43pm, when the moon is only at an elevation of 2.9⁰.
4Find the shooting spot
The time of the shoot is 8:43pm, when the center of the moon is at azimuth 107.7⁰ and elevation 2.9⁰ (read the top information panel).
If we assume that the moon has an angular diameter of 0.5⁰ (explained later in this article), then, the lower border of the moon disk will be at an elevation of 2.65⁰ (2.9⁰-0.25⁰) and the top border at 3.15⁰ (2.9⁰+0.25⁰).
Pay attention now, this is important!
You’ll choose the shooting spot based on these three principles:
- It has to be the furthest possible from the construction in order to capture a big full moon, at least 1km. The distance, of course, will always depend on the largest telephoto lens you'll have available. In our case a 500mm prime lens. This way will manage to capture a moon bigger than the construction.
- The moon must be aligned with the construction, thus the azimuth line of the moon has to go over the construction.
- The relative elevation between the shooting spot (Observer’s Pin) and the ground level of the old construction (Obstacle’s pin) needs to be at last 2.65⁰. Learn more about relative elavation and Obstacle's pin with the Geodesic information videotutorial.
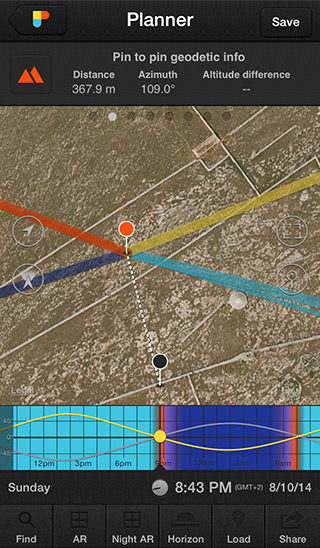
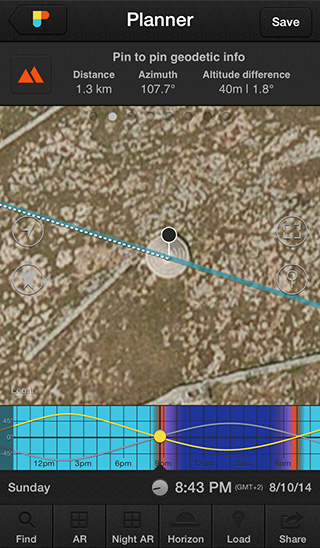
Now, let the Obstacle’s pin pop out on the map. To do it, go to the Pin to Pin geodetic information panel and tap on the Obstacle’s button. Then, drag the Obstacle’s pin and drop it on the construction.
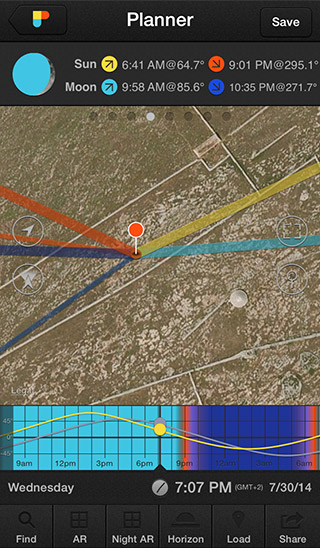
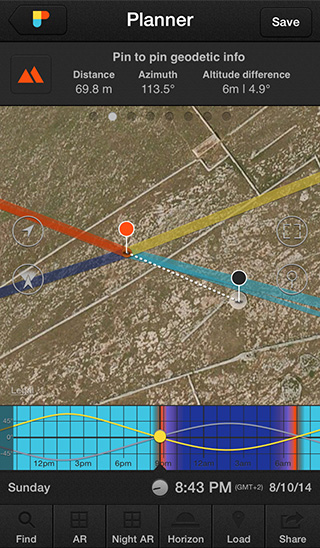
Have a look at the second screenshot. Notice that the top panel is telling you that the current Pin to Pin distance is 69.8m and the relative elevation 4.9⁰ (altitude difference). We need this elevation to be approximately 2.65⁰.
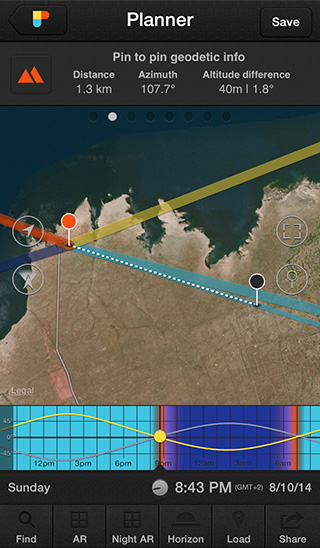
Place the Observer’s pin as far as possible from the construction (1.3km), but always making sure the azimuth line of the moon is aligned with the construction.
Again, check the Pin to Pin geodetic panel. The relative elevation between pins is 1.8⁰. At this time (8:43pm). Remember, the lower border of the moon disk is at an elevation of 2.65⁰, far too above the construction (2.65⁰ > 1.8⁰).
Keep moving the Observer’s pin closer until the relative elevation between pins is approximately 2.65⁰.
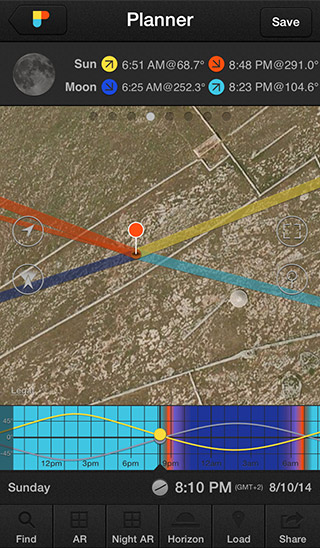
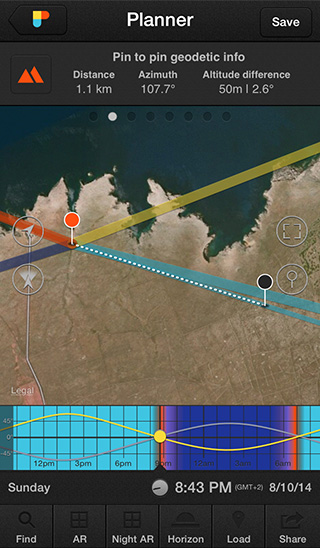
Have a look at the first screenshot. We’ve found a shooting spot 1.1km away from our subject where the relative elevation between pins is 2.6⁰, very close to our target 2.65⁰. This means that, from this position, we’ll see the full moon just behind the old construction. We got it! We’ve just planned the shot!
Now, we just need to wait until August 10th and be right on the position of the Observer’s pin ready for the shot at 8:43pm.
Believe it, there is nothing more exciting than being right on the spot enjoying the moment the moon appears just right where you decided a few days before.
5Check whether the moon is large enough
If we shoot in landscape orientation, from a distance of 1.1 Km away from our subject, using a Nikon D300S and a focal length of 500 mm, how large will the moon appear in the image compared to the old construction? Are we using the right equipment? Are we shooting from the right spot? Field of view gives us the answer.
But before we start with the math, let me insist on this fact:
“The angular diameter or apparent size of the moon, seen from Earth, can be reasonably assumed to be 0.5 degrees”.
0.5⁰ is not the exact number, it depends on the distance between moon and Earth, which changes throughout the year, but it’s precise enough for assessing whether the moon will appear large enough in the photo.
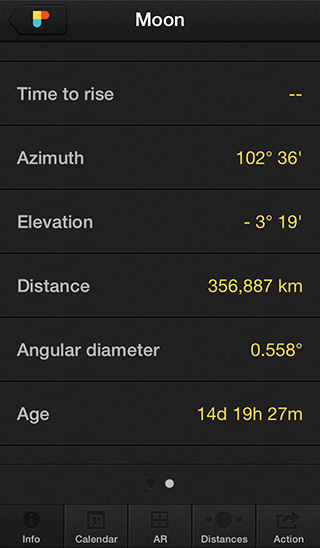
You can get the exact number from the Moon tool, which you'll find in the Pills menu.
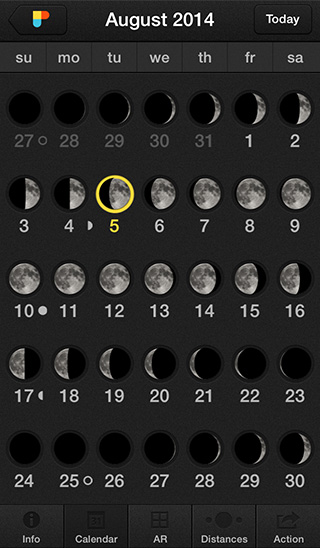
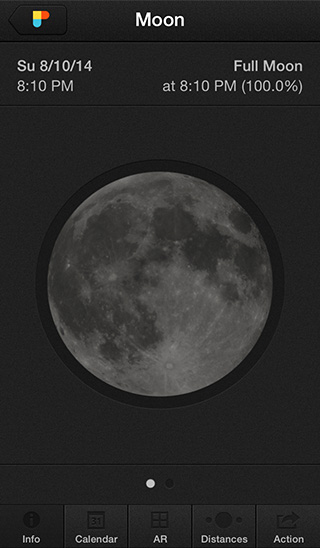
Once you’re on the main moon screen, tap on the calendar button and select August full moon, which happens to be the 2014 Supermoon.
Now, swipe the moon screen to the left and scroll down the table until you find the angular diameter: 0.558⁰.
Let’s calculate the angle of view for the camera settings we want to use. To do it, we’ll use PhotoPills’ Field of View Classic calculator.
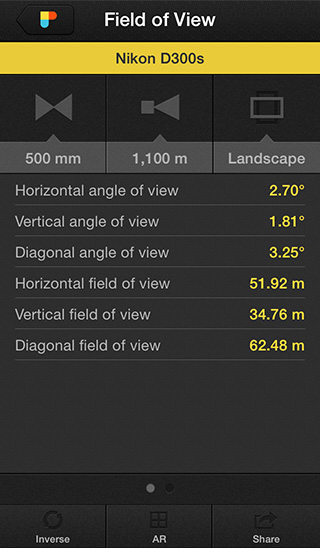
The field of view calculator indicates that the horizontal angle of view will be 2.70⁰ and the vertical angle of view 1.81⁰.
Dividing the angular diameter of the Supermoon (0.558⁰) by each angle of view, we’ll get the percentage of the image that will be covered by the moon: 20.66% (horizontally) and 30.83% (vertically).
Also, notice that the vertical field of view is 34.76m and the percentage covered by the moon is 30.83% (vertically). Thus, the apparent diameter of the moon in the photo is 10.72m (34.76m x 30.83%).
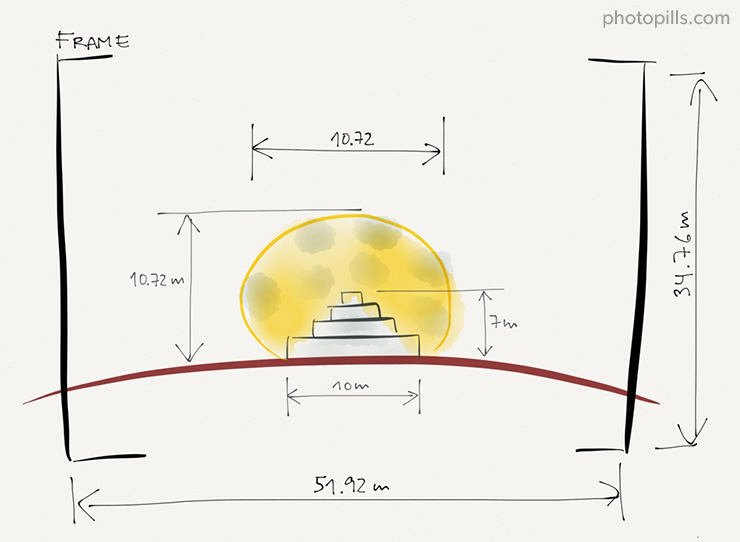
Knowing that the construction is 7m tall and 10m wide approximately, we can conclude that we’ll capture a huge full moon behind the construction (10.72m of diameter). Therefore, we’re shooting from the right spot, at the right distance (1.1km) and with the right equipment to get the result we want.
In conclusion, for long distance shots, you not only need to calculate the exact moment the moon will be aligned with your subject; you also need to choose the shooting spot (distance) and focal lens that give you the desired size of the moon.
In practice, to calculate the shooting distance that give us the size of the Moon we want compared with our subject, we use what we call the PhotoPills Rule of 100:
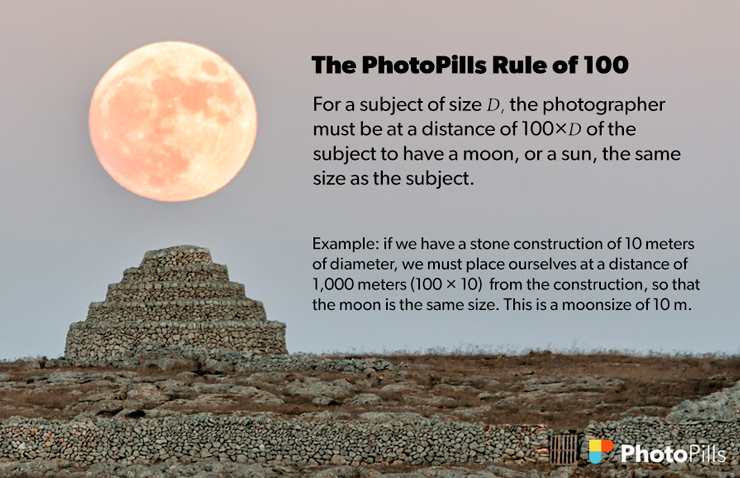
So, just multiply the size of the Moon you want compared to your subject by 100 and you'll get the shooting distance!!
6Timelapse
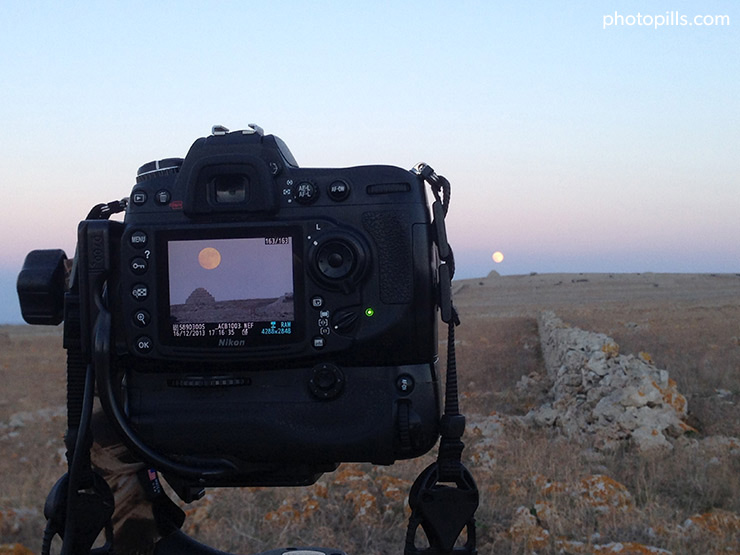
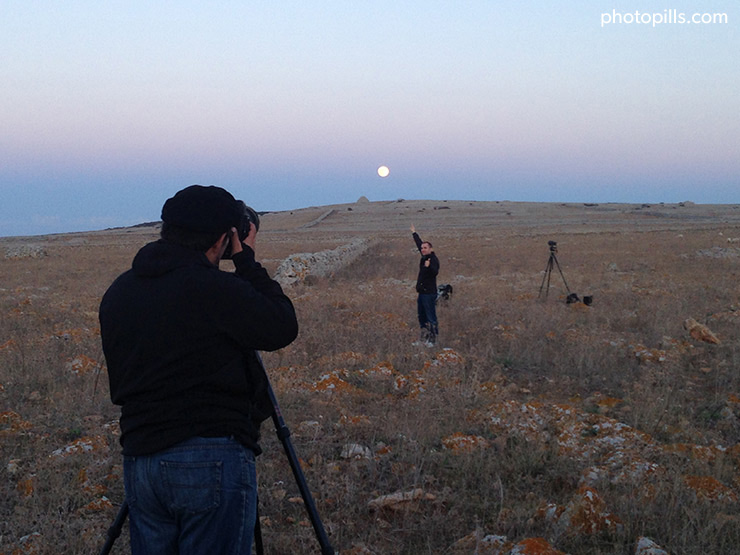
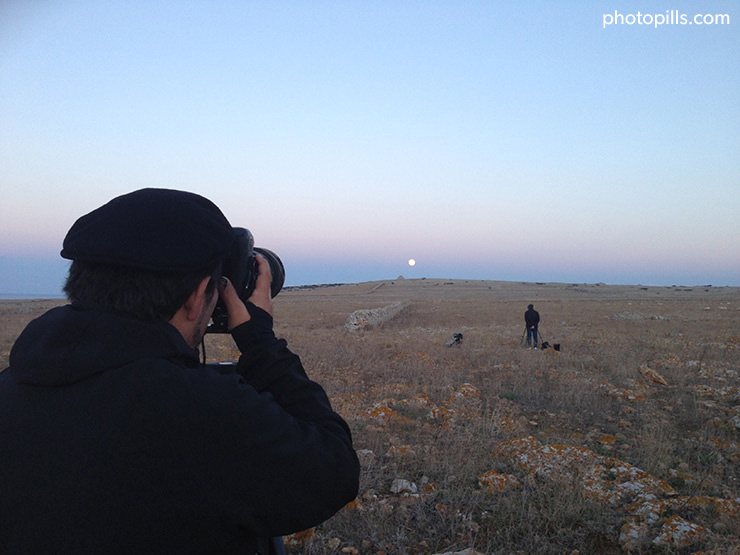
We followed these same steps to plan and shoot this time-lapse of the moonrise happening behind the same old construction on December 16th 2013 from 16:54pm to 17:29pm. The shooting spot was at a distance of 900m from the old construction.
7Photos
Happy Shooting!
Credits: All moon photos by Antoni Cladera. Timelapse by Germán Marqués (aka The Developer).