How To Plan the Milky Way Using The Augmented Reality
Do you have in mind a photo of the Milky Way, but don’t know when it occurs? Good news, you're at the right place!
This tutorial will help you learn how to use PhotoPills’ Night Augmented Reality to figure out the exact date and time the Galactic Center of the Milky Way will be exactly where you want.
On the other hand, if you prefer planning the Milky Way on a map, please, have a look at the following tutorial: How To Plan The Milky Way Using The 2D Map-Centric Planner.
Get this ebook for free now!
You can also take a look at the following video. We show you how to plan the Milky Way using both: the Night Augmented Reality view and the 2D Map-Centric Planner.
Finally, make sure you don't miss the article “How To Shoot Truly Contagious Milky Way Pictures”. You'll learn how to turn your Milky Way ideas into real images, step by step; from inspiring sources and equipment to camera settings.
Steps
- Two crucial Milky Way facts you should know
- When does Milky Way hunting season start?
- Decide where you want the core of the Milky Way
- On the Planner, place the Observer's pin on the initial shooting spot
- Set the date to the next new moon happening between April and August
- Use the time bar to set the time to the end of the evening astronomical twilight
- Tap on the Night AR button, check the Milky Way and adjust your position
- Scouting photos
1Two crucial Milky Way facts you should know
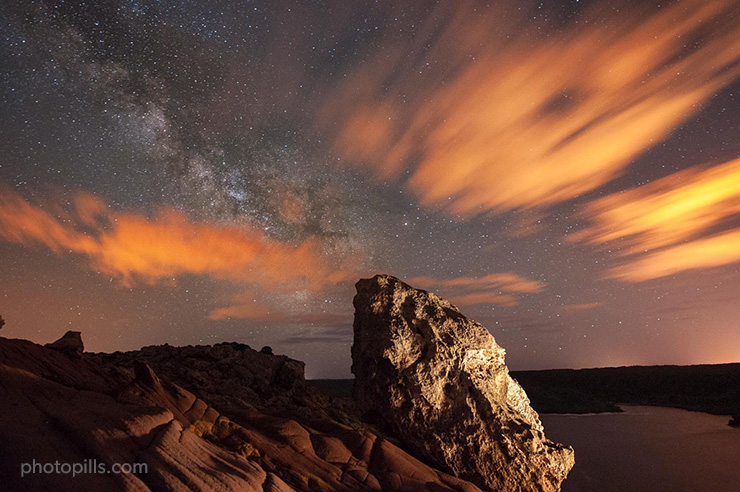
Let’s say that during one of your scouting sessions you come across this isolated rock. It’s located in a powerful landscape with no light pollution (complete darkness). It has the perfect conditions for a stunning Milky Way shot.

The Milky Way moves in the sky following Earth’s rotation as the stars move, this means you will have different compositions at different times of the night. You can get the band of the Milky Way in vertical, diagonal or horizontal orientation.
But, before you start brainstorming like crazy, there are two CAPITAL facts about the core of the Milky Way you should keep in mind:
You’ll find the core in the southern skies
Knowing the direction where it is possible to find the core of the Milky Way is mandatory.
Don’t waste your time designing images that are not possible. These are the general rules depending on the Hemisphere you are:
- Northern Hemisphere: look towards the southern skies to see the galactic core. The core will start to be visible due southeast (Spring), due south (Summer), or southwest (Fall).
- Southern Hemisphere: also look towards the southern skies to see the galactic core. In this case, the core will start to be visible due southwest (Spring) or southeast (Fall and Winter).
In conclusion, don’t look for the core of the Milky Way in northern directions. When brainstorming, think about different compositions with the galactic center in the southeast, south or southwest.
Same location, same direction, same altitude
“For a given location and direction (azimuth), the galactic center will ALWAYS be at the same altitude in the sky.”
This means that if you go to the same location in two different dates, look towards the same direction and wait until the galactic center is in that direction, you'll see it at the same altitude in the sky.
No matter the date, for a given location, when the galactic center is in one direction, it always has the same altitude.
Thus, given a location, the galactic center always rises in the same direction. Also, it always sets in the same direction.
Surprised?
The practical application of this fact is clear: for example, once you know the azimuth in which the galactic center rises, just choose the shooting spot in a way that the azimuth of the galactic center is just where you want relative to the main subject of your photo (rock, tree, lighthouse, building, etc).
In other words, when you find a location you like, proceed as follows:
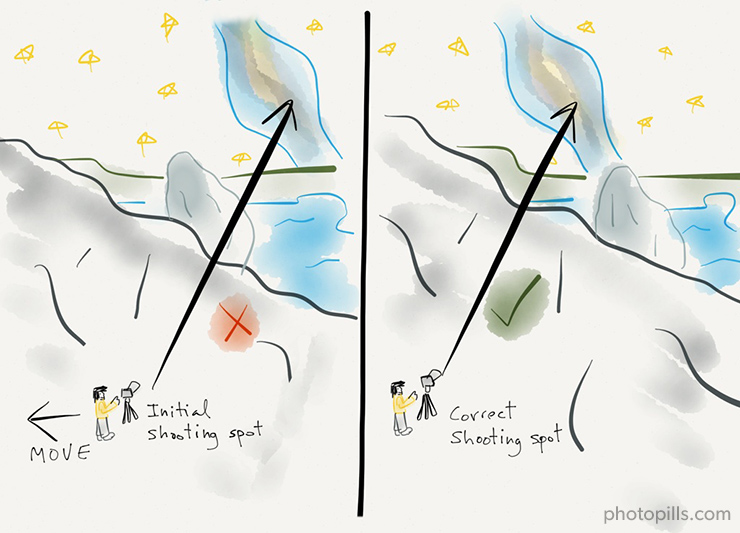
- Decide the position of the galactic center in the sky. Most times your initial shooting spot will not be right. You'll have to move.
- Use PhotoPills‘ Night AR to find out the azimuth in which the galactic center is at the desired altitude and orientation.
- Again, use the Night AR tool to choose the shooting spot that gives you the composition you want.
2When does Milky Way hunting season start?
In other words, when should you start looking for the core of the Milky Way? When will it be visible? Or even better, when is the best time of the year to shoot the Milky Way?
During part of the year, the core of the Milky Way is not visible because it is blocked by the sun. It's when the galactic center is only above the horizon during daylight hours.
When planning the Milky Way, you are only interested in looking into the period of the year the galactic center is visible during nighttime. Thus, knowing the starting and ending dates of the best period of the year to shoot the Milky Way is important to narrow the search and get results faster.
So, when is this?
Northern Hemisphere
In the Northern Hemisphere, the core is visible from March to October. But the best time for viewing it is from late April to late July, because the galactic center is visible for longer during the night. Don’t look for it from November to February.
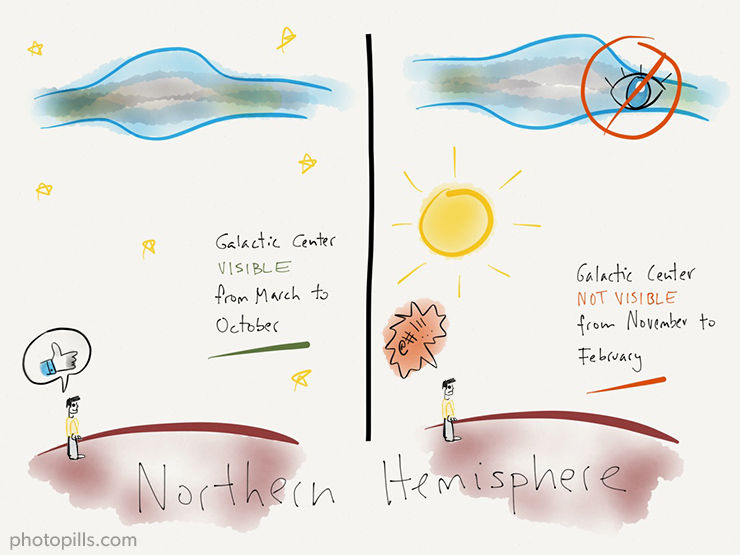
In late February, the core becomes visible in the pre-dawn hours just before sunrise, and remains above the horizon during daylight hours. As months go by, the core becomes visible for longer and longer each night, being June and July the months with longer visibility. During this time of year, the core will be visible all night.
From July on, core visibility begins to decrease and best viewing time moves towards after dusk, until it becomes totally invisible again in winter.
In conclusion, if you live in the Northern Hemisphere, late April is a good moment to start planning the Milky Way, being June and July the best months.
Southern Hemisphere
In the Southern Hemisphere, the core is visible from February to October, being in the middle of the winter, June and July, when the core is most visible. Again, don’t look for it from November to January.
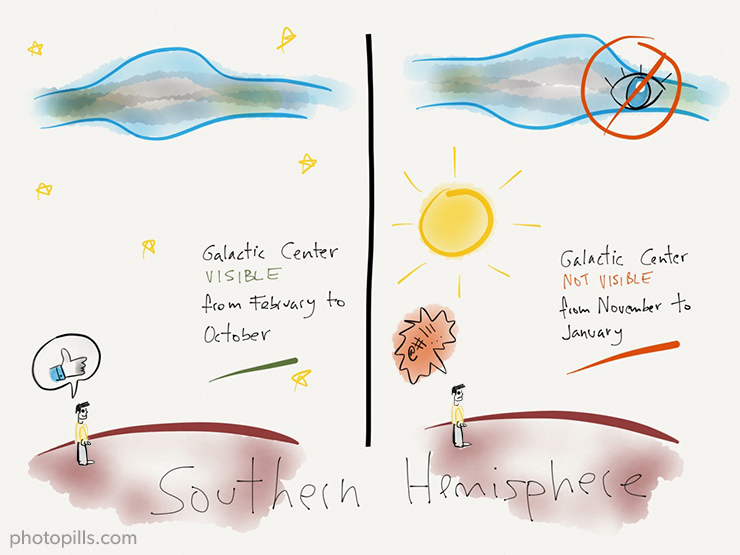
People living in the southern hemisphere enjoy visibility longer because the peak occurs in winter, when days are shorter and nights are longer.
If you live in the Southern Hemisphere, mid-April is a good moment to start planning the Milky Way.
Consider Moonphase
Most times, you’ll want to have complete darkness when shooting the Milky Way. Therefore, when planning, you need to take into account the phase of the moon. You need to have no moon!
As a result, you’ll plan Milky Way shots happening during new moon and the 4 days before and after it.
TIPS
- Don’t forget that in the winter (Northern Hemisphere) and summer (Southern Hemisphere) you can still see the Milky Way, just not the core.
3Decide where you want the core of the Milky Way
Let’s go back to the example. Remember that you’re just in front of the rock. Now, place yourself in a spot leaving the southern sky behind the rock and start brainstorming. This is your initial choice as shooting spot.

Imagine, that during the creative process, you realize you love the position of the rock in relation to the sky. The top is pointing towards the stars in a diagonal orientation.
What if you could shoot the core of the Milky Way following the same diagonal?

You see the horizon behind the rock. Therefore, you need to find a shooting spot from where it's possible to see the galactic center rising near the rock, just on the left-hand side.
Let’s use PhotoPills’ Planner and Night AR tool to plan the shoot!
Let’s find when it happens!
4On the Planner, place the Observer's pin on the initial shooting spot
You have everything you need to start planning the shoot:
- Initial shooting spot.
- Desired position of the core of the Milky Way.
- Planning period: from April new moon to August New moon.
On the Planner, place the Observer’s pin (red pin) on the initial shooting spot. AS you are in situ, right on this spot, tap on the GPS button you find on the map.
You’ll see how the Observer’s pin is automatically placed right where you are. If necessary, drag and drop it to re-adjust its position.
Notice that I've drawn on the screenshot a small black X that shows the position of the rock on the map.
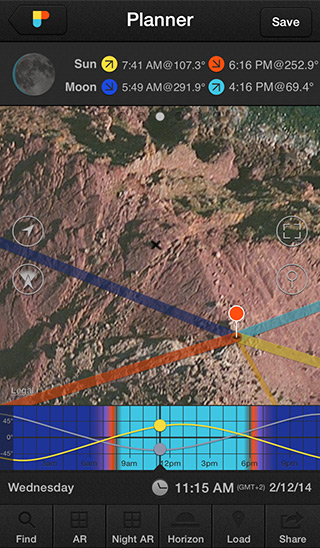
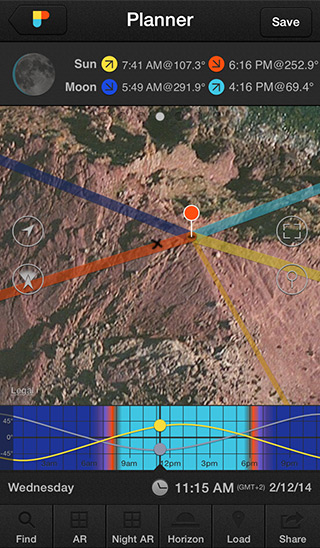
5Set the date to the next new moon happening between April and August
Imagine it’s February 12th 2014 and you are planning this shoot. You've learnt in Step 2 that the Milky Way hunting season starts in April. Then, you need to set the date of the Planner to April new moon.
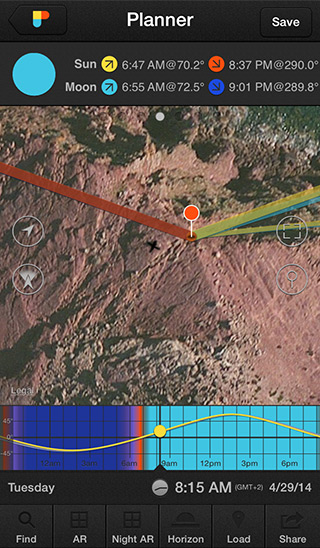
The easiest way to do it, it’s by tapping on the Moon picture you see on the rise and set information panel you find just above the map.
The picture of the moon shows how you'd see the moon on the selected date and time if you were on the location of the Observer's pin.
Tap once on the picture, you’ll see that time jumps forward to the date of the next main moonphase. In this case, you’ve landed on February 15th 2014, Full Moon.

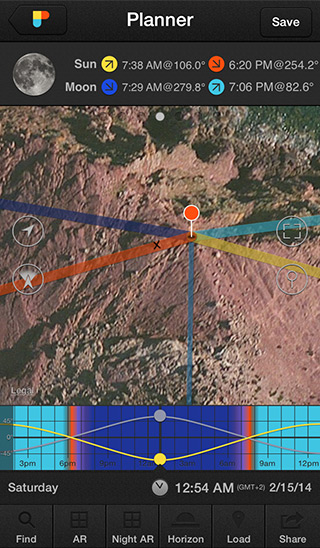
Keep tapping on the picture of the moon until you set the date to April new moon, which occurs on the 29th.
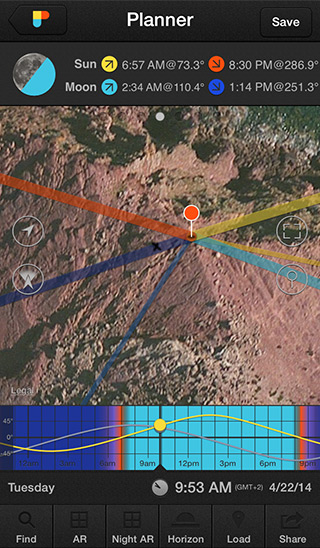
TIPS
- Double tap on the picture of the moon to jump backwards in time to the main past moon phase (new, last quarter, full moon, first quarter).
6Use the time bar to set the time to the end of the evening astronomical twilight
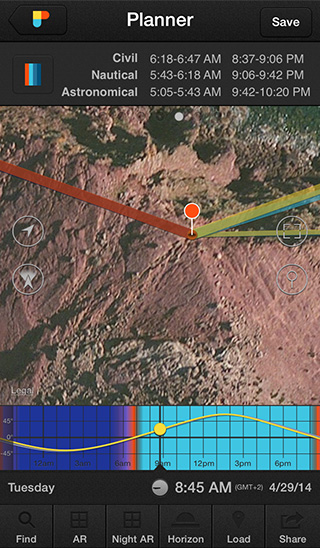
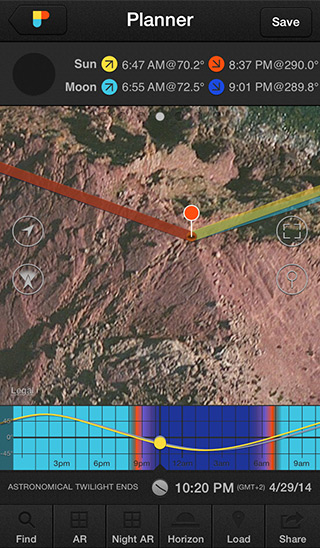
You want complete darkness. Set the time to the end of the evening astronomical twilight, when night begins.
Check on the twilight information top panel when the evening astronomical twilight ends: 10:20pm.
Now, drag the time bar towards the left to go forward in time until the time is set to 10:20pm.
TIPS
- You can set date and time numerically by tapping once on the centre of the time bar.
- To do it faster, tap on the right hand side of the time bar to jump to the next important event: golden hour begins, sunset, blue hour begins, civil twilight ends, nautical twilight ends, astronomical twilight ends, moonset, sunrise, moonrise…. Keep tapping on it until you set the time to the end of the evening astronomical twilight.
- On the other hand, tap on the left hand side of the time bar to jump backwards in time to the previous important event.
7Tap on the Night AR button, check the Milky Way and adjust your position
You’ve just set the initial shooting spot, date (April new moon) and time (the end of the evening astronomical twilight).
Let’s have a look at the Milky Way. Tap on the Night AR button you see at the bottom of the screen and wait a few seconds until the augmented reality is stable. Shaking the device helps! Make sure you are away from any electronic device or magnetic field because they may interfere with the sensors of the device.
Now, you can preview the position of the Milky Way for the selected Observer's pin location, date and time.
Notice that the galactic center is not aligned with the rock. Use the AR view to explore the sky until you find the galactic center, it's the brightest part.
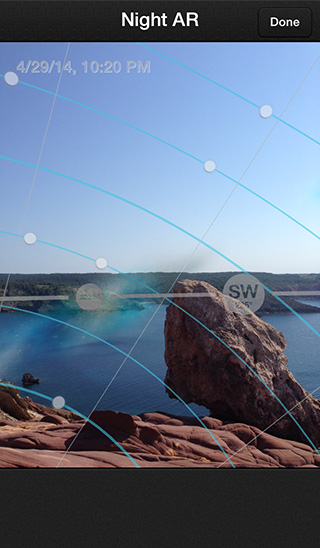
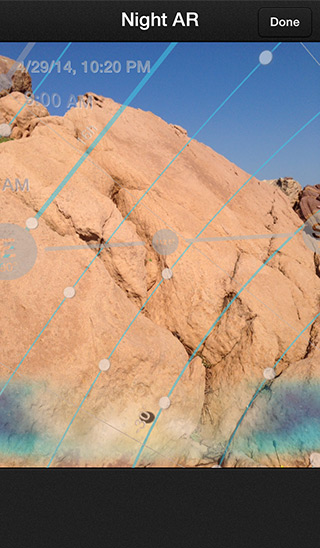
You want to shoot the core aligned with the rock just above the horizon level. Thus, you need the galactic center to rise near the rock, just on the left-hand side.
Swipe your fingertip on the AR view, from right to left, to move time forward until the core of the Milky Way rises and check the time that’s written on the top left-hand side corner of the screen: 12:49am.
Change time continuously, keep swiping your fingertip on the screen and observe how the core moves in the sky. Do it until you see the core next to the rock. This happens at 6:48am.
The Milky Way is far to much vertical, you want it in a diagonal orientation. Furthermore, 6:48 am is daytime, and you are only interested in results happening at night (complete darkness). In conclusion: you need to change the shooting spot.
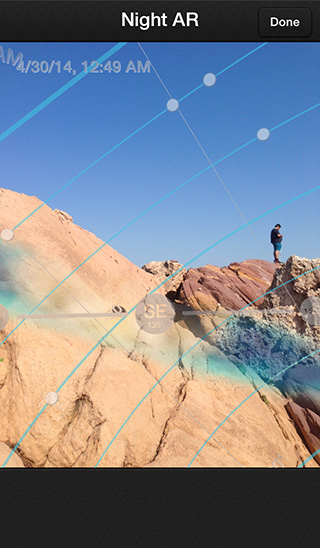
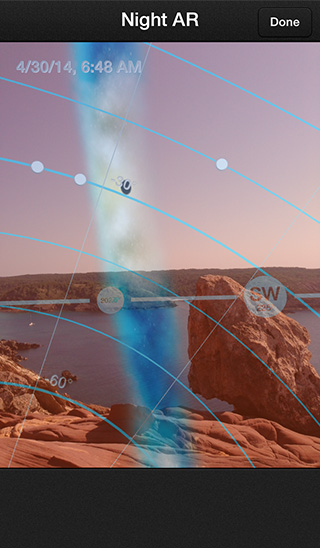
TIPS
- Notice that the background color of the two AR screenshots is different. The first one is clear (no color), however the second one has a darker color.
- The darker shade indicates that the result doesn’t occur at night and, therefore, we are not interested in it.
- We implemented the color change to help you disregard the results that occur during twilights, golden hour and daytime hours.
Move time backwards until you get the Milky Way in a more diagonal orientation, similar to what you want. To do it, just swipe your fingertip on the AR view, from left to right. This happens at 3:41am.
Now, use the Night AR view to guide yourself and move around until you find a spot from where you see the galactic center near the rock, just on the left-hand side.
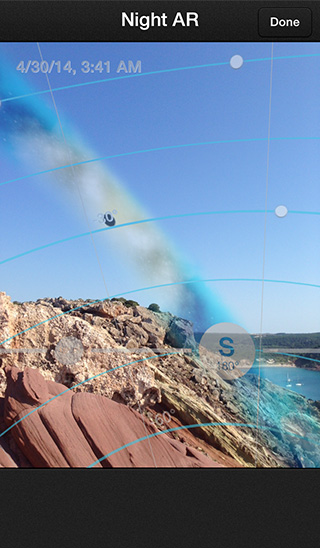
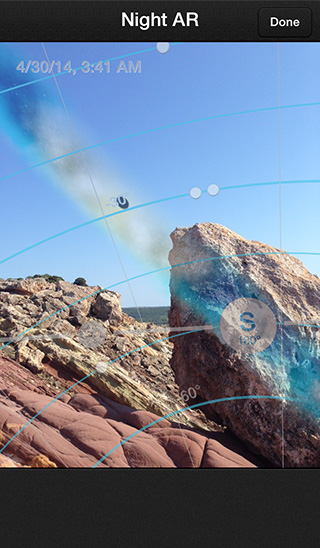
What you see now is pretty close to what you want. Shut the AR view, go back to the Planner and place the Observer's pin on the new shooting spot.
Again, make sure that the Milky Way is right where you want. If needed, change time to re-adjust the position of the Milky Way.
That's it! You've just planned it!
Now you know that you must be on the final shooting spot ready to press the shutter on April 30th 2014 at 3:41am.
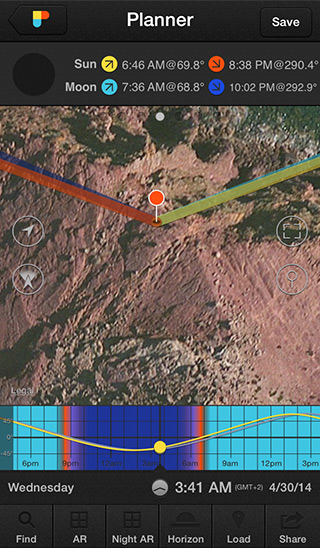
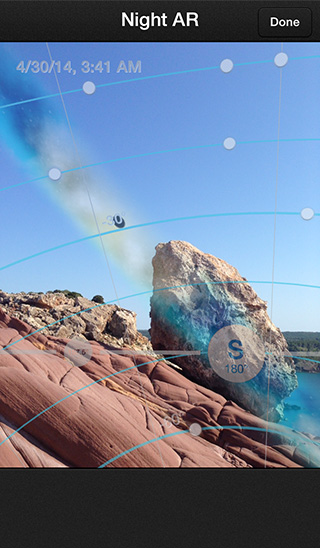
Keep in mind that the AR view is showing you what you'd see if you were right on the location of the Observer's pin. If you change your position, you have to re-adjust the position of the Observer's pin to make sure you see the right representation of the Milky Way.
If the shooting time is too early in the morning for you, check the next new moon:
- Tap on the moon picture until you set the date to the next new moon: May 28th 2014.
- Set the time to the end of the evening astronomical twilight.
- Change the time until the core of the Milky Way is placed where you want.
The new shooting date and time: May 29th 2014 at 2:27am.
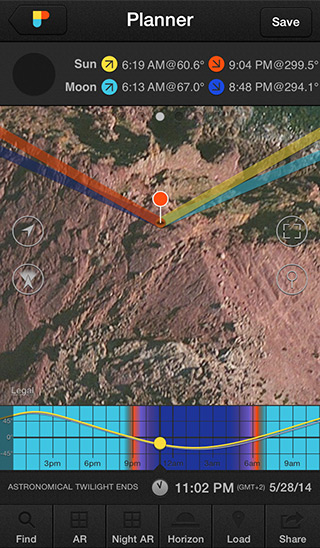
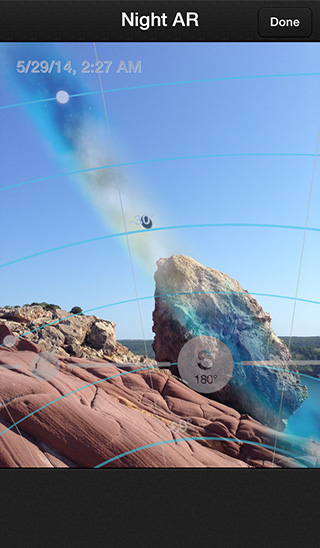
Keep repeating this process until you find a date and time that suits your schedule.
It’s also a good idea to check the 4 days before and after the new moon. If you do a single tap on the right-hand side of the Nigh AR screen, time will jump forward 24h. Do a single tap on the left-hand side of the screen to jump to the previous day.
I invite you to play a little bit with PhotoPills' Night AR tool and why not try to imagine, plan and shoot crazy images like the ones we took in our Star Wars Tribute.
Please, if you have questions, don't hesitate to use the comment section below.
Our goal is to help you bring your ideas to life!
TIPS
- There is a way to plan Milky Way shots from home. Basically, you need to follow the same steps explained in this tutorial with a tiny variation. I'll show it to you in a future How-to step-by-step article, but these are the main steps you need to follow:
- Relax yourself on the couch.
- Imagine the scene and decide where you want the core of the Milky Way.
- On the Planner, place the Observer's pin on the initial shooting spot.
- Set the date to the next new moon happening between April and August.
- Use the time bar to set the time to the end of the evening astronomical twilight.
- Place the Obstacle's pin on your main subject (in this example, the rock).
- Jot down the Pin to Pin azimuth from the Pin to Pin geodetic information panel (top). If you do it for this example, you'll get an azimuth of 252.7º (azimuth of the main subject seen from the initial shooting spot).
- Tap on the Night AR button and check the Milky Way due the azimuth 252.7º.
- Follow step 7 explained in this article.
8Scouting photos
We are in love with this rock...and this location.


Happy Shooting!
Credits: all the photos by Antoni Cladera.
Get this ebook for free now!

