How To Plan The Milky Way Using The 2D Map-Centric Planner
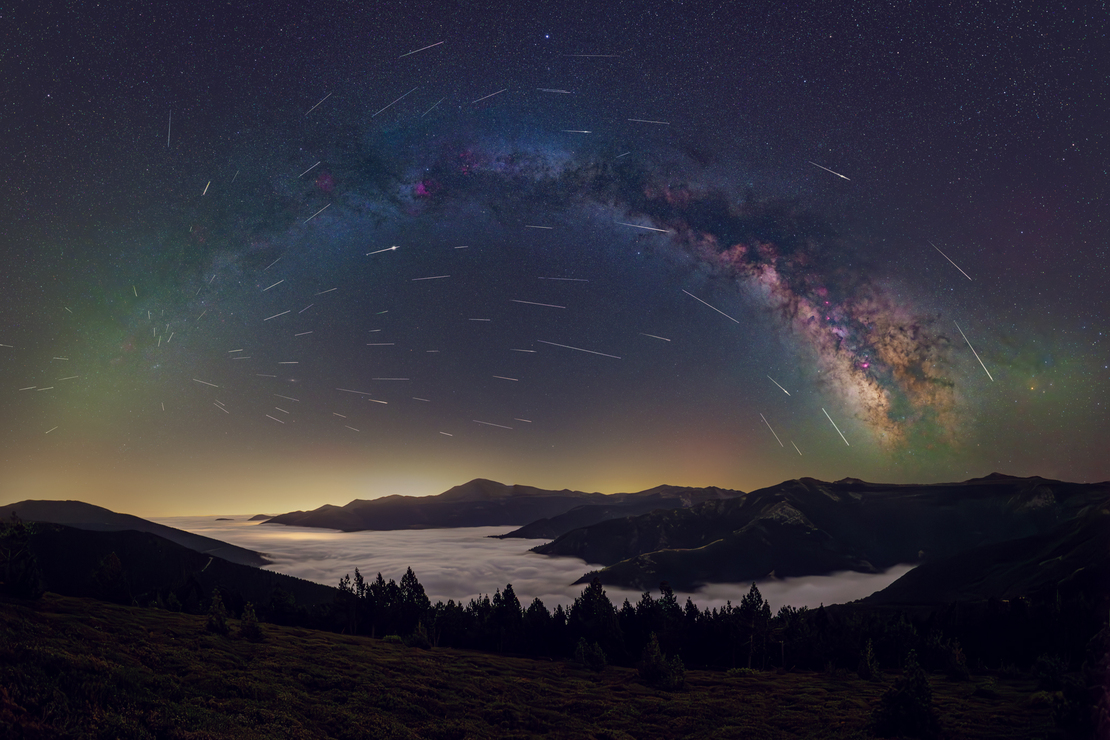
All of us love and chase the Milky Way looking for new compositions that transmit our thoughts to the world. Some of you sure need to predict it to prepare workshops and photography trips. At the end of the day, every landscape photographer needs a way to better understand and predict the Milky Way and, in particular, the Galactic Center.
In the article “How To Shoot Truly Contagious Milky Way Pictures”, we explain everything you need to turn your Milky Way ideas into real images, step by step; from inspiring sources and equipment to camera settings. In this article, you'll learn the planning part in detail.
Get this ebook for free now!
Also, as we learnt in another How-To article, PhotoPills’ Night Augmented Reality tool comes in handy when planning our Milky Way shots but, with the arrival of the 2D Map-Centric Milky Way Planner, we go a few steps further making the planning even easier.
Interested in mastering Milky Way planning with both the Night Augmented Reality view and the 2D Map-Centric Planner? Then, watch the following video. You'll love it!
If you want to shoot the Galactic Center aligned with a special subject you know (rock formation, lighthouse, tree, etc) or wish to capture the whole Milky Way arch above an ancient stone construction, the 2D Milky Way Planner is for you.
No matter the location on Earth you are or plan to go, this tutorial will help you learn the hidden secrets within this new photographic Pill allowing you to quickly plan any Milky Way photo you imagine.
But… first things first! The 2D Milky Way Planner includes a few things that need to be explained in detail before you start planning like crazy. Be patient, don’t hurry up, keep in mind Molière’s wise words:
"Trees that are slow to grow bear the best fruit."
Let’s start with the basics!
Content
- How can I activate the 2D Map-Centric Milky Way Planner?
- How is the Milky Way arch displayed on the map?
- Milky Way and world light distribution layer… when all make sense
- Where the Milky Way meets the horizon: an award-winning image
- How to plan the Galactic Center
- Timelapsers! Galactic Center vs Milky Way Core visibility
- Video: Delicate Arch - Arches National Park (USA) - Galactic Center visibility evolution during 2015 - Northern Hemisphere
- Video: Cape Palliser (New Zealand) - Galactic Center visibility evolution during 2015 - Southern Hemisphere
1How Can I Activate The 2D Map-Centric Milky Way Planner?
The first thing you need to learn is where to find the button that activates the 2D Miky Way Planner.
On the Planner, place the Observer's pin near a subject that interests you. In this example, I've placed it near the Naveta d’Es Tudons, the most remarkable megalithic chamber tomb in Europe.
Above the map (first screenshot), you see the sun/moon rise/set information panel. Drag the top panels to the left until you get to the Galactic Center visibility information panel. It’s the one following the Magic Hours’.
This panel is telling you that the Galactic Center is always invisible during the night between December 21st and 22nd 2014. As I explained in the article How to Plan the Milky Way Using The Augmented Reality, the Galactic Center will not be properly visible until March 2015 (Northern Hemisphere).


Notice that, on the left-hand side of the panel, there is a button with a kind of Milky Way icon on it. This is a three state button which allows you to control what is displayed on the map: (i) only sun and moon, (ii) sun, moon and Milky Way altogether or (iii) only Milky Way.
Tap on this button to activate the 2D Milky Way map representation. The icon of the button is telling you that sun, moon and Milky Way information is displayed on the map. If you wish to work with the Milky Way only, just tap on it again. Now, the sun and moon azimuth lines have disappeared and the icon of the button is only showing you the Milky Way.


TIPS
- At the moment, the Milky Way arch is not displayed on the map. This is because the time is set at 12:49pm (daytime) and PhotoPills will only show you the Milky Way arch during nighttime.
If you dare to include the moon and the Milky Way in the same image, tap again on the button until you see the sun, moon and Milky Way information displayed on the map. Then, got to the sun/moon position information panel and tap on the sun/moon button to switch off the sun azimuth lines. Go back to the Galactic Center Visibility panel. Notice that the icon of the Milky Way button adjusts too.


2How Is the Milky Way Arch Displayed On The Map?
The concentric thin gray circumferences you see around the Observer’s pin (red pin) will help us assess the elevation of the Milky Way arch and its position in the sky: near the horizon, above it or just above our heads.
The elevation between two consecutive circles is 10⁰. The outer circumference represents an elevation of 0⁰, when the arch is low in the sky, at the horizon level. The following one represents 10⁰ and so on (20⁰, 30⁰,etc) until 90⁰, when the arch is just above the observer’s pin. Summing up, these circumferences help us visualize whether the Milky Way arch is low in the sky, near the horizon, or above our heads.
As I said before, PhotoPills considers that the Milky Way will become visible only when it's completely dark. Thus, the Milky Way is only displayed on the map during nighttime, which is the period of time between the end of the evening astronomical twilight and the beginning of the morning astronomical twilight, when the sun is below -18⁰.
To see the Milky Way displayed on the map, move time forward to the end of the evening astronomical twilight (7:00pm). It's the white dotted arch you see in the second screenshot.


TIPS
- Notice that the dots in the Milky Way arch have the same size. This is because neither the Core of the Milky Way nor the Galactic Center is visible yet.
- When the Core begins to be visible, the dots in the Milky Way arch get progressively bigger, being the biggest dot the representation of the Galactic Center.
- Due to I have the the world light distribution layer switched on, you've seen that the map has changed the color when I've moved time towards the night. When it's daytime, there is no color layer, but as you get into the golden hour, twilights and night, the map appears colored to help you assess the light you'll have. Now, I'll switch off the layer and most of the screenshots in this tutorial will appear uncolored , although I will be working during nighttime.
To better understand how the gray circumferences can help us assess the elevation of the arch, have a look at the following screenshots.
In the first screenshot, the center of the Milky Way arch is near the Observer’s pin, touching the circumference of 80⁰ of elevation. This means that the maximum elevation of the Milky Way arch is 80⁰ approximately, almost above our heads.
To get the exact number, drag the Galactic Center visibility information panel to the left. You’ll get to the Milky Way quality information panel (second screenshot). On it, you can read the Milky Way maximum elevation (second row): 80.7⁰.


TIPS
- Have a look at the Milky Way picture that is on the Milky Way quality information panel (second screenshot). It’s showing you how you’d see the Milky Way if you where on the Observer’s pin position at 10:42pm on December 21st 2014. In this case, you’d see it pretty vertical. This is consistent with the Milky Way maximum elevation: 80.7⁰. It’s another feature that will help you assess how you’ll see the Milky Way in the Sky: horizontal (near the horizon), diagonal or vertical.
- Near the Milky Way picture, you find the Milky Way Quality information bar, which takes into consideration the phase of the moon to help you easily find the best days to photograph the Milky Way: new moon days.
- During new moon days, the bar is full, meaning you’ll have total darkness, the best conditions to shoot the Milky Way. The bar will be empty during full moons, when light conditions aren't good.
- Tap once on the Milky Way picture and time will jump forward to the next best quality date to shoot the Milky Way. Double-tap on it to jump backwards to the previous best quality date to shoot it.
- Finally, on this panel, you also get the azimuth (288.9⁰) and the elevation (-65.5⁰) of the Galactic Center for the Observer’s pin position and current date and time.
I recommend you to use the Night Augmented Reality view to double-check the Milky Way position in the sky.


We've also drawn the following picture to show you, approximately, the position of the Milky Way.

When you move time forward, the arch gets wider on the map as the center of the arch moves away from the Observer’s Pin (first screenshot), meaning that the Milky Way is getting lower in the sky, close to the horizon. In this case, the maximum elevation of the arch is 17.7⁰ (second screenshot).


Again, the following Augmented Reality screenshots and picture will help you visualize how the Milky Way is represented on the map.


With a single glance at the map, you’ll be able to understand the position of the Milky Way in the sky, its orientation (horizontal, diagonal, vertical) and visualize, as you move time forward/backwards, how it moves.
Remember that you can always use the Night Augmented Reality view to double-check that you get what you plan.
3Milky Way And World Light Distribution Layer… When All Make Sense
When it comes to the Planner, all make sense… Let me prove it!
Move time backwards until is daytime, you’ll see the Milky Way disappear. Now, switch on the world light distribution layer by tapping on the button you find on the twilights information panel. Then, zoom out until you have a complete view of the light layer.


Now, move time forward to the end of the evening astronomical twilight, the exact moment PhotoPills considers the Milky Way to become completely visible. Notice that the Observer’s pin is just on the light line that separates astronomical twilight and night.
At this time, the picture of the Milky Way you see on the top information panel will become bright and the Milky Way arch will appear on the map.


Keep moving time forward and see how the Milky Way arch progressively fades, until it completely disappears.


Having both, the world light distribution layer and the Milky Way, displayed on the map at the same time is very useful, for example, to visually find out when is the best time of the year to plan a trip to Iceland, in terms of Milky Way possibilities.
If you continuously change time starting on January 1st 2014 and ending on December 31st 2014, you’ll see how light conditions change throughout the year. You’ll realize that, from March to September, it is not a good idea to go to Iceland, because the Observer’s pin is never within the darker layer, it’s never nighttime!


4Where The Milky Way Meets The Horizon: An Award-Winning Image
The white line connecting both ends of the Milky Way arch shows you the two directions where the Milky Way meets the horizon. This means that if you were on the Observer’s pin position, and looked towards both directions of the white line, you’d see that the Milky Way meets the horizon in these directions.
This line will help you plan any photo in which you wish the Milky Way arch to start or end in a determined direction, for example, aligned with a subject (lighthouse, rock, etc). It’s ideal for shooting panoramas of more than 180⁰ (horizontal) and capturing the whole Milky Way arch.
Have a look at the following example. Let’s align one of the ends of the Milky Way with the lighthouse of Nati (40.050513, 3.823813), in Menorca. Set the date to December 22nd 2014 (new moon) and drop the Observer’s pin on a spot which leaves the lighthouse in the south.
Now, you only have to move time forward until the azimuth line of one of the ends of the Milky Way is aligned with the lighthouse, which happens at 4:21am on the 23rd.


Again, use the Night Augmented Reality view to double-check the Milky Way position in the sky.

This is a representation of what you should get with a panorama:

I hope you realize how important this feature is. It is extremely useful to plan shots like Mark Gee’s winning image of the Astronomy Photographer of the Year 2013: Guiding Light To The Stars.
This is a spectacular view of the Milky Way arching over the coast of the North Island of New Zealand. I love the way that the Milky Way appears to emanate from the lighthouse – really cementing the connection between the stars and the landscape.
Have a look at the image, the central patch of light in the sky marks the Galactic Center, the bulge of stars at the heart of our Galaxy, 26,000 light years away.
Would you like to learn how to predict the Galactic Center, the central spot of the brightest area of the Milky Way? Keep reading!
5How To Plan The Galactic Center

The simplest way to understand how the Galactic Center information is displayed on the Planner, and how you can use it to plan a shot, is by having a look at an example.
Let’s see how you can use the 2D Milky Way Planner to find out the exact date and time the Galactic Center will be in front of the Naveta d’es Tudons (40.003128, 3.891558).
Drop the Observer’s pin near the Naveta and set the next new moon date (complete darkness). Remember that we always plan Milky Way shots happening during the new moon and the 4 days before and after it.
Let’s assume that you are planning this shot on December 12th 2014. Tap on the Milky Way picture you find on the Milky Way quality information panel to set December new moon date: 22nd 2014. Shhhh....This is our secret short-cut to jump to next best quality day to shoot the Milky Way… Please don’t tell!


Go to the Galactic Center visibility panel (first screenshot). From this panel you learn that that the Galactic Center is always invisible. Thus, December is not a good month for shooting it. Let's have a look at the following new moon day. Again, tap on the Milky Way picture to land on January new moon: 20th 2015.
Now, the visibility panel (second screenshot) is telling you that the Galactic Center will become visible at 6:16am (on the 21st) at azimuth 128.5⁰ when it is rising. Also, it’ll become invisible at 6:27am at azimuth 130.3⁰ and elevation 1.4⁰.


Notice that the information you find on the visibility panel refers to the night between two consecutive dates: from the 20th to the 21st. This is the reason I know that 6:16am refers to the 21st (morning) and not the 20th.
Have a look at the two azimuth lines that have appeared on the map. The light gray line is showing the direction where the Galactic Center will become visible (azimuth 128.5⁰) and the dark gray one, where it’ll become invisible (azimuth 130.3⁰).
With all this information, You can get to the conclusion that, for this location, January is not a good month for capturing the Galactic Center. Although you’ll manage to see it, you’ll only have 11 minutes to enjoy it… and 6:16am is too early in the morning!
Let’s have a look at the February, March, April and May new moons and see how the visibility of the Galactic Center evolves.
During February new moon night, the Galactic Center will be visible for 1 hour and 43 minutes, starting at 4:18am (February 20th) and ending at 6:01am (February 20th). In March, the total visibility time is 2 hours and 52 minutes.


As you jump from month to month, you'll see how the total visibility time increases and the angle between the two visibility azimuth lines gets larger. During April new moon, the total visibility time is 3 hours and 54 minutes, starting at 1:30am (April 19th) and ending at 5:24am (April 19th). In May, the total visibility time reaches 5 hours and 2 minutes, starting at 11:32pm (May 18th) and ending at 4:34am (May 19th), which are very nice conditions for planning a Milky Way shot.


Let's stay on May 18th. If you set the time at 11:32pm (first screenshot), a white line will appear on the light gray visibility azimuth line. It’s the Galactic Center azimuth line. A bigger white circle, that represents the Galactic Center, marks the crossing point between this new azimuth line and the Milky Way arch. This way, you can easily distinguish the Galactic Center on the Milky Way arch.
Go to the Milky Way quality panel (second screenshot). Notice that the quality bar is full, meaning that you’ll have complete darkness. The Milky Way arch maximum elevation is 15.4⁰, the arch is low in the sky which is also confirmed by the Milky Way picture (pretty horizontal).
Also, this panel gives you the Galactic Center position for the selected date and time: azimuth 128.6⁰ and elevation 0.0⁰ (rise).


TIPS
- As you get near 11:32pm, you’ll notice how the white dots near the line, which connects both ends of the arch, suddenly get bigger and bigger, until the Galactic Center becomes visible.
- The white dots on the arch start to get bigger when the core of the Milky Way starts to become visible.
Check now the night augmented reality view to have a better understanding of the position of the Galactic Center and the inclination of the Milky Way arch.

Move time a little bit forward to see how the Galactic Center moves on the map. The Galactic Center azimuth line is showing you its direction seen from the Observer’s pin location, for the selected date and time. Therefore, at 1:08am, reading the top panel (first screenshot), the Galactic Center will be at azimuth 145.6⁰ and elevation 12.1⁰.
At 4:34am, the Galactic Center will start to fade as we get into the morning astronomical twilight. Its position in the sky will be azimuth 191.5⁰ and elevation 20.2⁰.


You know all the basics now, let’s start the planning!
Remember, we'd like to find the right shooting spot and the right time to photograph the Galactic Center when is low in the sky and just in front of the Naveta. How to do it? Follow these simple steps.
First, set the time at 11:32pm on May 18th, right when the Galactic Center becomes visible, and check its elevation: 0.0⁰.
Second, on the Night Augmented Reality view, swipe your fingertip on the screen, from right to left, to move time forward until the Galactic Center has the elevation and position in the sky you desire. This happens at 1:33am on May 19th.

Go back to the planner and check the elevation of the Galactic Center: 14.6⁰ (first screenshot). Now set the shooting spot. Drag and drop the Observer’s pin near the Naveta d’Es Tudons, in a way that the Galactic Center azimuth line is just in front of the ancient stone construction. This way, you’re choosing a shooting spot from where you’ll be able to shoot the Galactic Center when it is just in front of the Naveta.


And use the Night Augmented Reality view to check that the composition is right... As you see, it’ll be a great shot!

TIPS
- If you desire, you can adjust the composition by moving time directly on the Night Augmented Reality view.
- If you want to test other possible shooting spots, just move the observer’s pin and repeat the same process.
6Timelapsers! Galactic Center vs Milky Way Core visibility

The Galactic Center is displayed as a big red spot on the Night Augmented Reality view and the Core of the Milky way as a more realistic bright band.
If you plan to shoot a timelapse, you'll probably want to capture the rise of the Core. Therefore, you’ll need to assess when and where the Core will begin to appear above the horizon. This will happen before the rise of the Galactic Center and in a different direction (azimuth).
Thanks to the 2D Milky Way Planner and the Night Augmented Reality view, it is very easy to find out the exact time and direction the first stars of the Core will appear above the horizon level.
Let's move from the Naveta d'Es Tudons to the lighthouse of Artrutx, which is situated on the south coast of our island. Place the Observer's pin near the lighthouse.
Have a look at the first screenshot, it is 11:32pm, the Galactic Center is becoming visible at azimuth 128.5⁰. Notice that there are white dots of different size on the Milky Way Arch.
On the left-hand side of the arch, the dots are small and the same size. On the right-hand side, suddenly, the dots start to be bigger and bigger, meaning that the Core of the Milky Way begins to be visible. The right moment you see one of the white dots get bigger is approximately when the first stars of the Core become visible at the horizon level.
Therefore, move time backwards until the first big white dot appears on the Milky Way arch (second screenshot). This happens at 10:45pm. The white line that connects both ends of the arch is showing you the direction (azimuth) where Core is becoming visible.


Using the Night Augmented Reality view is even easier to figure out. Just swipe your fingertips on the AR view, from left to right, to move time backwards, until you see the core appear above the horizon line.


7Video: Delicate Arch - Arches National Park (USA) - Galactic Center Visibility Evolution During 2015 - Northern Hemisphere
If you’re planning to go to the Arches National Park to hunt the Milky Way in 2015, have a look at this video and learn how the Galactic Center visibility time and direction change throughout the year at the Delicate Arch.
Delicate Arch 2015 Galactic Center visibility (38.743611⁰, -109.499444⁰):
- Total visibility time: 988.31 hours
- Visibility peak: 5.63 hours, May 27th
- Minimum visibility azimuth: 127.8⁰
- Maximum visibility azimuth 232.2⁰
- Hunting season:
| January | 7.38 hours |
| February | 44.62 hours |
| March | 87.94 hours |
| April | 118.9 hours |
| May | 159.16 hours |
| June | 157.63 hours |
| July | 156.64 hours |
| August | 119.06 hours |
| September | 82.1 hours |
| October | 47.89 hours |
| November | 6.99 hours |
| December | 0.0 hours |
8Video: Cape Palliser (New Zealand) - Galactic Center Visibility Evolution During 2015 - Shouthern Hemisphere
I hope that those of you living in the Southern Hemisphere and, in particular, those living near Cape Palliser, enjoy watching how the Galactic Center visibility changes throughout 2015!
Cape Palliser 2015 Galactic Center visibility (-41.611940⁰, 175.290038⁰):
- Total visibility time: 2,267.75 hours
- Visibility peak: 11.5 hours, June 17th
- Minimum visibility azimuth: 2.72⁰
- Maximum visibility azimuth 357.72⁰
- Hunting season:
| January | 25.38 hours |
| February | 99.64 hours |
| March | 193.76 hours |
| April | 264.82 hours |
| May | 338.16 hours |
| June | 343.85 hours |
| July | 346.80 hours |
| August | 287.11 hours |
| September | 203.05 hours |
| October | 127.51 hours |
| November | 37.67 hours |
| December | 0.0 hours |
Happy Shooting!
Get this ebook for free now!